Salta al contenuto principale

Smontaggio del rivestimento esterno Playstation 2 Slimline

Cosa ti serve

  1. Smontaggio del rivestimento esterno Playstation 2 Slimline, Rivestimento Esterno: passo 1, immagine 1 di 1
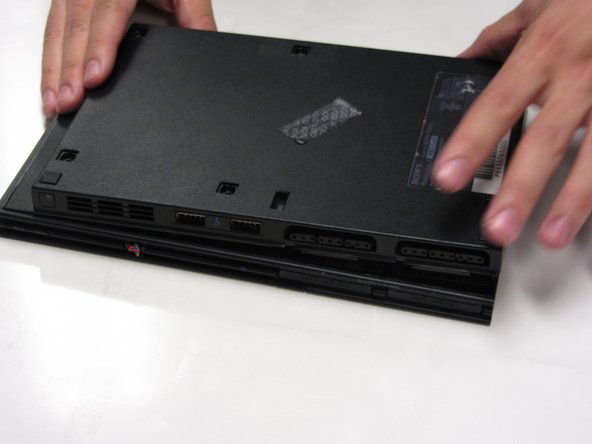
    • Disconnetti tutti i cavi dalla console e capovolgi l'unità per vedere la base.

  2. Smontaggio del rivestimento esterno Playstation 2 Slimline: passo 2, immagine 1 di 3 Smontaggio del rivestimento esterno Playstation 2 Slimline: passo 2, immagine 2 di 3 Smontaggio del rivestimento esterno Playstation 2 Slimline: passo 2, immagine 3 di 3
    • Individua i 6 piedi della base. Tirali fuori usando uno spudger per svelare le viti.

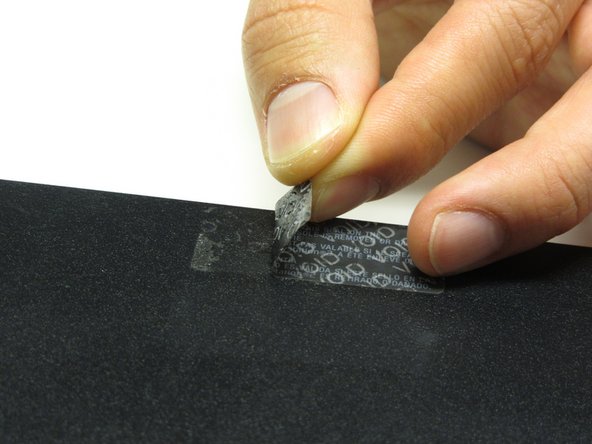
    • Nota: Uno dei piedi si trova sotto lo sticker mostrato in foto. Se togli questo sticker annullerai qualsiasi garanzia con Sony.

  3. Smontaggio del rivestimento esterno Playstation 2 Slimline: passo 3, immagine 1 di 3 Smontaggio del rivestimento esterno Playstation 2 Slimline: passo 3, immagine 2 di 3 Smontaggio del rivestimento esterno Playstation 2 Slimline: passo 3, immagine 3 di 3
    • Rimuovi tutte le sei viti da 4,0 mm dalla base dell'unità usando un cacciavite a croce Phillips #1.

  4. Smontaggio del rivestimento esterno Playstation 2 Slimline: passo 4, immagine 1 di 3 Smontaggio del rivestimento esterno Playstation 2 Slimline: passo 4, immagine 2 di 3 Smontaggio del rivestimento esterno Playstation 2 Slimline: passo 4, immagine 3 di 3
    • Iniziando dall'angolo dove ci sono le porte di accensione ed Ethernet, apri il rivestimento esterno usando uno spudger e continua a girare intorno all'intera unità.

    • Nota: Puoi usare le mani per avere maggiore forza per separare i due pezzi dal rivestimento esterno.

Conclusione

Per rimontare il dispositivo, segui queste istruzioni nell'ordine inverso.

Altre 19 persone hanno completato questa guida.

Un ringraziamento speciale a questi traduttori:

en it

100%

Questi traduttori ci stanno aiutando ad aggiustare il mondo! Vuoi partecipare?
Inizia a tradurre ›

3 Commenti

Just to clarify: in order to FULLY remove the bottom half of the shell on my PS2 Slim, I had to remove a screw that pinned the controller ports in place; it's at the front, right between the Player 1 and Player 2 ports.

Other than that, this guide worked perfectly! :D

Kizul Emeraldfire - Replica

Good morning. Hello. The disassembly of the PS2 series 7XXXX (PS2 Slim) is very well explained, except for one detail. Indeed, when I started to separate the bottom from the top, a small metal plate with a threaded hole in the center. And I find no mention of it anywhere. Considering the part, I think it's used by one of the screws that holds the two plastic hulls, but I don't see where. Can you help me, please? Friendly, Marc.

Translated with www.DeepL.com/Translator

Marc Blériot - Replica

The metal plate with a screw hole in the middle is for the stand-up-base-stand to be screwed down. It’s an after market item SONY sold seperately.

김동현 -

Aggiungi Commento

Visualizza Statistiche:

Ultime 24 Ore: 7

Ultimi 7 Giorni: 44

Ultimi 30 Giorni: 138

Tutti i Tempi: 10,974