Introduzione
If your 700m is prone to overheating, a new fan and some upgraded thermal paste may be just the ticket. You can also use this guide to access the fan for cleaning.
Cosa ti serve
-
-
Before you begin, make sure the 700m is powered off.
-
Unplug the power cable.
-
Flip the 700m over and remove the battery.
-
Slide the battery release switch toward the center of the 700m, and then pull the battery free from the back.
-
-
-
Remove the three Phillips screws securing the hard drive cover.
-
Remove the hard drive cover and set it aside.
-
-
-
Remove the two Phillips screws securing the wi-fi cover.
-
Remove the wi-fi cover and set it aside.
-
-
-
-
Open the display and lay it down flat.
-
Beginning from the left side, use the flat end of a spudger to gently pry up the plastic trim that runs along the top of the keyboard. Remove the trim.
-
-
-
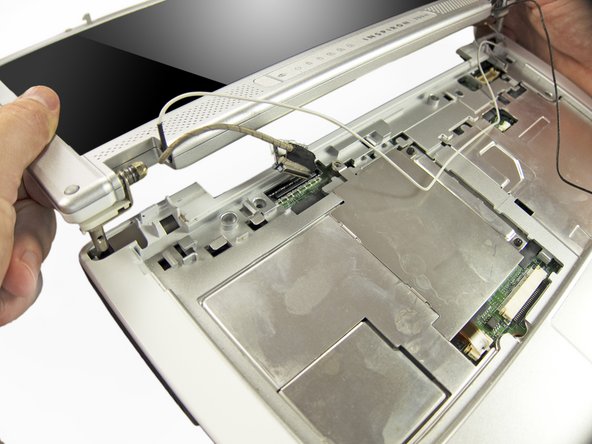
Identify the LCD cable, which connects to the top left side of the motherboard.
-
To disconnect the LCD cable, grab the pull tab on the top of the connector and pull it straight up from the motherboard.
-
It may be helpful to use a spudger or small flathead screwdriver for extra leverage.
-
-
-
Remove the two Phillips screws securing the inner RAM cover.
-
Tilt the right side of the RAM cover up at an angle and remove it.
-
-
-
Two clips secure the RAM module in place, one on either side. Using your fingers, spread the clips away from the RAM module.
-
Lift the RAM module to an angle of about 30 degrees and slide it out.
-
-
-
Beginning from the top left, use your fingers to separate the upper case from the 700m by pulling it straight up.
-
Remove the upper case.
-
-
-
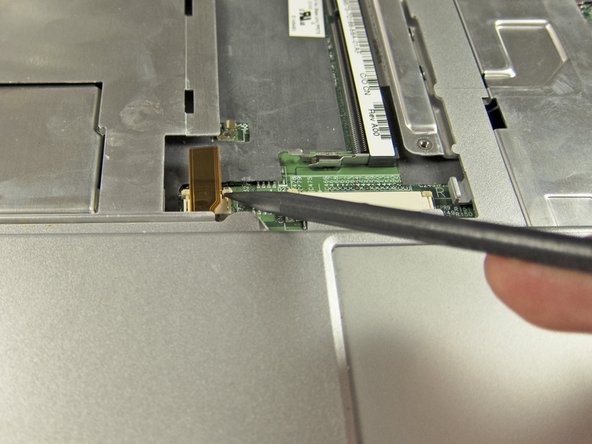
Remove the two Phillips screws from the top right edge of the motherboard.
-
-
-
Flip the motherboard over and lay it down flat.
-
Disconnect the fan wire from the motherboard by pulling the connector straight up.
-
-
-
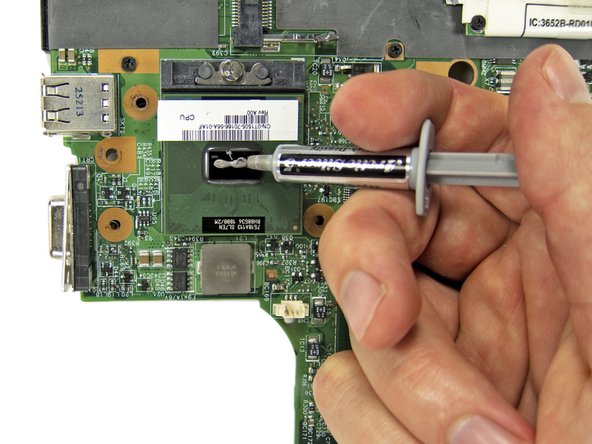
Now use our guide on Come applicare la Pasta Termica to clean your heat sink and add some spicy hot thermal paste!
-


To reassemble your device, follow these instructions in reverse order.
To reassemble your device, follow these instructions in reverse order.
Annulla: non ho completato questa guida.
Altre 2 persone hanno completato questa guida.


2 Commenti
A very well detailed instruction , very well presented, easy to follow and step by step pictures reference for the amateur handy husband . Thanks for the acquired knowledge you have given.