Salta al contenuto principale

Comfort Zone CZ6C Switch Replacement

Cosa ti serve

  1. Comfort Zone CZ6C Switch Replacement, Switch: passo 1, immagine 1 di 3 Comfort Zone CZ6C Switch Replacement, Switch: passo 1, immagine 2 di 3 Comfort Zone CZ6C Switch Replacement, Switch: passo 1, immagine 3 di 3
    • Make sure to unplug the Comfort Zone CZ6C before cutting any wires.

    • Before replacing your switch, learn how to solder using the How To Solder and Desolder Connections Guide.

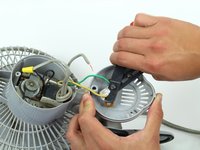
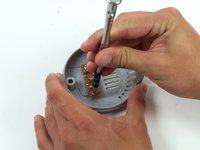
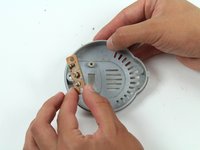
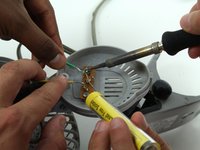
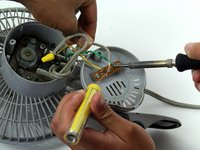
    • Start with the fan on its back. Unscrew the back panel to expose the internal wiring.

  2. Comfort Zone CZ6C Switch Replacement: passo 2, immagine 1 di 2 Comfort Zone CZ6C Switch Replacement: passo 2, immagine 2 di 2
    • Remove the plastic cover on the switch by pulling it apart from the the back panel.

  3. Comfort Zone CZ6C Switch Replacement: passo 3, immagine 1 di 1
    • Use the soldering iron with caution. Don't touch the tip of the soldering iron to avoid the risk of injury.

    • This step can be made easier with the help of a partner to hold the wiring while you desolder the connection.

    • Disconnect the gray power wire from the switch by desoldering the connection.

  4. Comfort Zone CZ6C Switch Replacement: passo 4, immagine 1 di 2 Comfort Zone CZ6C Switch Replacement: passo 4, immagine 2 di 2
    • Cut the green and yellow wire as close to the switch connection as possible.

  5. Comfort Zone CZ6C Switch Replacement: passo 5, immagine 1 di 3 Comfort Zone CZ6C Switch Replacement: passo 5, immagine 2 di 3 Comfort Zone CZ6C Switch Replacement: passo 5, immagine 3 di 3
    • Strip the green and yellow wire about two centimeters from where it was just cut.

  6. Comfort Zone CZ6C Switch Replacement: passo 6, immagine 1 di 3 Comfort Zone CZ6C Switch Replacement: passo 6, immagine 2 di 3 Comfort Zone CZ6C Switch Replacement: passo 6, immagine 3 di 3
    • Unscrew the switch from the back panel and remove it.

  7. Comfort Zone CZ6C Switch Replacement: passo 7, immagine 1 di 3 Comfort Zone CZ6C Switch Replacement: passo 7, immagine 2 di 3 Comfort Zone CZ6C Switch Replacement: passo 7, immagine 3 di 3
    • After replacing the switch, resolder the gray power cord, the green wire, and the yellow wire.

Conclusione

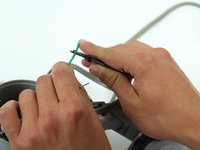
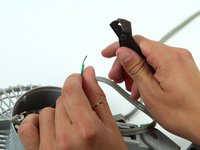
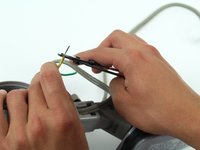
To reassemble your device, follow these instructions in reverse order.

Un'altra persona ha completato questa guida.

James Abundis

Membro da: 04/08/15

169 Reputazione

1 Guida realizzata

Team

Cal Poly, Team 17-5, Forte Spring 2015 Membro di Cal Poly, Team 17-5, Forte Spring 2015

CPSU-FORTE-S15S17G5

4 Membri

5 Guide realizzate

Un commento

I need a replacement switch for a Comfort Zone CZ40 heater. Can you help?

Michael Drasic - Replica

Aggiungi Commento

Visualizza Statistiche:

Ultime 24 Ore: 0

Ultimi 7 Giorni: 2

Ultimi 30 Giorni: 16

Tutti i Tempi: 2,276