Introduzione
This guide will require you to use a Phillips head screwdriver to remove the screws holding the screen in place.
Cosa ti serve
-
-
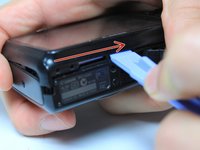
First, remove the batteries and memory card.
-
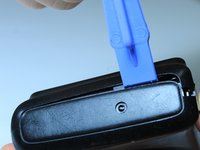
Remove the 5.0 mm black screw with a Phillips #00 screwdriver.
-
Remove the 5.0 mm silver screw with a Phillips #00 screwdriver.
-
-
-
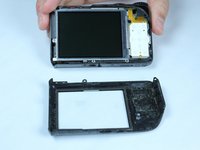
Begin taking off the back cover with a plastic opening tool.
-
Begin by wedging the plastic opening tool behind the bottom left corner of the LCD screen as shown.
-
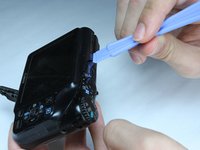
Slide the plastic opening tool to the right, along the mating edge, to pry off the back cover.
-
Continue taking off the back cover along the left side of the camera as seen in the third picture.
-
-
-
-
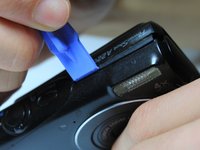
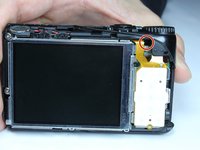
Lift up the electrical ribbon shown to access the next screw.
-
Remove the 3.9 mm screw with a Phillips #00 screwdriver.
-
-
-
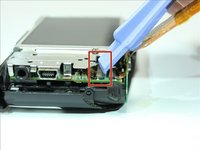
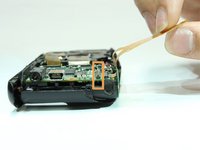
Locate ribbon flap, enclosed in red. (picture 1)
-
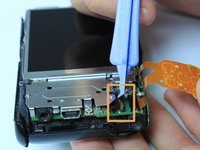
Using a plastic opening tool, lift up the ribbon flap to allow insertion of the LCD ribbon. (picture 2)
-
Place the LCD screen on the camera and align the ribbon underneath the open ribbon flap. Close the ribbon flap onto the ribbon. (picture 3)
-


To reassemble your device, follow these instructions in reverse order, starting with the last guide step.
Annulla: non ho completato questa guida.
Un'altra persona ha completato questa guida.

Team

Baylor, Team 4-5, Williams Spring 2015 Membro di Baylor, Team 4-5, Williams Spring 2015
BU-WILLIAMS-S15S4G5
4 Membri
13 Guide realizzate