Questa guida ha delle modifiche più recenti. Passa all'ultima versione non verificata.
Introduzione
This guide will show the steps to in replacing the Flash assembly on the top of the camera.
Cosa ti serve
-
-
Remove all visible exterior screws:
-
Two 6.84 mm screws on the right side
-
Six 5.33 mm screws
-
-
-
-
To disconnect the white wire, pinch the wire casing and pull directly out from the camera. It will take a very small amount of elbow grease. However, do not force or pry it.
-
To disconnect the ribbon connector, softly pull the back away from the motherboard. It should come undone with little force.
-
Once removed, set the back in a safe place.
-
-
-
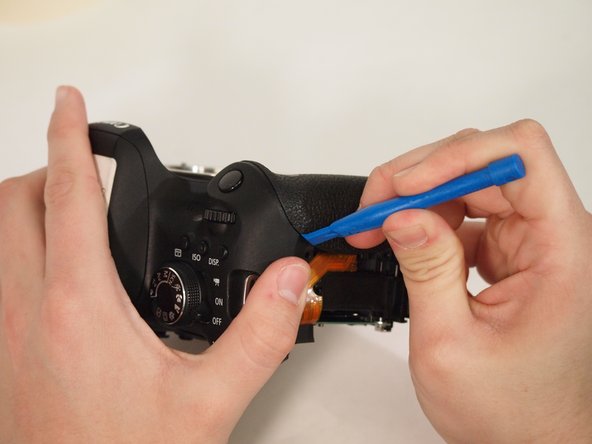
To remove the Ribbon connectors that have a locking mechanism, identify the flap on the ribbon connector. Use either needle nose tweezers, or a plastic wedge to flip the small flap to the "up" position.
-
Once the flap is up, use the plastic spudger to pull the ribbon connector out of the connection using the hole in the center of the ribbon.
-
-
-
Disconnect the small plastic connectors on the top left corner of the motherboard by gripping the small plastic portion of the wire and gently pulling out of the connector.
-
Go ahead and disconnect all of the ribbon connectors along the top that you can get to. Don't worry about the connectors underneath or the ribbon connectors with the foam block, as these will be removed later.
-


To reassemble your device, follow these instructions in reverse order.
To reassemble your device, follow these instructions in reverse order.
Annulla: non ho completato questa guida.
Altre 3 persone hanno completato questa guida.
Team

University of Memphis, Team S2-G1, Kim Spring 2018 Membro di University of Memphis, Team S2-G1, Kim Spring 2018
UM-KIM-S18S2G1
3 Membri
11 Guide realizzate