Salta al contenuto principale
Unisciti alla Community delle riparazioni - Crea un account
Canon EOS 30 Remote Control Socket Replacement

Canon EOS 30 Remote Control Socket Replacement

Antonia

Antonia e 5 altri collaboratori

Ultimo aggiornamento il 21 feb 2020

25 minuti
Moderato
Foto Azione

Introduzione

Vai al passo 1

The Remote Control Socket is not difficult to access. However, it's connections are soldered, so it will be difficult to remove.

Cosa ti serve

Strumenti

  1. Canon EOS 30 Remote Control Socket Replacement, Front Panel: passo 1, immagine 1 di 1
    • Remove the two 4.8 mm black screws above the lens on the front of the camera.

  2. Canon EOS 30 Remote Control Socket Replacement: passo 2, immagine 1 di 1
    • Remove the 4.3 mm black screw under the lens ring, and the 4.8 mm black screw under the camera.

  3. Canon EOS 30 Remote Control Socket Replacement: passo 3, immagine 1 di 1
    • Remove the 4.8 mm black screw on the left side of the camera.

  4. Canon EOS 30 Remote Control Socket Replacement: passo 4, immagine 1 di 1
    • Remove the front panel by lifting it away from the camera's body.

  5. Canon EOS 30 Remote Control Socket Replacement, Bottom Panel: passo 5, immagine 1 di 1
    • Remove seven 4.25 mm black screws on the bottom panel.

  6. Canon EOS 30 Remote Control Socket Replacement: passo 6, immagine 1 di 1
    • Remove the bottom panel.

  7. Canon EOS 30 Remote Control Socket Replacement, Side Panel With Remote Control Socket: passo 7, immagine 1 di 1
    • Remove two 6.5 mm black screws from the panel.

  8. Canon EOS 30 Remote Control Socket Replacement: passo 8, immagine 1 di 1
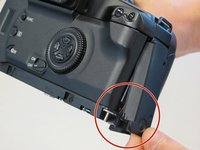
    • Remove the plastic remote control socket cap by pulling it straight out.

  9. Canon EOS 30 Remote Control Socket Replacement: passo 9, immagine 1 di 2 Canon EOS 30 Remote Control Socket Replacement: passo 9, immagine 2 di 2
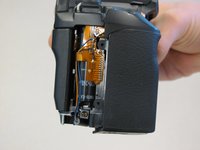
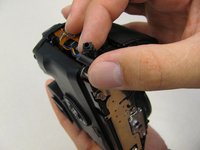
    • Slide the panel toward the bottom of the camera to remove.

  10. Canon EOS 30 Remote Control Socket Replacement: passo 10, immagine 1 di 1
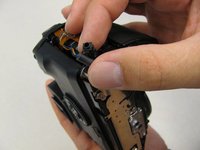
    • Remove the single 4.8 silver screw from the control socket.

  11. Canon EOS 30 Remote Control Socket Replacement: passo 11, immagine 1 di 2 Canon EOS 30 Remote Control Socket Replacement: passo 11, immagine 2 di 2
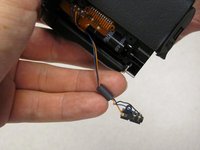
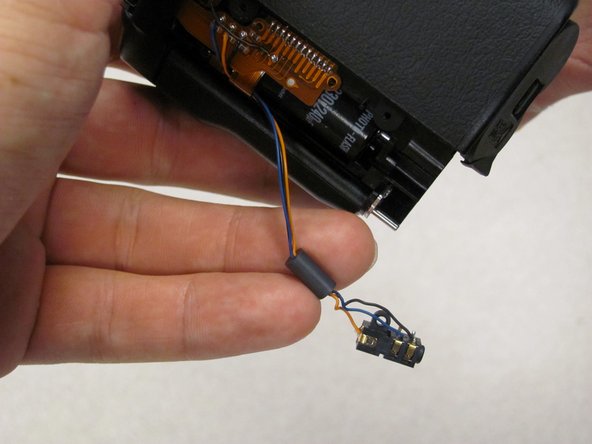
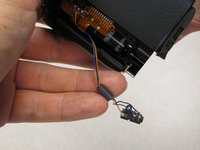
    • The control socket is now secure by three wires.

    • Desolder connections to replace the remote control socket.

  12. Canon EOS 30 Remote Control Socket Replacement, Remote Control Socket: passo 12, immagine 1 di 1
    • Remove one 4.8 mm silver screw securing Remote Control Socket to camera.

  13. Canon EOS 30 Remote Control Socket Replacement: passo 13, immagine 1 di 2 Canon EOS 30 Remote Control Socket Replacement: passo 13, immagine 2 di 2
    • Remote Control Socket is now secured by 3 wires.

    • Desolder connections to replace Remote Control Socket.

Conclusione

To reassemble your device, follow these instructions in reverse order.

Altre 2 persone hanno completato questa guida.

Antonia

Membro da: 04/17/11

124 Reputazione

2 Guide realizzate

Team

Cal Poly, Team 8-8, Regan Spring 2011 Membro di Cal Poly, Team 8-8, Regan Spring 2011

CPSU-REGAN-S11S8G8

5 Membri

22 Guide realizzate

0Commenti sulla guida

Aggiungi Commento

Visualizza Statistiche:

Ultime 24 Ore: 0

Ultimi 7 Giorni: 0

Ultimi 30 Giorni: 4

Tutti i Tempi: 2,992