Salta al contenuto principale
Unisciti alla Community delle riparazioni - Crea un account

Smontaggio Behringer BCD3000

Cosa ti serve

  1. Smontaggio Behringer BCD3000, Behringer BCD3000: passo 1, immagine 1 di 1
    • Scollega tutti i cavi.

  2. Smontaggio Behringer BCD3000, Apri i lati: passo 2, immagine 1 di 2 Smontaggio Behringer BCD3000, Apri i lati: passo 2, immagine 2 di 2
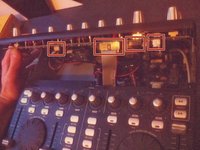
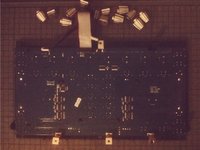
    • Svita le due viti a croce Phillips su ciascun lato del BCD3000.

    • Se le viti sono troppo strette, puoi usare l'estensione per una migliore torsione.

  3. Smontaggio Behringer BCD3000, Allenta la parte superiore: passo 3, immagine 1 di 2 Smontaggio Behringer BCD3000, Allenta la parte superiore: passo 3, immagine 2 di 2
    • Svita un'altra vite a croce Phillips su ciascun lato.

  4. Smontaggio Behringer BCD3000: passo 4, immagine 1 di 3 Smontaggio Behringer BCD3000: passo 4, immagine 2 di 3 Smontaggio Behringer BCD3000: passo 4, immagine 3 di 3
    • Solleva la parte superiore dei controlli.

    • Fai attenzione, ci sono ancora alcuni cavi connessi alla sezione inferiore.

    • Scollega i cavi sfilandoli dalle loro prese.

  5. Smontaggio Behringer BCD3000: passo 5, immagine 1 di 1
    • Rimuovi completamente la parte superiore.

  6. Smontaggio Behringer BCD3000: passo 6, immagine 1 di 1
    • Scollega i due cavi dalla sezione inferiore della scheda del connettore.

  7. Smontaggio Behringer BCD3000: passo 7, immagine 1 di 3 Smontaggio Behringer BCD3000: passo 7, immagine 2 di 3 Smontaggio Behringer BCD3000: passo 7, immagine 3 di 3
    • Fai scorrere la sezione inferiore in avanti.

    • Ora puoi sollevarla e metterla da parte.

  8. Smontaggio Behringer BCD3000: passo 8, immagine 1 di 3 Smontaggio Behringer BCD3000: passo 8, immagine 2 di 3 Smontaggio Behringer BCD3000: passo 8, immagine 3 di 3
    • Scollega le schede separate.

    • Ora puoi rimuovere i moduli svitandoli dal case.

  9. Smontaggio Behringer BCD3000: passo 9, immagine 1 di 2 Smontaggio Behringer BCD3000: passo 9, immagine 2 di 2
    • Le jog wheel sul pannello anteriore possono essere rimosse usando uno spudger e facendo leva.

  10. Smontaggio Behringer BCD3000: passo 10, immagine 1 di 2 Smontaggio Behringer BCD3000: passo 10, immagine 2 di 2
    • Le manopole possono essere rimosse facilmente tirandole.

  11. Smontaggio Behringer BCD3000: passo 11, immagine 1 di 3 Smontaggio Behringer BCD3000: passo 11, immagine 2 di 3 Smontaggio Behringer BCD3000: passo 11, immagine 3 di 3
    • La stessa cosa vale per le manopole sulla parte superiore del pannello frontale.

Conclusione

Per rimontare il dispositivo, segui queste istruzioni in ordine inverso.

Altre 6 persone hanno completato questa guida.

Un ringraziamento speciale a questi traduttori:

en it

100%

Sara Balestra ci sta aiutando ad aggiustare il mondo! Vuoi partecipare?
Inizia a tradurre ›

Tobias Isakeit

Membro da: 03/31/14

130.698 Reputazione

189 Guide realizzate

4Commenti sulla guida

Pensaba que serviría para la BCD2000… pero es algo distinta.

Antonio - Replica

great stuff, with better quality pictures would be better

csipapicsa - Replica

This is great! I thought it would be like the other BC controllers (BCR/BCF2000) with a clip on the side panels. I need to re-seat my knob rings that have gotten loose and fallen of the top panel.

NomeX - Replica

Thanks for the guide! I was able to re-glue and re-seat my knob rings that popped loose. I had two on the top section (main vol and FX4) and one at the lower that was working loose, so I decided to hit that one as well since I already had the BDC3000 apart. I find it odd that Behringer used machine screws on the bottom of the machine since they screw into plastic posts. The control knobs rings are held in place with a thin glue that, after nearly 20 years (mine was 1105 date), have weakened and allow easy popping off. I used a glue that didn't melt the pieces together (preferred, but I didn't have), so I may have to go through this process again. When reassembling, take care that the buttons seat properly into the panels as they can wiggle out of place and make screwing the PCBs difficult and reassembly impossible. If you need total disassembly, you'll need a socket wrench or mini pliers to remove the nut from the headphone jack. I don't think this is a necessary step if you're just re-seating/gluing the rings.

NomeX - Replica

Aggiungi Commento

Visualizza Statistiche:

Ultime 24 Ore: 3

Ultimi 7 Giorni: 18

Ultimi 30 Giorni: 87

Tutti i Tempi: 3,286