Introduzione
If you find that you need to replace the motherboard on the Asus VivoBook E203MA-TBCL432B, this guide will help you access it. This replacement requires only a standard Phillips #0 screwdriver and a plastic opening tool. The screwdriver is used to remove the screws on the bottom panel of the laptop and the screws connecting the battery and motherboard to the laptop. This is a simple replacement and should not require any additional knowledge or information.
Cosa ti serve
-
-
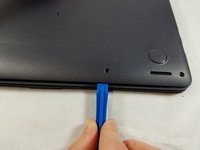
Position the laptop so that the bottom panel is facing upwards, the hinge is away from you, and the ASUS logo is against the table.
-
-
-
Insert the iFixit opening tool in between the back panel and the rest of the laptop.
-
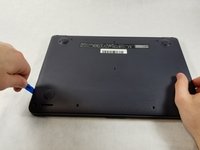
With the iFixit opening tool, lift the panel from the laptop body. Work your way around the device creating separation with the tool.
-
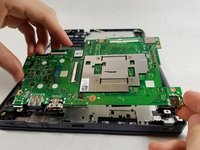
Once there is enough separation between the back panel and the device, gently pull off the back panel with your hands and completely remove it.
-
-
-
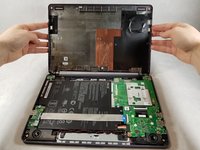
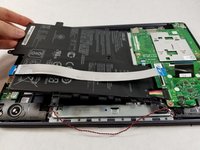
Now that the back panel is removed you can clearly see the battery and all of its connectors.
-
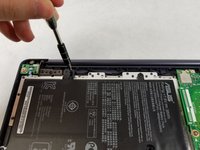
Begin by removing the silver ribbon cable along the back of the battery.
-
To disconnect it from the motherboard, lift the black tab on the Zero Insertion Force (ZIF) connector up and pull the cable away using the blue tab.
-
Disconnect the ribbon cable from the left side in the same way.
-
-
-
Remove the red and black wire along the bottom of the battery.
-
This does not need to be disconnected, only removed from the clamps along the bottom of the battery.
-
-
-
-
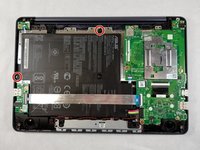
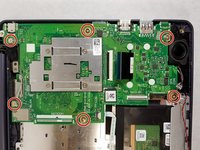
Using the Phillips #0 screwdriver, remove the two 3 mm screws located at the top and left side of the battery.
To discard battery damage, disconnect the battery and try to power on the notebook using only the power cable connected. Maybe the power button is the cause of bad working.
-
-
-
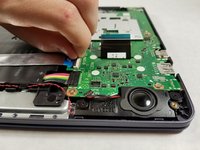
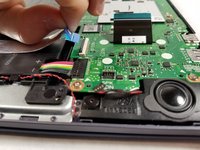
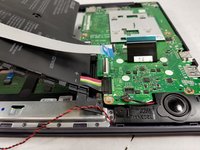
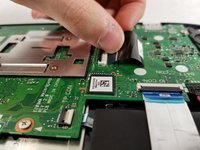
Disconnect the small black and red bundled cable by lifting it directly up from the connector on the motherboard.
-
-
-
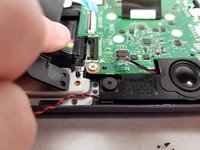
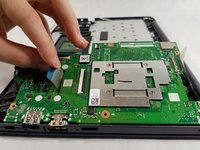
Remove the coaxial connector from the motherboard.
-
Grasp the wire close to where it connects to the motherboard.
-
Pull up and away from the motherboard until the connector is no longer attached to the motherboard.
this is the antenna cable for wifi signal. When it's not working, is not possible to replace the wlan drive because it's integrated to the motherboard. You need disconnect the connector and use a wifi adapter trough usb connection.
-
-
-
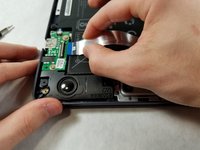
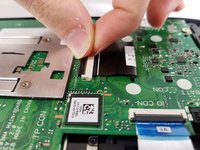
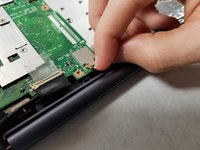
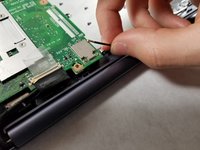
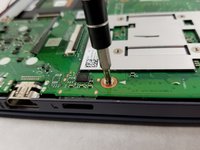
At the top of the motherboard there is a connector that is taped in place.
-
Peel back the tape so that it is no longer in contact with the motherboard.
-
Gently pull the connector out from its socket.
this is the video connector. Some times replacing this flex can be the solve to LCD problems. First at all, check video signal connecting HDMI monitor and reinstall video drivers to discard physical damage on video components.
-


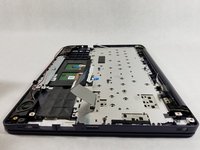
To reassemble your device, follow these instructions in reverse order.
To reassemble your device, follow these instructions in reverse order.
Annulla: non ho completato questa guida.
Altre 7 persone hanno completato questa guida.
Team

UMass Dartmouth, Team S8-G1, Bailey Spring 2019 Membro di UMass Dartmouth, Team S8-G1, Bailey Spring 2019
UMASSD-BAILEY-S19S8G1
3 Membri
6 Guide realizzate