Questa versione può contenere modifiche errate. Passa all'ultima istantanea verificata.
Cosa ti serve
-
Questo passaggio è privo di traduzione. Aiuta a tradurlo
-
Using the plastic opening tool, carefully pry the top panel from the base.
-
-
Questo passaggio è privo di traduzione. Aiuta a tradurlo
-
Lift the side of the keyboard.
-
Disconnect the attached ribbon located underneath the keyboard.
-
Place your index finger in the hole on the right side of the keyboard tray and lift the tray.
-
-
-
Questo passaggio è privo di traduzione. Aiuta a tradurlo
-
Use your fingers to lift the battery and gently disconnect the wires from the base.
-
-
Questo passaggio è privo di traduzione. Aiuta a tradurlo
-
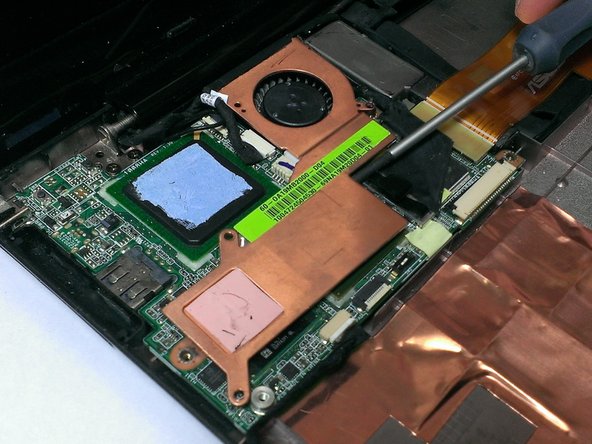
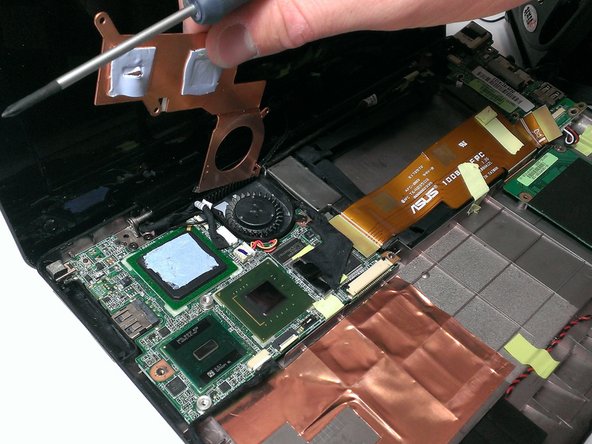
Use the Phillips #0 screwdriver to remove the two 2mm screws from the copper heat sink. These are found on the left side of the device.
-
-
Questo passaggio è privo di traduzione. Aiuta a tradurlo
-
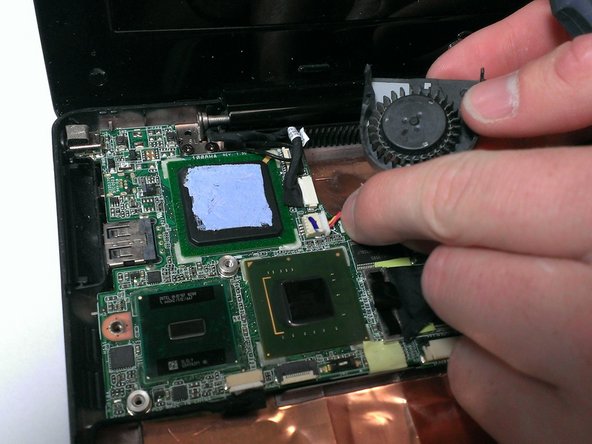
Remove the small white connector attached to the fan. Make sure to carefully pull from the white connector. Do not pull the connecting wires, as this can cause damage to the component.
-
Replace with new cooling fan!
-


Annulla: non ho completato questa guida.
Altre 2 persone hanno completato questa guida.
Team

Cal Poly, Team 21-52, Johann Spring 2013 Membro di Cal Poly, Team 21-52, Johann Spring 2013
CPSU-JOHANN-S13S21G52
4 Membri
11 Guide realizzate