Introduzione
Questa guida mostra come applicare l'adesivo specifico per il gruppo display a un iPad.
Cosa ti serve
-
-
Prima di installare il nuovo adesivo, pulisci con cura il gruppo display e la scocca da ogni residuo di colla.
-
Usa delle pinzette per tirare via pezzi di nastro residuo.
-
Usa uno strumento di apertura o uno spudger per raschiare via i residui. Per ammorbidire l'adesivo, puoi usare alcol isopropilico ad alta concentrazione (oltre il 90%).
-
Rimuovi quello che resta sfregando in una sola direzione per evitare di spalmare l'adesivo sulla superficie.
-
-
-
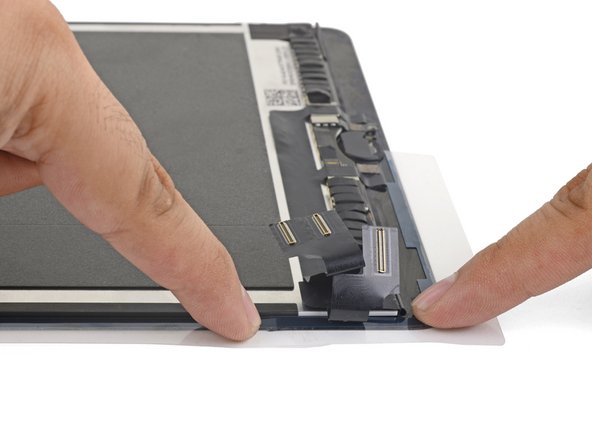
Disponi le strisce adesive sostitutive attorno al gruppo display in modo che corrispondano ai rispettivi lati.
Beim iPad Air müssen die Klebestreifen übrigens nicht auf das Gehäuse, sondern an das Front Panel geklebt werden.
Danke. Sehr gut.
Regarding which is the left side and which is the right side, do not rely on the color coding on the image in step 2. Instead, look for how the width of the adhesive strip varies. A thinner strip should correspond to the location of the screen side cables. I used the color coding on the image and got the sides reversed. However, even though there was too much adhesive near the side cables, it did not matter once I finished assembly. Another thing I did to make alignment easier is to cut the left and right sides in two close to the middle. It was easier to align the 4 strips working from corner to middle
-
-
-
-
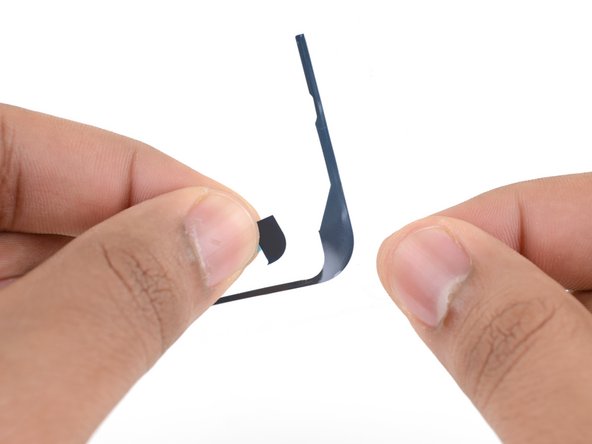
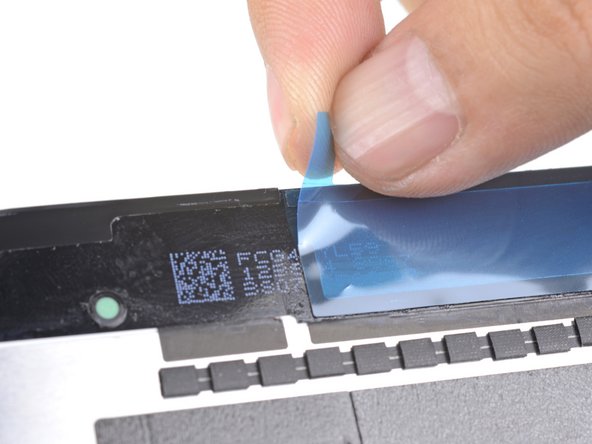
Stacca e rimuovi dalla striscia lo strato adesivo superiore in plastica.
-
Stacca e rimuovi dalla striscia la protezione inferiore in plastica.
-
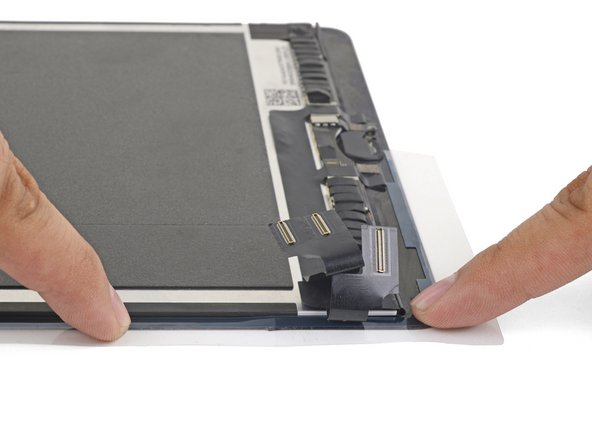
Allinea la striscia adesiva al bordo destro del gruppo display.
-
Iniziando da un angolo, disponi la striscia adesiva sul gruppo display e premi nella sua posizione la striscia stessa.
-
-
-
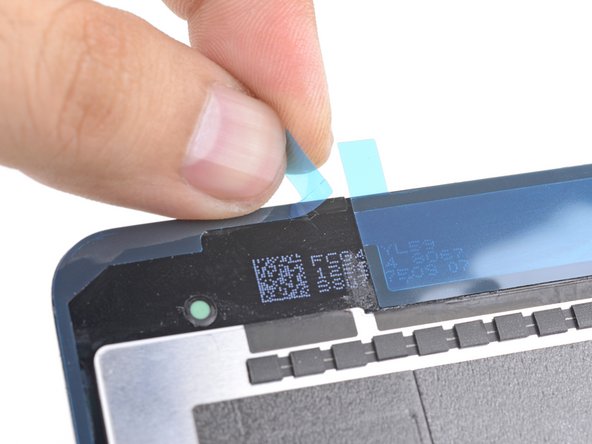
Stacca e rimuovi dalla striscia lo strato adesivo superiore in plastica.
-
Stacca e rimuovi dalla striscia la protezione inferiore in plastica.
-
Allinea la striscia alla parte superiore del gruppo display in modo che la linea dritta riempia l'interruzione tra le strisce di sinistra e di destra.
-
Premi la striscia nella sua posizione.
-


La riparazione non è andata secondo i piani? Vai sulla nostra comunità Risposte iPad per trovare aiuto nella risoluzione dei problemi.
La riparazione non è andata secondo i piani? Vai sulla nostra comunità Risposte iPad per trovare aiuto nella risoluzione dei problemi.
Annulla: non ho completato questa guida.
Altre 55 persone hanno completato questa guida.
Un ringraziamento speciale a questi traduttori:
100%

Questi traduttori ci stanno aiutando ad aggiustare il mondo! Vuoi partecipare?
Inizia a tradurre ›


10 Commenti
Thanks, I was able to fix my wife’s shattered digitizer screen on the iPad 6th gen with this guide!
I managed to get it done, but this was a personal nightmare for me and more difficult than replacing the battery in my ipad. There are too many instruction that say “remove plastic” and I have no idea which layer; there was nothing on the packaging to indicate which side was up or which side was the front and I ended up guessing the wrong direction because it “looked” right, but wasn’t. A simple sticker on the packaging indicating a direction would have removed all of the frustration. I only managed to figure it out by removing all of the plastic so that the sticky side of the adhesive was exposed and then I could finally see how it was supposed to fit and how I was supposed to press down with the other side of the plastic to push the adhesive side into the frame.
Fixed a cracked iPad 4 mini screen; I agree with twizzlercraze72. Some kind of labeling would have saved so much peeling and re-sticking. I ended up with a gap next to my home button. An expensive lesson to learn.
For me, actually replacing the battery wasn’t too bad, but I ended up using too much isopropyl to clean off the old glue, and it seeped under the display and ruined it. Wish Apple didn’t use so much glue. It massively impedes repairability, which is not very environmentally sound. My iPad was perfect apart from the battery - it’s now got a perfect battery but the iPad is ruined :-(
Same here :(. $50 repair just turned into $250!
I had the same thing happen. Lesson is not work so hard to remove the glue. :(
I too thought it was the isopropanol that ruined the screen (even though I made sure it wouldn't go into the screen), but that stuff evaporates pretty quickly anyway. Your screen was most likely damaged just by opening the device with those picks (just like in my case) - a variety of people have reported the same thing. Turns out the instructions are just doing a really bad job at indicating how easy it is to damage the screen, and underestimate the force as well as time and heat required for the whole procedure. The German instructions are even worse. Even though the instructions give a warning, at one point they inexplicably also suggest it's "ok" to shove those picks into the display as far as the display bezel goes. If that's not going to ruin people screens, I don't know what is. And I personally think those "picks" are horrible choice for this repair. I never used them in any of my other repairs, but stupidly decided to work with them this time. This is by far one of the most difficult repairs.
Adhesive: Used CRC Brakleen PRO SERIES. Applied sparingly with a Q-tip 2 inches at a time. Softened the adhesive was easily squeezed off with a plastic spudger. Final cleaned with Isopropyl.
Application: Went as instructed including sick book method over night.
Result: Display is secure except on the upper left side ½” below the corner. This is the area where the adhesive narrows for about an inch. The narrowing is not necessary on an iPad Air 2. In hind site adding some Tesa 61395 Tape in the narrowed areas would have prevented reopening to redo the adhesive. At this point using B7000 adhesive may have been a better choice.
AT LEAST THIS recognizes that taping the screen back in place is a non-trivial task. I have searched through multiple iPad ifixit repairs and they all say "Now that you have got it apart now just do the reverse with the good part".
FI's
Interesting the the tape is applied prior to reconnecting the digitizer
I followed these instructions and used 99.9% isopropyl alcohol to clean off the glue around the display - but the isopropyl leaked under the screen and ruined it! Replacement screen more than the iPad’s worth. Use tiny amounts and don’t allow for any seepage, or try to manage without and just carefully scape. My iPad’s now a write-off… :-(
Alex Harness - Replica
Hi Alex!
I’m really sorry to hear about your experience. Can you describe a little more how the alcohol ruined the screen? This info can help with future guides!
Arthur Shi -
Use goof off or xylene on cotton swab outdoors to remove adhesive. Do it outside so you don’t smell up the house. Better than rubbing alcohol.
macman2 - Replica
Goof-off will unfortunately leave a residue that can eventually weaken the replacement adhesive. Be sure to fully clean off the surface with alcohol after you use Goof-off.
Arthur Shi -
I used a hair dryer to soften the adhesive.
OK, you still leave a very small, microscopic, layer of adhesive after removing the black tape, but really, new tape will still stick to that. We’re not trying to make the iPad water proof - we’re simply trying to make the components secure and not fall apart. Shame Apple couldn’t have used screws instead!
Billinski - Replica
Used CRC Brakleen PRO SERIES. Applied sparingly with a Q-tip 2 inches at a time. Softened the adhesive was easily squeezed off with a plastic spudger.
dklj - Replica