Questa versione può contenere modifiche errate. Passa all'ultima istantanea verificata.
Cosa ti serve
-
Questo passaggio è privo di traduzione. Aiuta a tradurlo
-
Place the Cinema Display so that it is lying on its face and the feet are pointed away from you.
-
Remove the three screws (9.52 x 4.43mm) that connect the back foot to the hinge using the Hex Key.
-
Remove the back foot from the hinge mount by grabbing the foot and pulling upwards.
-
-
Questo passaggio è privo di traduzione. Aiuta a tradurlo
-
Remove the eighteen (5.25 x 4.43 mm) screws around the edge of the backplate using the Hex key.
-
Disconnect the small white connector leading to the display's Power button.
-
Gently lift the backplate off of the display. Completely remove the backplate and set it aside.
-
-
-
Questo passaggio è privo di traduzione. Aiuta a tradurlo
-
Use a Phillips #2 screwdriver to remove the four (9.52 x 3.43 mm) screws on the outer rim of the metal cover.
-
Next, remove the four cover (11.91 x 2.89 mm) screws located at the corners of the metal cover using the Phillips #2 screwdriver.
-
-
Questo passaggio è privo di traduzione. Aiuta a tradurlo
-
Unplug the large brown plug in the center-right, that connects the control board to the rest of the display.
-
Unplug the blue and gray plug on the right side of the control board. Repeat with the left side.
-
-
Questo passaggio è privo di traduzione. Aiuta a tradurlo
-
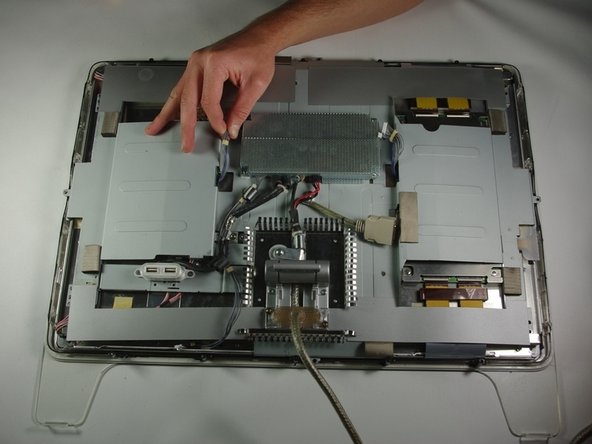
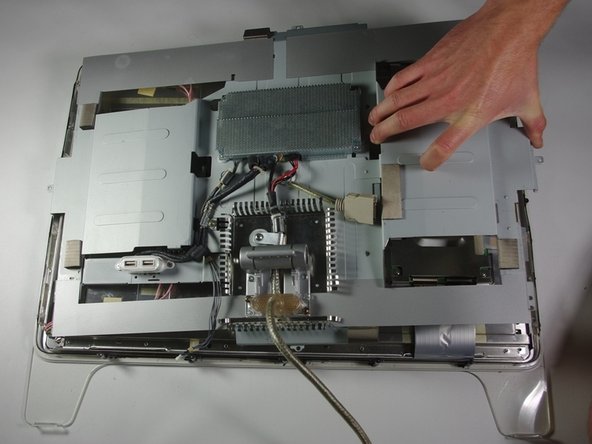
Gently lift the large metal cover which spans across the back of the whole display.
-
-
Questo passaggio è privo di traduzione. Aiuta a tradurlo
-
Turn your attention to the left side of the cinema display.
-
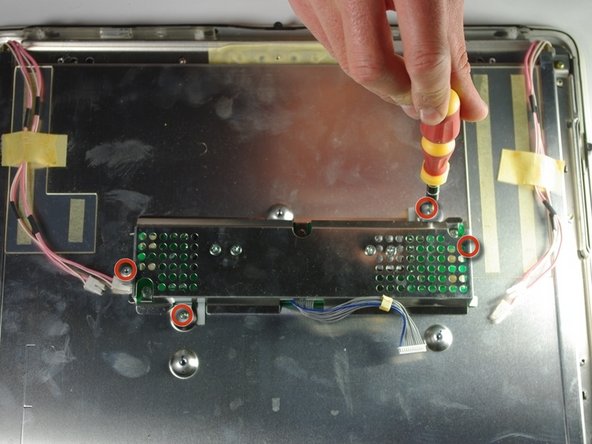
Using your fingers, unplug the small white plugs with pink wires from the top and bottom of the circuit board.
-
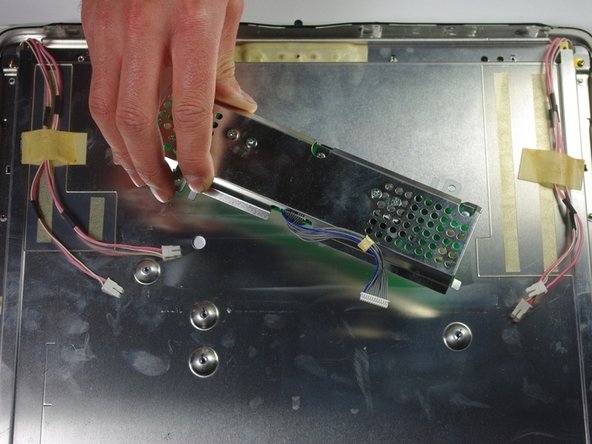
Using the PH 2 screw driver, remove the four screws (6.9 x 2.55 mm) holding down the circuit board.
-
Remove the circuit board by gently lifting it from the display.
-


Annulla: non ho completato questa guida.
Altre 3 persone hanno completato questa guida.
Team

Cal Poly, Team 10-41, Forte Spring 2011 Membro di Cal Poly, Team 10-41, Forte Spring 2011
CPSU-FORTE-S11S10G41
5 Membri
12 Guide realizzate
Un commento
Brilliantly clear and simple to follow. As I suspected it was the inverter board that failed leaving me a totally black screen on my 20 year old 22 inch Cinema display (ADC). Your guide enabled me to restore the monitor to working order, and it’s now paired once again with my Apple cube. Thank you ever so much!