Salta al contenuto principale

Anker Soundcore Life Q30 Button Replacement

Cosa ti serve

  1. Anker Soundcore Life Q30 Button Replacement, Headphone Driver: passo 1, immagine 1 di 2 Anker Soundcore Life Q30 Button Replacement, Headphone Driver: passo 1, immagine 2 di 2
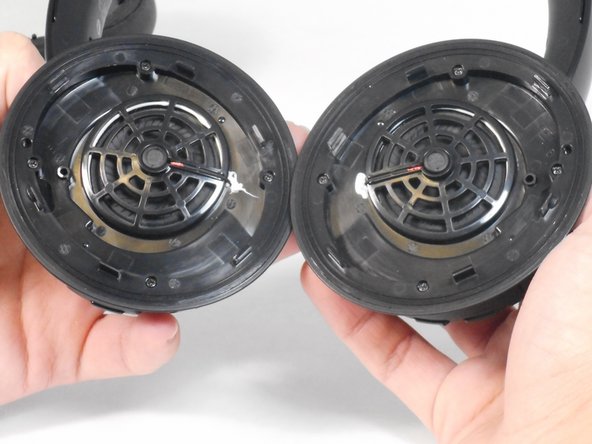
    • Orient the headphones such that the headphone speakers are closest to you, and the headband is furthest from you.

    • Adjust the folding hinge to where the speakers are facing up.

    • Make sure you can easily reach the edge where the cushion connects to the rest of the headphones.

  2. Anker Soundcore Life Q30 Button Replacement: passo 2, immagine 1 di 3 Anker Soundcore Life Q30 Button Replacement: passo 2, immagine 2 di 3 Anker Soundcore Life Q30 Button Replacement: passo 2, immagine 3 di 3
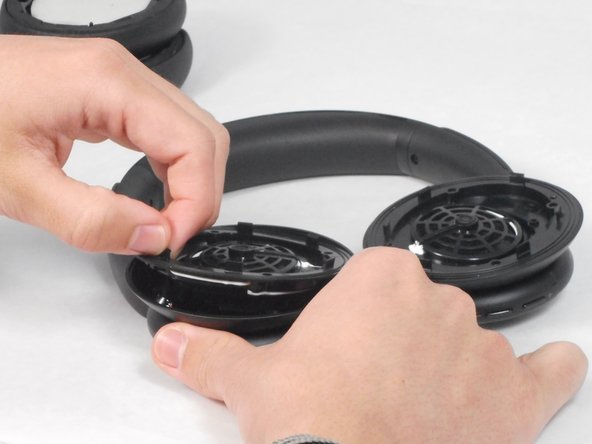
    • Using one hand, hold the right side of the headphones still.

    • Using your other hand, slide the plastic opening tool in the edge along the cushion.

    • Gently pry the cushion off using the plastic opening tool.

    • Set the right ear cushion aside and repeat this step for the left side of the headphones.

  3. Anker Soundcore Life Q30 Button Replacement: passo 3, immagine 1 di 3 Anker Soundcore Life Q30 Button Replacement: passo 3, immagine 2 di 3 Anker Soundcore Life Q30 Button Replacement: passo 3, immagine 3 di 3
    • Remove the four 5.7 mm screws from the headphone driver using a Phillips #00 screwdriver.

    • Pull the headphone driver apart from the headphones.

    • If you’re having difficulty doing so without any tools, use tweezers to get a better grip on it.

  4. Anker Soundcore Life Q30 Button Replacement: passo 4, immagine 1 di 2 Anker Soundcore Life Q30 Button Replacement: passo 4, immagine 2 di 2
    • Lift the drivers out of the headphones.

    • Remove the wires from the circuit board that connect the drivers.

    • Take note of where the wires are connected, as you will have to solder them back to the circuit board.

  5. Anker Soundcore Life Q30 Button Replacement, Battery: passo 5, immagine 1 di 3 Anker Soundcore Life Q30 Button Replacement, Battery: passo 5, immagine 2 di 3 Anker Soundcore Life Q30 Button Replacement, Battery: passo 5, immagine 3 di 3
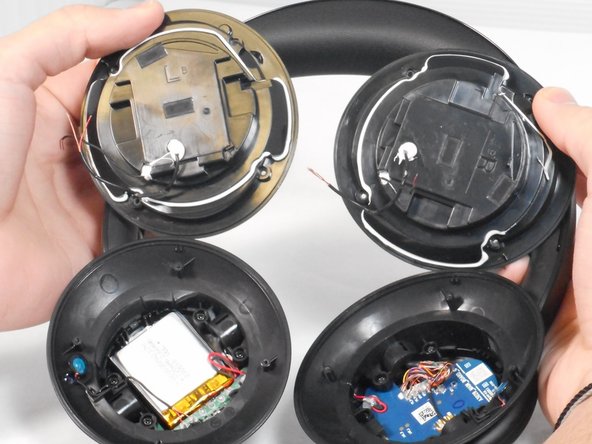
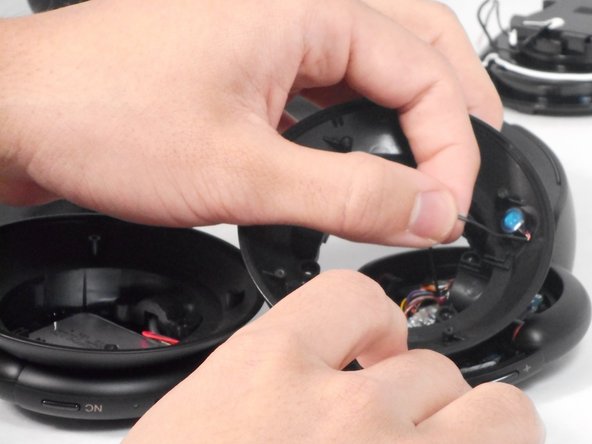
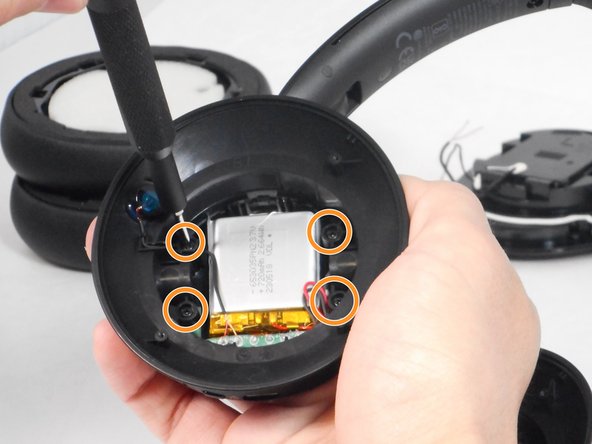
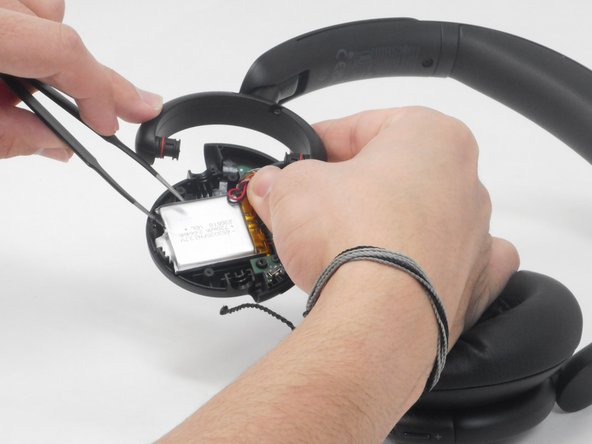
    • Pull the microphone (circular blue part) from its socket by the connected red wire that is covered in black rubber.

    • Take note of where the microphone is, as you will have to reconnect it.

    • The wire itself is connected to the battery and will disconnect the battery from the exterior piece of the earcup.

    • Unscrew the four 5.7 mm screws with a Phillips #00 screwdriver connecting the earcup to the headphone’s frame.

    • Remove the earcup.

  6. Anker Soundcore Life Q30 Button Replacement: passo 6, immagine 1 di 2 Anker Soundcore Life Q30 Button Replacement: passo 6, immagine 2 di 2
    • Unscrew the 5.7mm screw with a Phillips #00 screwdriver within the green circuit board connected to the battery.

    • Carefully pry the green circuit board and battery off of the earcup.

    • The battery may be glued into place, which will require some force to remove.

  7. Anker Soundcore Life Q30 Button Replacement: passo 7, immagine 1 di 2 Anker Soundcore Life Q30 Button Replacement: passo 7, immagine 2 di 2
    • If you are following this guide to reach the buttons, ignore this step.

    • Remove the wires connecting the battery from the circuit board.

    • Note the placement of the wires you remove, as you will have to solder them back into place.

  8. Anker Soundcore Life Q30 Button Replacement, Button: passo 8, immagine 1 di 3 Anker Soundcore Life Q30 Button Replacement, Button: passo 8, immagine 2 di 3 Anker Soundcore Life Q30 Button Replacement, Button: passo 8, immagine 3 di 3
    • You can follow a similar process to open up the right side of the headphones. The main difference is that there is no battery to remove, so there will just be a circuit board that will need to be removed from the earcup.

  9. Anker Soundcore Life Q30 Button Replacement: passo 9, immagine 1 di 2 Anker Soundcore Life Q30 Button Replacement: passo 9, immagine 2 di 2
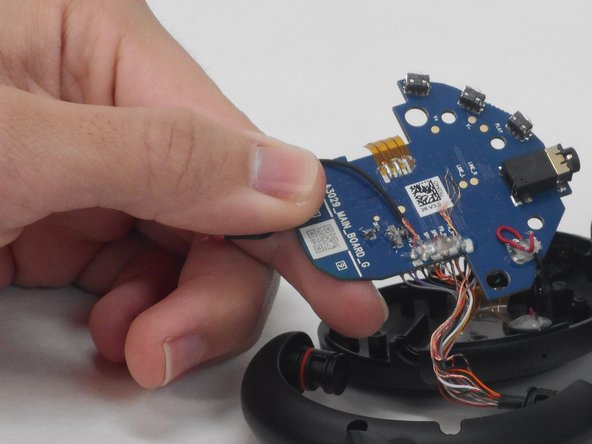
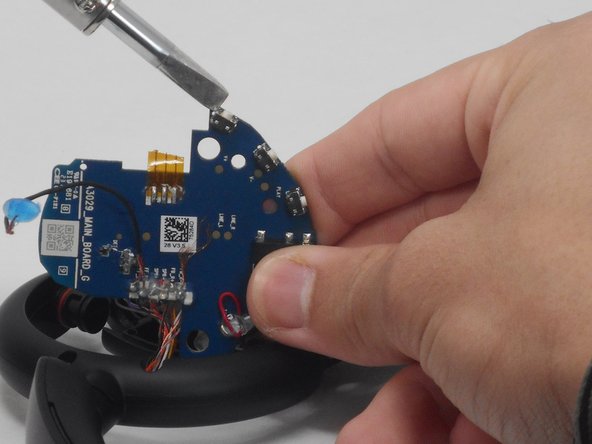
    • After the circuit boards can be accessed, you will need to desolder the button you are trying to replace from it. This guide will be using the right side of the headphones as an example, but the process will be the same for the buttons on the left side. This link will take you to a guide on soldering.

    • You can now solder your replacement button into place. Take care that you orient the button correctly so that it matches the position of the external part of the button.

Conclusione

To reassemble your device, follow these instructions in reverse order.

0 Commenti

Aggiungi Commento

Visualizza Statistiche:

Ultime 24 Ore: 0

Ultimi 7 Giorni: 5

Ultimi 30 Giorni: 23

Tutti i Tempi: 68