Questa versione può contenere modifiche errate. Passa all'ultima istantanea verificata.
Cosa ti serve
-
Questo passaggio è privo di traduzione. Aiuta a tradurlo
-
Place the device on a flat surface faced down so that the fan vents are at the top of the device.
-
-
Questo passaggio è privo di traduzione. Aiuta a tradurlo
-
Unscrew the eighteen 6 mm PH0 Phillips head screws from the back of the device.
-
-
Questo passaggio è privo di traduzione. Aiuta a tradurlo
-
Use a plastic opening tool to pry open the back cover around the edges of the device.
-
-
-
Questo passaggio è privo di traduzione. Aiuta a tradurlo
-
Stand the device up with the hinges on top and carefully pull apart the back cover from the device.
-
-
Questo passaggio è privo di traduzione. Aiuta a tradurlo
-
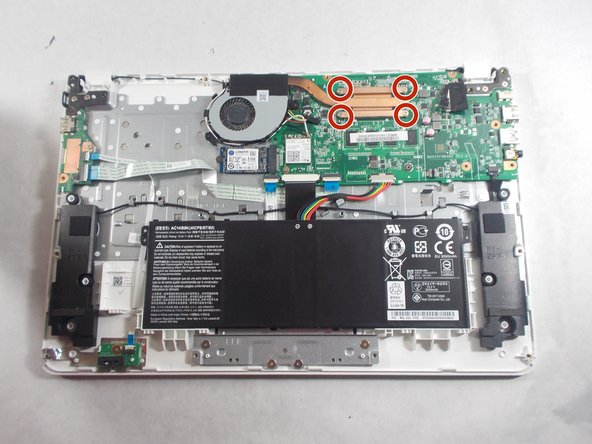
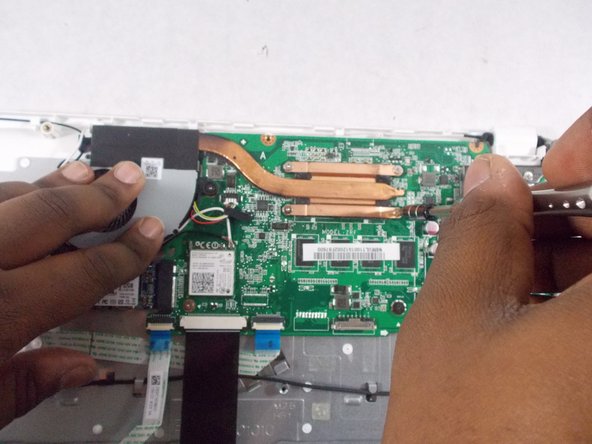
Unscrew the four 3 mm PH00 Phillips screws located on the corner edges of the brass colored piece of metal.
-
-
Questo passaggio è privo di traduzione. Aiuta a tradurlo
-
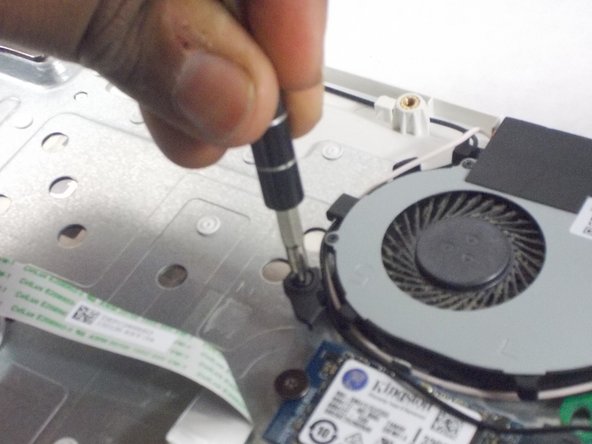
Unscrew the two 4 mm PH00 Phillips head screws on either side of the the fan.
-
-
Questo passaggio è privo di traduzione. Aiuta a tradurlo
-
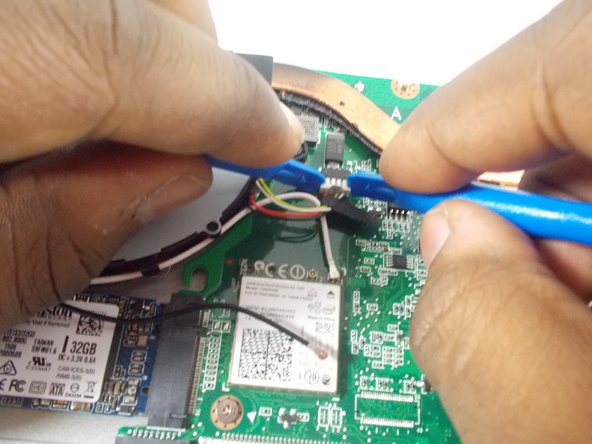
Disconnect the fan connector from the motherboard using two plastic opening tools.
-
-
Questo passaggio è privo di traduzione. Aiuta a tradurlo
-
Carefully unwrap the black and white wires from around the fan cover.
-
-
Questo passaggio è privo di traduzione. Aiuta a tradurlo
-
Grab the fan by its cover and the brass colored piece of metal and carefully lift up and pull out the fan from the device.
-
Annulla: non ho completato questa guida.
Un'altra persona ha completato questa guida.
Un commento
Thanks for the guide. I was able to successfully replace my fan using it. I would like to point out a couple of things:
1. 10 minutes is not a realistic completion time for this guide.
2. Disconnecting the fan plug is challenging. It might have been easier with a small pair of pliers.
3. Since this guide involves dis/re-connecting the thermal interface between the processor and heat sink, you should be prepared to properly clean both surfaces and re-apply new thermal compound. There is an excellent guide on applying thermal compound here:


