Salta al contenuto principale

Acer Aspire E1-510P-4637 CMOS Battery Replacement

Cosa ti serve

  1. Acer Aspire E1-510P-4637 CMOS Battery Replacement, Battery: passo 1, immagine 1 di 1
    • To release the battery, depress the battery release with a nylon spudger. Hold the latch down and slide it over.

  2. Acer Aspire E1-510P-4637 CMOS Battery Replacement: passo 2, immagine 1 di 1
    • Firmly grab hold of the battery and slide it out of the laptop.

  3. Acer Aspire E1-510P-4637 CMOS Battery Replacement, Hard Drive: passo 3, immagine 1 di 1
    • Remove the M2.5x8 screw with a PH1 screwdriver.

  4. Acer Aspire E1-510P-4637 CMOS Battery Replacement: passo 4, immagine 1 di 1
    • Use the plastic opening tool to pop off the small back cover.

  5. Acer Aspire E1-510P-4637 CMOS Battery Replacement: passo 5, immagine 1 di 1
    • Use a PH0 Phillips screwdriver to remove the screw securing the hard drive.

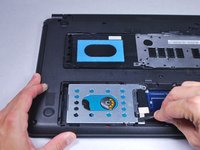
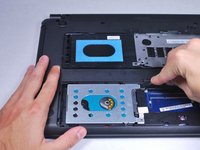
  6. Acer Aspire E1-510P-4637 CMOS Battery Replacement: passo 6, immagine 1 di 2 Acer Aspire E1-510P-4637 CMOS Battery Replacement: passo 6, immagine 2 di 2
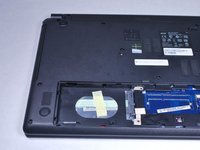
    • Use a nylon spudger to slightly pry up the hard drive near the screw holes.

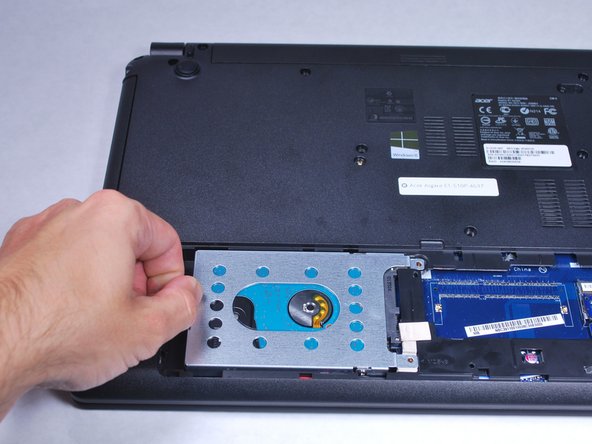
  7. Acer Aspire E1-510P-4637 CMOS Battery Replacement: passo 7, immagine 1 di 3 Acer Aspire E1-510P-4637 CMOS Battery Replacement: passo 7, immagine 2 di 3 Acer Aspire E1-510P-4637 CMOS Battery Replacement: passo 7, immagine 3 di 3
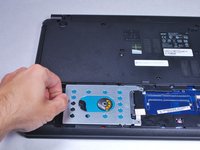
    • Grab hold of the plastic tab and pull the hard drive away from the connectors. This will release the hard drive.

    • The hard drive connector is fragile. Handle with care.

  8. Acer Aspire E1-510P-4637 CMOS Battery Replacement, CMOS Battery: passo 8, immagine 1 di 1
    • Remove the fourteen M2.5x8 screws highlighted in the picture with a PH0 Phillips screwdriver.

  9. Acer Aspire E1-510P-4637 CMOS Battery Replacement: passo 9, immagine 1 di 1
    • Slide out the disk drive tray.

  10. Acer Aspire E1-510P-4637 CMOS Battery Replacement: passo 10, immagine 1 di 1
    • Use the plastic opening tool to gently pry open the laptop.

  11. Acer Aspire E1-510P-4637 CMOS Battery Replacement: passo 11, immagine 1 di 1
    • Slowly rotate the back cover up to reveal cables attached to the motherboard.

    • Carefully slide the connectors out of their receptacle to remove the back panel.

    • The connectors are very small and fragile. Handle with care.

  12. Acer Aspire E1-510P-4637 CMOS Battery Replacement: passo 12, immagine 1 di 2 Acer Aspire E1-510P-4637 CMOS Battery Replacement: passo 12, immagine 2 di 2
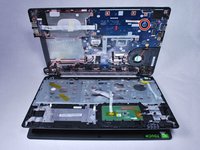
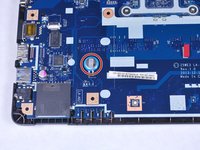
    • Open the up the laptop to reveal the CMOS battery.

    • Desolder the CMOS battery to remove it. For soldering help, check out iFixit's soldering guide.

Conclusione

To reassemble your device, follow these instructions in reverse order.

Altre 6 persone hanno completato questa guida.

Team

Cal Poly, Team 34-15, Maness Spring 2016 Membro di Cal Poly, Team 34-15, Maness Spring 2016

CPSU-MANESS-S16S34G15

4 Membri

6 Guide realizzate

2 Commenti

molto utile e ben fatta, anche se il mio problema è più legato alla alimentazione che pare non funzionare anche senza batteria

Franco Ferrandi - Replica

It'd be really handy if you were to list the model number of the CMOS battery so we can order one in advance.

Dave Compton (SirCompo) - Replica

Aggiungi Commento

Visualizza Statistiche:

Ultime 24 Ore: 2

Ultimi 7 Giorni: 14

Ultimi 30 Giorni: 70

Tutti i Tempi: 17,876