Questa versione può contenere modifiche errate. Passa all'ultima istantanea verificata.
Cosa ti serve
-
Questo passaggio è privo di traduzione. Aiuta a tradurlo
-
Place the laptop upside down so that the bottom panel is facing upwards.
-
-
Questo passaggio è privo di traduzione. Aiuta a tradurlo
-
Unscrew the following 10 screws
-
Eight 5 mm Phillips head screws
-
Two 10 mm Phillips head screws
-
-
Questo passaggio è privo di traduzione. Aiuta a tradurlo
-
Carefully peel the panel off of the bottom of the laptop.
-
-
-
Questo passaggio è privo di traduzione. Aiuta a tradurlo
-
Remove the following 6 screws:
-
Two 5 mm screws holding the fan down.
-
Four 3 mm screws holding the heat sink down
-
-
Questo passaggio è privo di traduzione. Aiuta a tradurlo
-
Carefully disconnect the only sliding connector by using a plastic opening tool to pry the connector out.
-
-
Questo passaggio è privo di traduzione. Aiuta a tradurlo
-
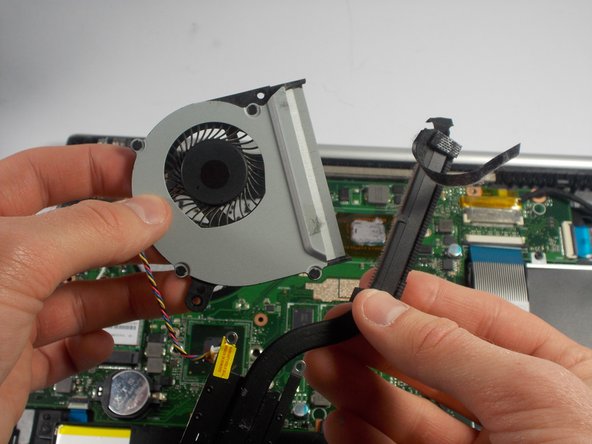
Remove the fan and heat sink by lifting it upwards.
-
-
Questo passaggio è privo di traduzione. Aiuta a tradurlo
-
Remove the tape holding the fan and heat sink together.
-


Team

UMass Dartmouth, Team 3-4, Bhusal Spring 2016 Membro di UMass Dartmouth, Team 3-4, Bhusal Spring 2016
UMASSD-BHUSAL-S16S3G4
2 Membri
5 Guide realizzate