Salta al contenuto principale

Questa versione può contenere modifiche errate. Passa all'ultima istantanea verificata.

Cosa ti serve

  1. , Utilizzo del cric: passo 1, immagine 1 di 2 , Utilizzo del cric: passo 1, immagine 2 di 2
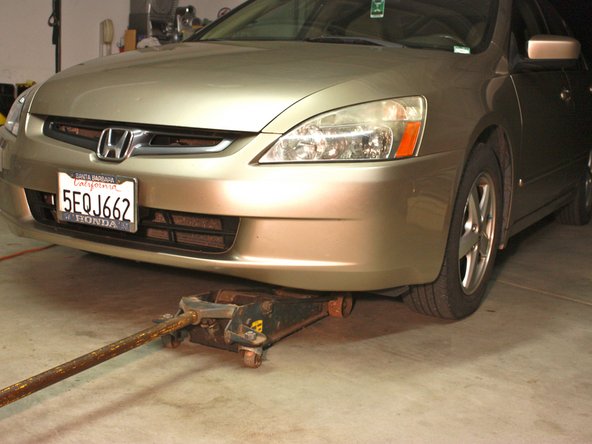
    • Infila il cric idraulico sotto l'auto finché la sua testa non si trova direttamente sotto la traversa.

    • La traversa è la lunga trave metallica di supporto che corre dal parafango anteriore a quello posteriore su entrambi i lati dell'auto.

    • La testa del cric è la parte tonda in metallo che si muove verticalmente per sollevare l'auto.

  2. , Usa il cric per sollevare l'auto: passo 2, immagine 1 di 1
    • Spingi la leva del cric verso il basso per muovere la testa verso l'alto fino a farle toccare la traversa. Continua a spingere la leva verso il basso per sollevare l'auto.

  3. : passo 3, immagine 1 di 1
    • Posiziona il supporto per l'auto sotto il punto di montaggio del cric.

    • Il punto di montaggio del cric è una sporgenza metallica sotto ogni portiera dell'auto.

  4. : passo 4, immagine 1 di 1
    • Solleva il supporto fino a toccare il punto di montaggio del cric.

    • Nel caso che il cric si abbassi da solo, il supporto per l'auto è progettato per evitare che l'auto cada insieme alla testa del cric.

  5. Questo passaggio è privo di traduzione. Aiuta a tradurlo

    : passo 5, immagine 1 di 1
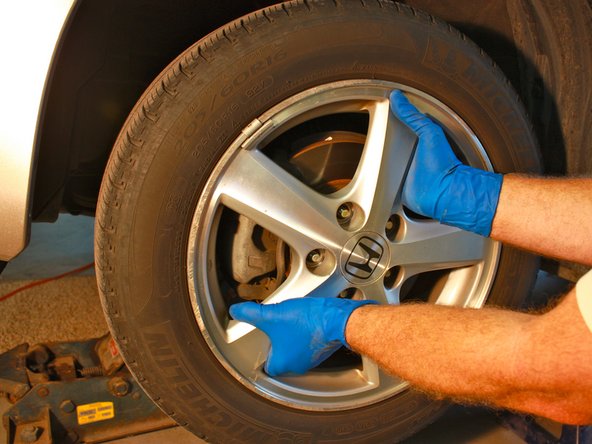
    • Once car is raised, remove the lug nuts on one of the front tires with the 3/4'' socket.

  6. Questo passaggio è privo di traduzione. Aiuta a tradurlo

    : passo 6, immagine 1 di 3 : passo 6, immagine 2 di 3 : passo 6, immagine 3 di 3
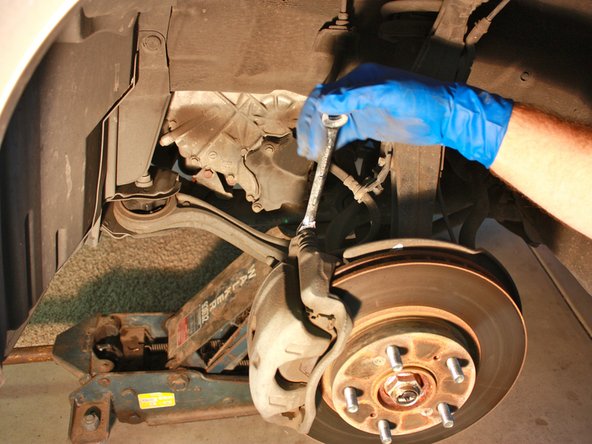
    • Remove the wheel and tire off the wheel studs, and place it aside.

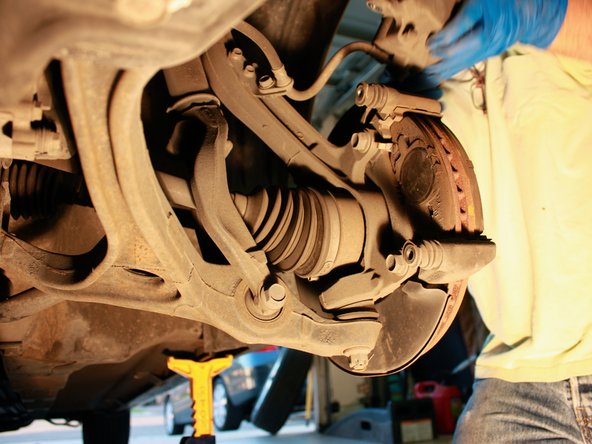
    • This exposes the caliper (shown in rectangle) and rotor (shown in circle).

  7. Questo passaggio è privo di traduzione. Aiuta a tradurlo

    : passo 7, immagine 1 di 3 : passo 7, immagine 2 di 3 : passo 7, immagine 3 di 3
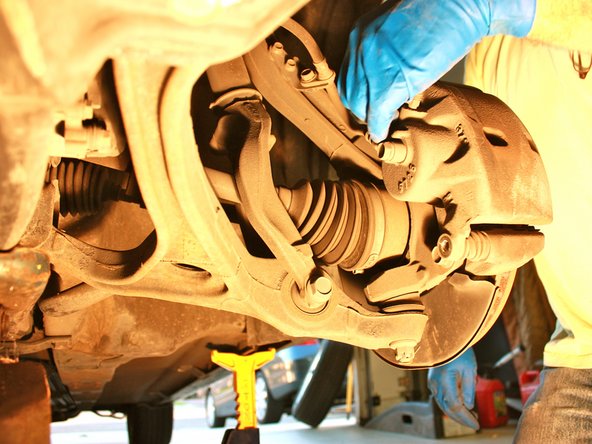
    • Identify the two mounting bolts on the rear of the caliper.

    • Using a 12 mm wrench or socket, remove the two caliper mounting bolts.

    • Alternatively, you may remove only the bottom mounting bolt and, using the top bolt as a hinge, rotate the caliper up and away from the rotor to access the brake pads. If you do this, skip the next step.

  8. Questo passaggio è privo di traduzione. Aiuta a tradurlo

    : passo 8, immagine 1 di 3 : passo 8, immagine 2 di 3 : passo 8, immagine 3 di 3
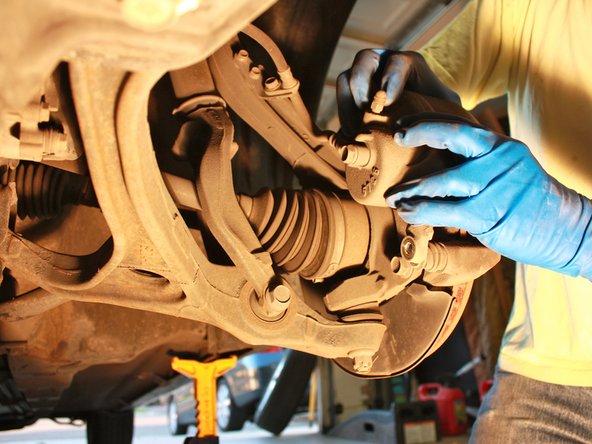
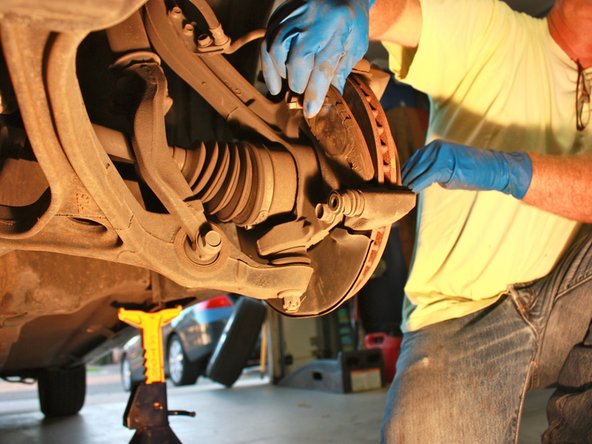
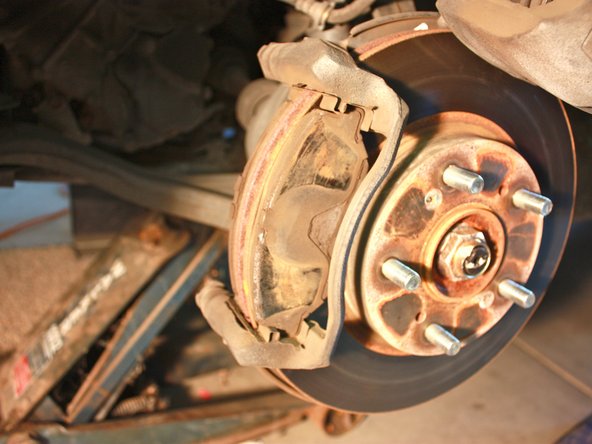
    • Slide the caliper off and rest it on the top of the rotor.

    • Do not let the caliper hang freely because the brake lines may stretch and weaken.

  9. Questo passaggio è privo di traduzione. Aiuta a tradurlo

    : passo 9, immagine 1 di 2 : passo 9, immagine 2 di 2
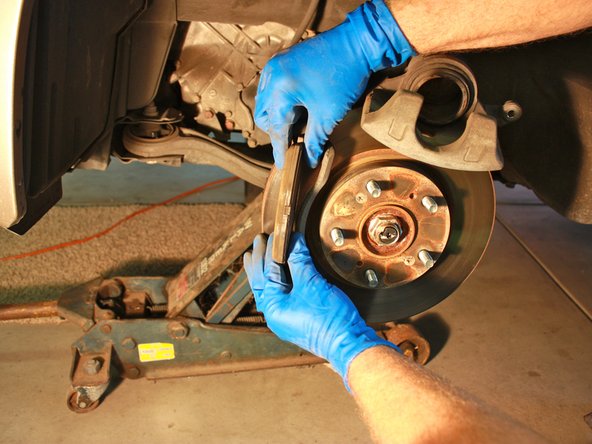
    • Pull the two old brake pads out of both the front and rear of the pad bracket.

  10. Questo passaggio è privo di traduzione. Aiuta a tradurlo

    : passo 10, immagine 1 di 1
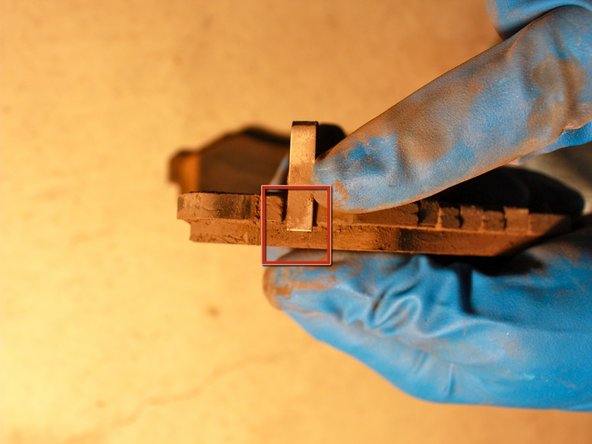
    • Inspect the brake pad wear sensor on the old brake pad. The sensor is a metallic tab attached to the brake pad. When the brake pads wear down too much, the metallic tab contacts the rotor and makes a screeching sound.

  11. Questo passaggio è privo di traduzione. Aiuta a tradurlo

    : passo 11, immagine 1 di 1
    • Place the new brake pads into the bracket. Make sure that the new pads are secure.

  12. Questo passaggio è privo di traduzione. Aiuta a tradurlo

    : passo 12, immagine 1 di 1
    • The new brake pads are thicker than the old pads. Because of this, the caliper piston protrudes too far out to allow enough clearance for the caliper to be placed over the new pads. You will need to manually retract the caliper piston.

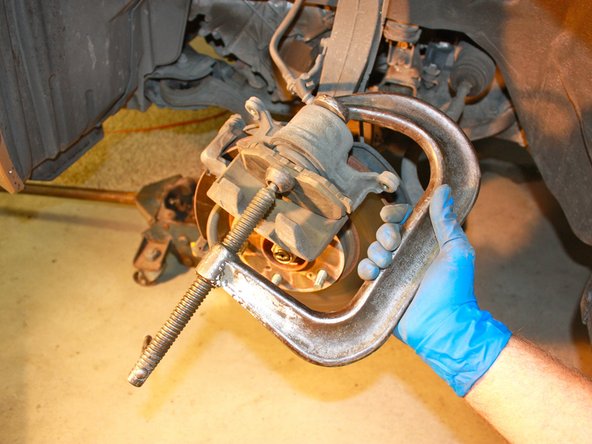
    • To do this, place an old brake pad over the caliper piston.

  13. Questo passaggio è privo di traduzione. Aiuta a tradurlo

    : passo 13, immagine 1 di 2 : passo 13, immagine 2 di 2
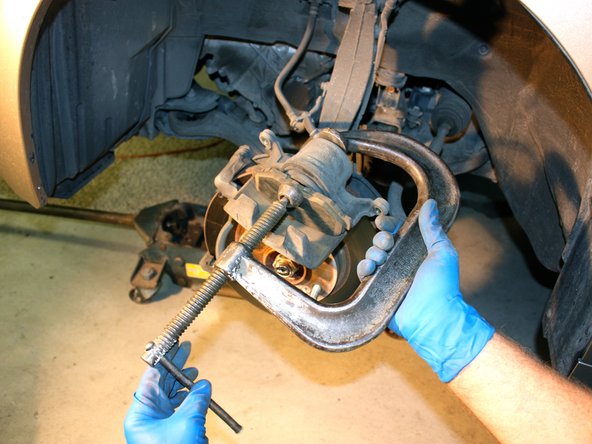
    • Place one end of the c-clamp jaw over the old pad. Place the other end of the jaw on the rear of the caliper. Tighten the c-clamp to push the piston back into the caliper.

    • This will push oil back into the brake reservoir, which could overflow. This can be wasteful, messy, and damage your car's paint job. Make sure the reservoir isn't topped off. It is also a good idea to remove the cap from the reservoir before retracting the piston. The reservoir is located under the hood and should be clearly labeled.

  14. Questo passaggio è privo di traduzione. Aiuta a tradurlo

    : passo 14, immagine 1 di 2 : passo 14, immagine 2 di 2
    • Slide the caliper over the brake pad bracket with the new brake pads.

    • If you removed the cap from the brake fluid reservoir replace it as soon as the brake caliper piston has been retracted. Do not leave the cap off any longer than absolutely necessary.

  15. Questo passaggio è privo di traduzione. Aiuta a tradurlo

    : passo 15, immagine 1 di 1
    • To reassemble the wheel assembly. Follow the Steps 1-7 in reverse order.

    • The caliper mounting bolts and the lug nuts must be tightened to the correct torque value, using a torque wrench. The values may differ depending on your car's configuration and options, but are typically listed as:

    • Caliper bolts: 54 ft lbs

    • Lug nuts: 80 ft lbs

    • Remove the jack stand. Then lower and remove the floor jack.

    • CAUTION! : Before driving the car, pump the brake pedal several times in order to push the caliper piston back against the brake pads. If this step is not performed, the car may not brake reliably when first driven. For your safety, this step is essential.

Linea Traguardo

Altre 26 persone hanno completato questa guida.

Team

Cal Poly, Team 24-27, Regan Fall 2012 Membro di Cal Poly, Team 24-27, Regan Fall 2012

CPSU-REGAN-F12S24G27

4 Membri

22 Guide realizzate

Un commento

Safety tip - before lifting the car up with the jack, break loss the lug nuts as in step 5, break lose means to get them started but they are still snug. Why - This way you don't have to crank with strength when the car is on the stands and possibly knock it off the stands.

mike whitaker - Replica

Aggiungi Commento

Visualizza Statistiche:

Ultime 24 Ore: 7

Ultimi 7 Giorni: 63

Ultimi 30 Giorni: 215

Tutti i Tempi: 82,496