Introduzione
The picture quallity is pretty bad, but i've done my best to make this teardown as comprehensive as possible. No parts description and macro shots here for now.
Cosa ti serve
-
-
We'll begin with a few pictures of how the phone looks
-
Here we have the front, back and side views
-
-
-
-
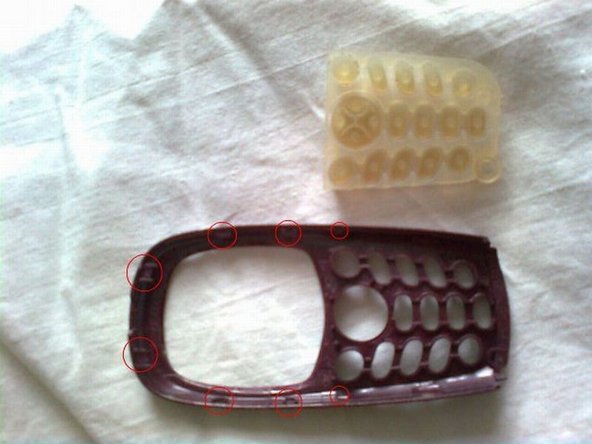
There are 8 clips(3 on each side and two on the top) holding the front case to the body (shown in picture 1 and 3). Oh, by the way, Philips didn't use any screws on this device, so don't worry about that.
-
A plastic card or pr plastic spudger is used to unclip the case from the body, starting on one side, from bottom to top, and then continuing on the other side in the same fashon. (picture 1)
-
The Keyboard membrane can be seen now. Also notice that the keyboard itself can be unattached from the front cover. The keyboard is made of silicone and can break easily, so be careful with it.
-
-
-
The back part of the phone is attatched to the board and lcd by 8 clips on each side (pic 1 ilustrates the biggest one) and two clips on the top (pic 3)
-
Removing it consists in pulling from the sides on the phone (from the point shown in pic 1) and pushing from the battery slot onto the motherboard
-
-
-
To remove the screen from the board, take note that it comes off via a slide mechanism. Gently pull on the two sides and pull the board down on the slide. Once it stops, the screen should come down easily.
-
The display itself may look like it's glued to the grey body, but it comes right out when you flip it.
-


Un commento
I didn't use this guide for this device but for another phone of Philips, the CD180. I have zero experience with teardown of devices and thanks to this article I was able to teardown the phone. Thanks!