Salta al contenuto principale

Cosa ti serve

Questo smontaggio non è una guida di riparazione. Per riparare il tuo BlackBerry 8700c, usa il nostro manuale di assistenza.

  1. BlackBerry 8700c Teardown, BlackBerry 8700c Teardown: passo 1, immagine 1 di 1
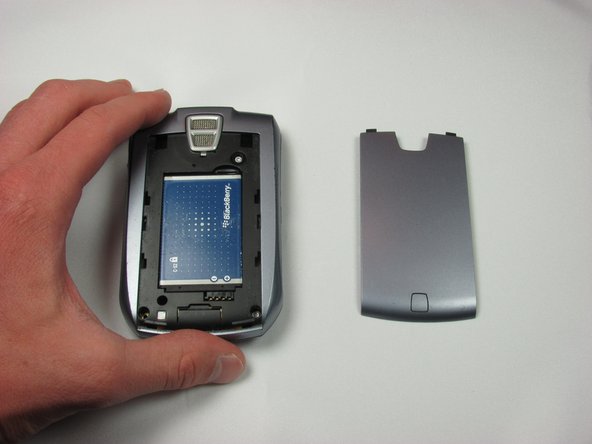
    • In this first step you will remove the battery cover by pushing down on the button on the cover and sliding towards the bottom of the phone.

    • To do this unscrew all four T6 screws

    • Once this is done gently remove the back cover of the phone by pulling first from the bottom towards you, then from the top upwards.

  2. BlackBerry 8700c Teardown: passo 2, immagine 1 di 1
    • To remove the battery, place your fingernail in the slot at the top right of the battery and pull up.

  3. BlackBerry 8700c Teardown: passo 3, immagine 1 di 3 BlackBerry 8700c Teardown: passo 3, immagine 2 di 3 BlackBerry 8700c Teardown: passo 3, immagine 3 di 3
    • Next, remove the back portion of the phone by removing four T6 Screws.

    • Once the screws have been removed, firmly grab the back cover and pull back from the front cover.

  4. BlackBerry 8700c Teardown: passo 4, immagine 1 di 2 BlackBerry 8700c Teardown: passo 4, immagine 2 di 2
    • To remove the middle portion of the phone you will again remove four T6 screws.

    • Follow the removal of the screws, you can now pull the front face plate away from the middle portion.

  5. BlackBerry 8700c Teardown: passo 5, immagine 1 di 2 BlackBerry 8700c Teardown: passo 5, immagine 2 di 2
    • Follow the removal of the screws, you can now pull the middle portion away from the main logic board.

    • Next, hold the logic board and remove the front face plate of the phone

  6. BlackBerry 8700c Teardown: passo 6, immagine 1 di 2 BlackBerry 8700c Teardown: passo 6, immagine 2 di 2
    • When the front face plate has been pulled away, be sure to grab the keypad as it may fall out.

  7. BlackBerry 8700c Teardown: passo 7, immagine 1 di 2 BlackBerry 8700c Teardown: passo 7, immagine 2 di 2
    • Next, use a metal spudger to unhook the earpiece from the inside of the front panel.

  8. BlackBerry 8700c Teardown: passo 8, immagine 1 di 3 BlackBerry 8700c Teardown: passo 8, immagine 2 di 3 BlackBerry 8700c Teardown: passo 8, immagine 3 di 3
    • Using a metal spudger, push back on the four clips holding the LCD screen to the logic board.

    • Next gradually pull the screen away from the board so that none of the clips are engaged.

    • Last, use a metal spudger to push back on the clip locking in the ribbon cable for the screen.

  9. BlackBerry 8700c Teardown: passo 9, immagine 1 di 1
    • The screen is now fully detached, and the phone is completely disassembled.

k3nt

Membro da: 10/28/09

42 Reputazione

4 Guide realizzate

Team

Cal Poly, Team 18-4, Maness Fall 2009 Membro di Cal Poly, Team 18-4, Maness Fall 2009

CPSU-MANESS-F09S18G4

4 Membri

10 Guide realizzate

0 Commenti

Aggiungi Commento

Visualizza Statistiche:

Ultime 24 Ore: 1

Ultimi 7 Giorni: 2

Ultimi 30 Giorni: 6

Tutti i Tempi: 6,545