Salta al contenuto principale

Questo smontaggio è in corso – Ricarica periodicamente per vedere gli ultimi cambiamenti!

Cosa ti serve

  1. Sony Xperia U Teardown, Sony Xperia U Teardown: passo 1, immagine 1 di 1
    • Remove the back cover and the bottom clip. And also remove the sim card and battery.

  2. Sony Xperia U Teardown: passo 2, immagine 1 di 1
    • Remove the 6 T5 screws

  3. Sony Xperia U Teardown: passo 3, immagine 1 di 1
    • Remove the back piece, reveiling the headphone jack, speaker and the Liquid contact indicator.

    • Camera and flash

    • Vibrating motor

    • Headphone jack

    • Speaker

    • Liquid contact indicator

  4. Sony Xperia U Teardown: passo 4, immagine 1 di 2 Sony Xperia U Teardown: passo 4, immagine 2 di 2
    • Remove the 2 T5 screws.

    • Remove the lower antenna.

  5. Sony Xperia U Teardown: passo 5, immagine 1 di 2 Sony Xperia U Teardown: passo 5, immagine 2 di 2
    • Carefully remove the motherboard being aware on the lower left edge, there is the display connector.

    • Be aware of the display connector on the lower left.

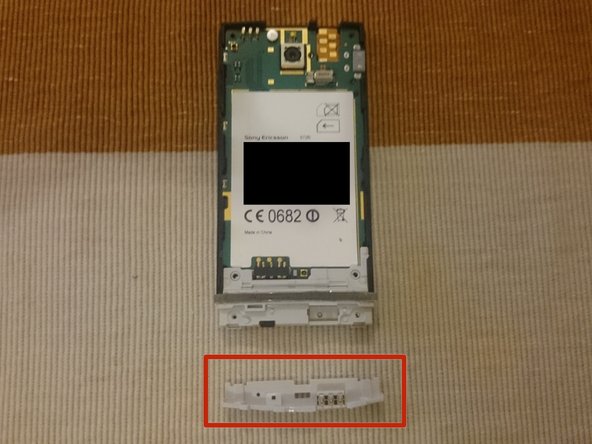
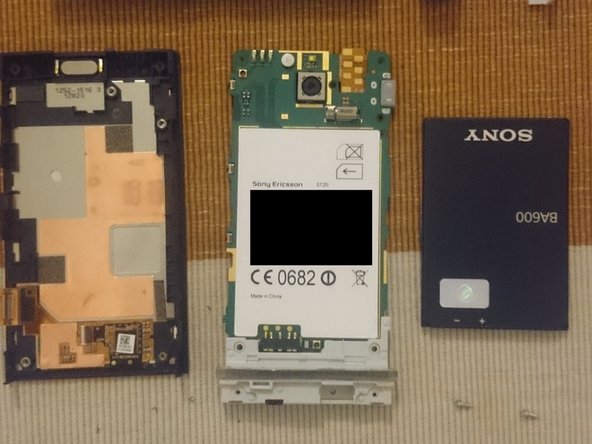
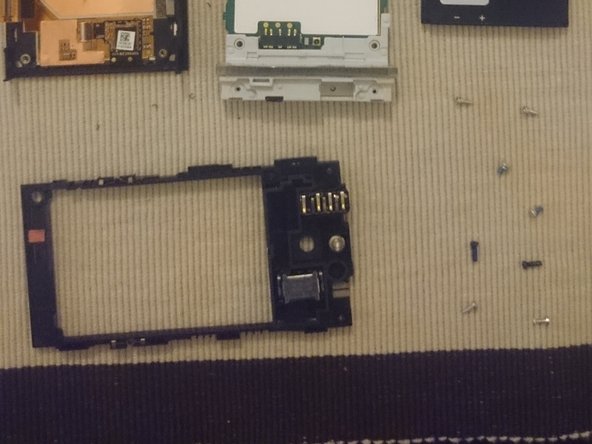
  6. Sony Xperia U Teardown: passo 6, immagine 1 di 3 Sony Xperia U Teardown: passo 6, immagine 2 di 3 Sony Xperia U Teardown: passo 6, immagine 3 di 3
    • Removal back and bottom cap

    • Screen + main case, motherboard + antenna, battery

    • Back casing holding the headphone jack, speaker and liquid contact indicator.

Anthony

Membro da: 07/29/14

201 Reputazione

1 Guida realizzata

0 Commenti

Aggiungi Commento

Visualizza Statistiche:

Ultime 24 Ore: 0

Ultimi 7 Giorni: 0

Ultimi 30 Giorni: 5

Tutti i Tempi: 3,086