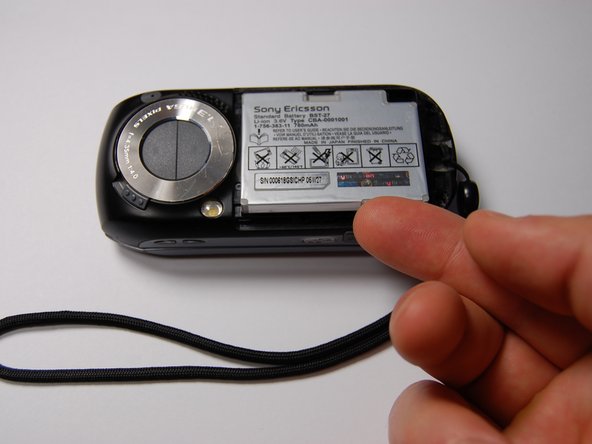
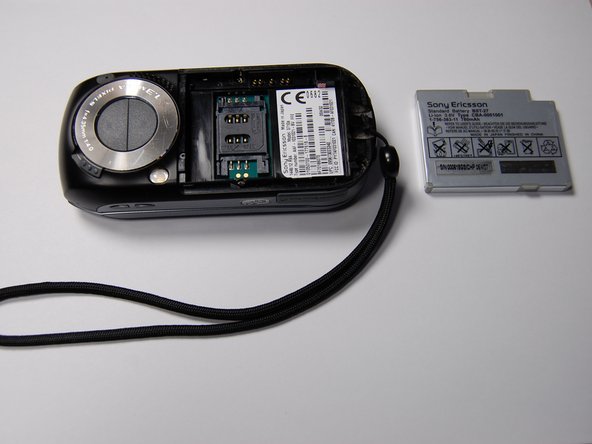
The Sony Ericsson s710a is a camera phone with all of the features expected of a phone in the mid '00's.
Questo smontaggio non è una guida di riparazione. Per riparare il tuo Sony Ericsson s710a, usa il nostro manuale di assistenza .
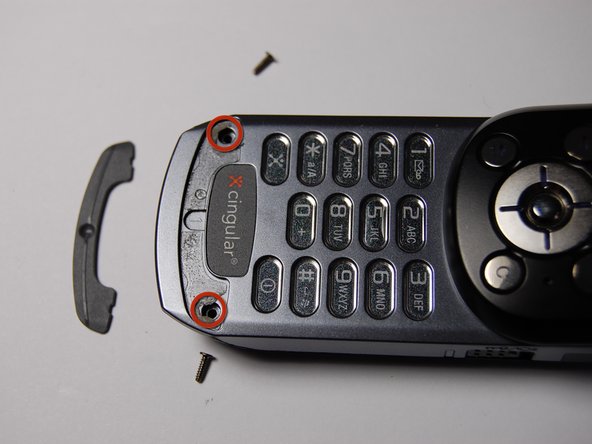
Remove the plastic piece near the base of the keypad.
This will require prying it off with a plastic opening tool and breaking the seal with the glue. Unfortunately there is no way around this.
Then remove the two 6mm screws beneath the plastic cover with a Phillips head screwdriver.
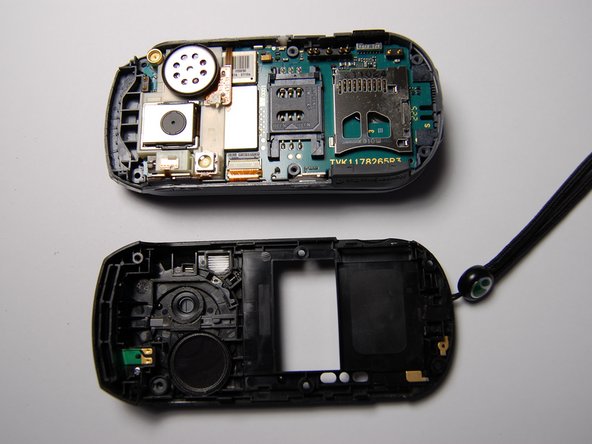
Use the plastic opening tool to pry off the back cover of the phone. This will require a bit of careful work.
You should start prying the back cover from the SD card slot. Alternate prying the back cover on each side until it pops off.
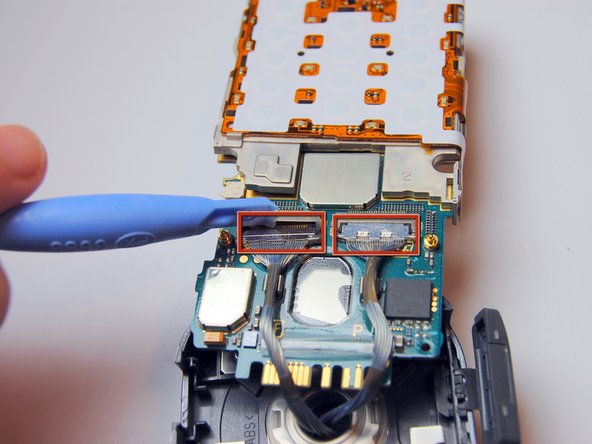
Remove the LCD cable connectors coming from through the hinge hole with a flathead screwdriver.
Be sure to record which port each cable was in, including the orientation in which they were plugged into each socket.
Now the two parts of the phone are separated.
On the non-camera side of the phone, remove the four 3mm screws and two 2.3mm screws holding down the twist-structure.
When you lift this off, you will need to disconnect the cables from the other side using the same method as in Step 5.
Again, be sure to record which port each cable was in, and the orientation in which they were plugged into each socket.
Remove the plastic piece near the bottom of this side of the phone with the plastic opening tool. This will give you access to two additional screws.
Remember you will have to break the glue seal, but that is alright.
Remove the four visible 6mm screws. Then remove the back cover.
In this picture, you can see all of the parts in the non-camera side of the phone.
Interestingly, the four control buttons are all one piece
Incorpora questa guida
Scegli una dimensione e copia il codice qui sotto per incorporare questa guida come un piccolo widget sul tuo sito/forum.
Passo Singolo
Guida Completa
Piccolo - 600px
Medio - 800 px
Grande - 1200 px
Anteprima