Salta al contenuto principale

Cosa ti serve

Questo smontaggio non è una guida di riparazione. Per riparare il tuo Polaroid One-Step 600, usa il nostro manuale di assistenza.

  1. Polaroid One-Step 600 Teardown, Polaroid One-Step 600 Teardown: passo 1, immagine 1 di 3 Polaroid One-Step 600 Teardown, Polaroid One-Step 600 Teardown: passo 1, immagine 2 di 3 Polaroid One-Step 600 Teardown, Polaroid One-Step 600 Teardown: passo 1, immagine 3 di 3
    • Open the flash/lens compartment of the Polaroid camera to a 30 degree angle with the horizontal.

  2. Polaroid One-Step 600 Teardown: passo 2, immagine 1 di 3 Polaroid One-Step 600 Teardown: passo 2, immagine 2 di 3 Polaroid One-Step 600 Teardown: passo 2, immagine 3 di 3
    • Separate the flash section of the camera from the main body by unhooking the sides.

    • BE CAREFUL NOT TO YANK THE TWO SECTIONS APART BECAUSE THE BAND WIRE STILL ATTACHES THEM!

  3. Polaroid One-Step 600 Teardown: passo 3, immagine 1 di 1
    • Open the battery/ cartridge compartment fully.

  4. Polaroid One-Step 600 Teardown: passo 4, immagine 1 di 3 Polaroid One-Step 600 Teardown: passo 4, immagine 2 di 3 Polaroid One-Step 600 Teardown: passo 4, immagine 3 di 3
    • Insert spudger in between face of camera and sides where the four tabs are located.

  5. Polaroid One-Step 600 Teardown: passo 5, immagine 1 di 2 Polaroid One-Step 600 Teardown: passo 5, immagine 2 di 2
    • Once tabs are released, pull face of camera straight out.

  6. Polaroid One-Step 600 Teardown: passo 6, immagine 1 di 2 Polaroid One-Step 600 Teardown: passo 6, immagine 2 di 2
    • Remove the capture button if it did not pop out when you removed the face.

    • There are two pieces to the capture button and both should be removed.

  7. Polaroid One-Step 600 Teardown: passo 7, immagine 1 di 3 Polaroid One-Step 600 Teardown: passo 7, immagine 2 di 3 Polaroid One-Step 600 Teardown: passo 7, immagine 3 di 3
    • To remove the back of the camera, you have to find the tabs located near the hinges of the battery and film compartment.

    • Using a screw driver, pry the tabs of the outer case away from the metal frame.

    • Once the tabs are removed slide the metal frame forward.

  8. Polaroid One-Step 600 Teardown: passo 8, immagine 1 di 2 Polaroid One-Step 600 Teardown: passo 8, immagine 2 di 2
    • Remove the battery and film compartment latch

    • Pull the metal frame away from the case.

    • The entire case will come off but the flash compartment will come with the insides of the camera.

  9. Polaroid One-Step 600 Teardown: passo 9, immagine 1 di 1
    • Using a spudger, pop the battery and film cartridge hatch from its hinges.

    • The tabs are located at the bottom of the metal frame.

  10. Polaroid One-Step 600 Teardown: passo 10, immagine 1 di 3 Polaroid One-Step 600 Teardown: passo 10, immagine 2 di 3 Polaroid One-Step 600 Teardown: passo 10, immagine 3 di 3
    • Remove the sight by lifting it straight up.

    • Follow the red wire from the flash compartment

    • Take the red wire off of the 2 hooks

    • Slide the uncovered wire end out of the small brass clip. Move wire away from camera.

  11. Polaroid One-Step 600 Teardown: passo 11, immagine 1 di 3 Polaroid One-Step 600 Teardown: passo 11, immagine 2 di 3 Polaroid One-Step 600 Teardown: passo 11, immagine 3 di 3
    • Follow the black wire from flash bulb to the back of the case.

    • When you find the brass tab, pull it up. When the tab is free, remove the tab from the black wire.

  12. Polaroid One-Step 600 Teardown: passo 12, immagine 1 di 3 Polaroid One-Step 600 Teardown: passo 12, immagine 2 di 3 Polaroid One-Step 600 Teardown: passo 12, immagine 3 di 3
    • Follow the metal band from the flash compartment to the brass tab.

    • Unhook the wire on the left of the brass tab.

    • Remove the metal band from behind the brass clip.

    • Set the now detached flash compartment to the side.

    • Pull the brass tab up and out like the first one and remove the uncovered wire.

  13. Polaroid One-Step 600 Teardown: passo 13, immagine 1 di 3 Polaroid One-Step 600 Teardown: passo 13, immagine 2 di 3 Polaroid One-Step 600 Teardown: passo 13, immagine 3 di 3
    • Slide the brightness adjuster to right and off the camera.

    • Use the pointed end of the spudger to lift a small latch located next to the bottom of lenz plate

    • Then find the small latch located below the plastic bridge that is over the shutter mechanism

    • This latch is small and is hard to see but you just have to push it with the pointed end of the spudger to unlatch it.

  14. Polaroid One-Step 600 Teardown: passo 14, immagine 1 di 2 Polaroid One-Step 600 Teardown: passo 14, immagine 2 di 2
    • Using the pointed end of the spudger, pull the band wire out of the electric motor.

    • In the same manner as above, remove the band wire from the plastic extension.

  15. Polaroid One-Step 600 Teardown: passo 15, immagine 1 di 2 Polaroid One-Step 600 Teardown: passo 15, immagine 2 di 2
    • Rotate the lens plate up to unhook the plat from two tabs located at the top of the plate.

    • Remove the lens plate, flash compartment and wires from the camera.

  16. Polaroid One-Step 600 Teardown: passo 16, immagine 1 di 3 Polaroid One-Step 600 Teardown: passo 16, immagine 2 di 3 Polaroid One-Step 600 Teardown: passo 16, immagine 3 di 3
    • Follow the uncovered wire around the side of the camera

    • Remove the metal spring tab next to the counter

    • Remove the brass tab by lifting the top piece over the notch and sliding back.

  17. Polaroid One-Step 600 Teardown: passo 17, immagine 1 di 3 Polaroid One-Step 600 Teardown: passo 17, immagine 2 di 3 Polaroid One-Step 600 Teardown: passo 17, immagine 3 di 3
    • Locate the small brass tab with the uncovered wire running through it.

    • Remove the wire by sliding under the hooks.

    • then unhook the uncovered wire from the the final latch located on the top of the plastic extension.

  18. Polaroid One-Step 600 Teardown: passo 18, immagine 1 di 2 Polaroid One-Step 600 Teardown: passo 18, immagine 2 di 2
    • The cameras insides could now be in two major pieces.

    • The Pyramid and the lens plate

  19. Polaroid One-Step 600 Teardown: passo 19, immagine 1 di 3 Polaroid One-Step 600 Teardown: passo 19, immagine 2 di 3 Polaroid One-Step 600 Teardown: passo 19, immagine 3 di 3
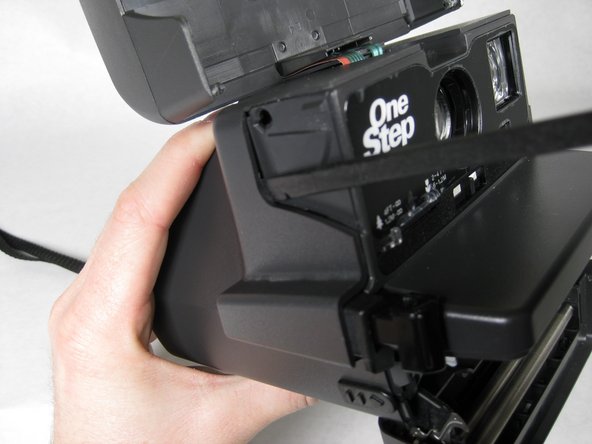
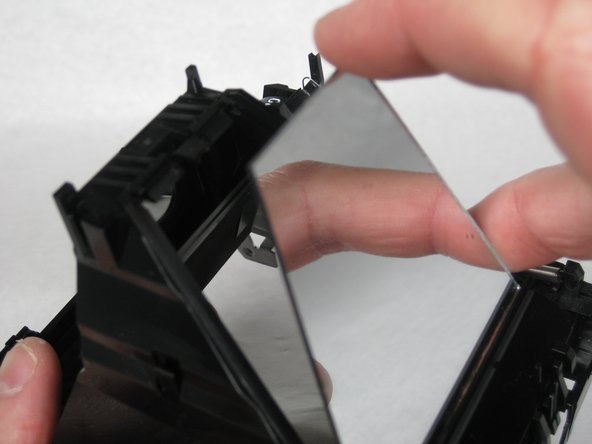
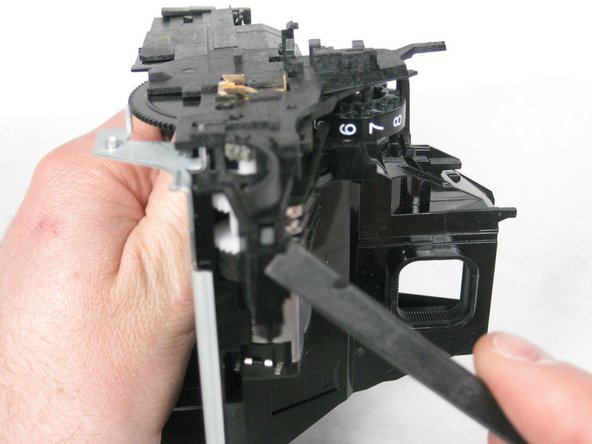
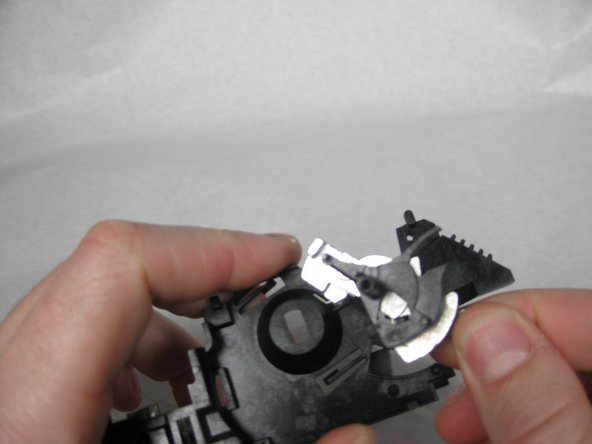
    • The top of the pyramid has cover that can be lifted off

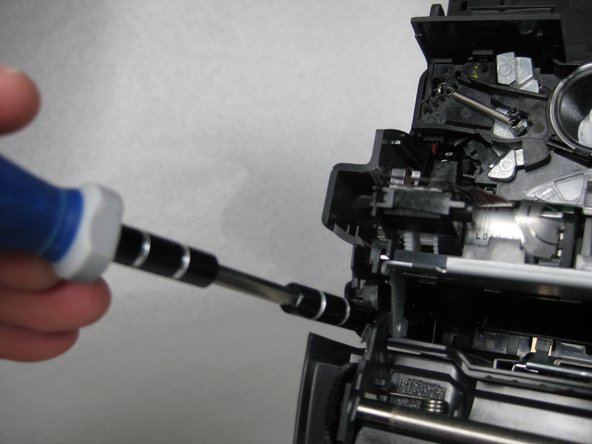
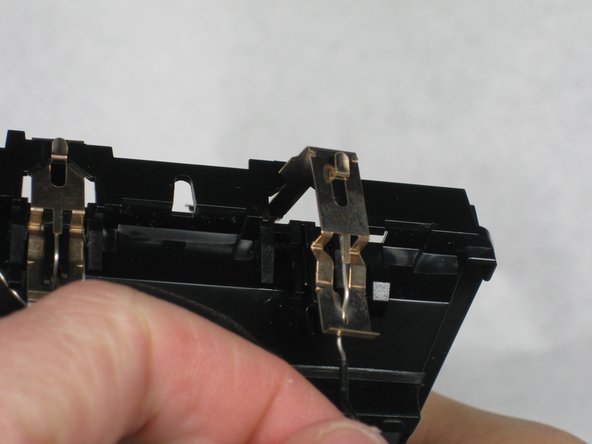
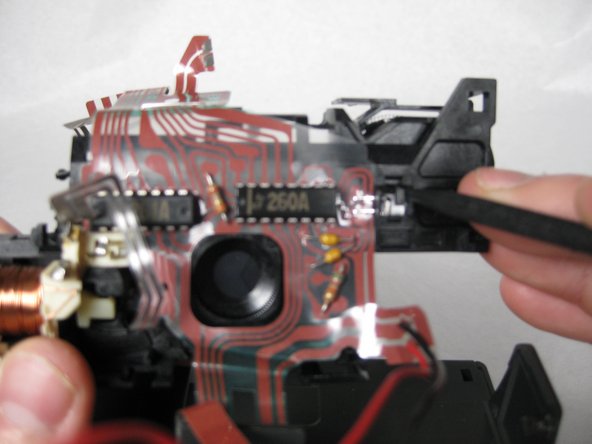
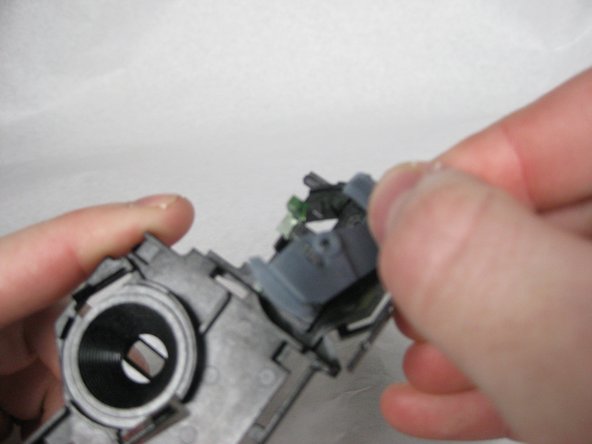
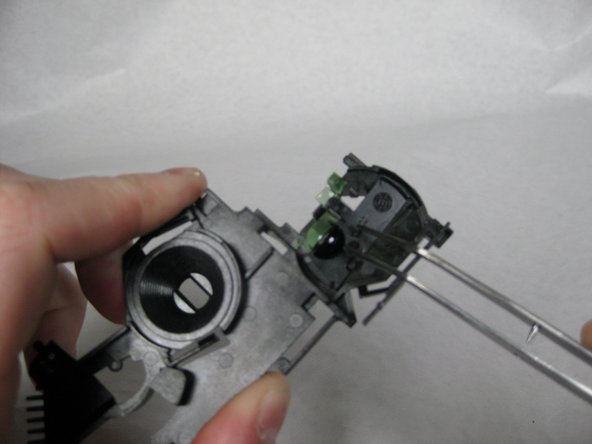
    • Below is the mirror which is held in by a tab.

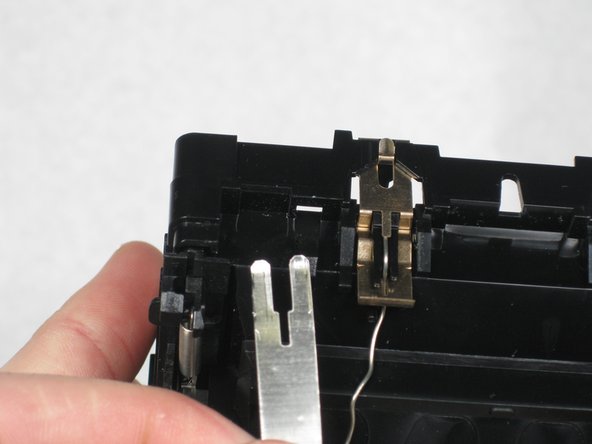
    • Lift the tab with the spudger and pop out the mirror.

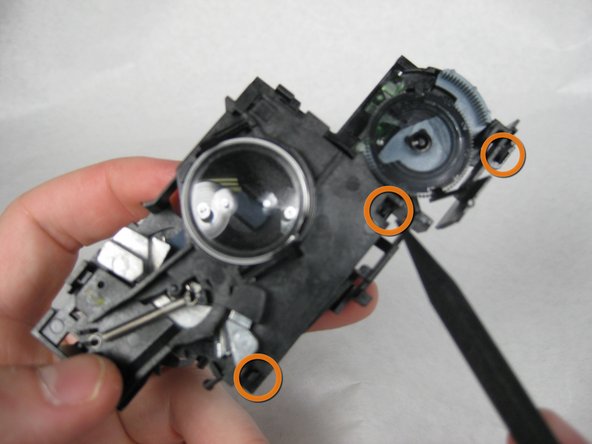
    • If you intend to reassemble the camera make sure the mirror is completely clean without any spots or fingerprints because they will affect the quality of your pictures.

  20. Polaroid One-Step 600 Teardown: passo 20, immagine 1 di 3 Polaroid One-Step 600 Teardown: passo 20, immagine 2 di 3 Polaroid One-Step 600 Teardown: passo 20, immagine 3 di 3
    • There are 4 tabs total that must be removed for the next step

    • The first is directly under the spring mounted at the back left of the camera

    • The next is located on the front of the plastic extension

    • The third tab is used to connect the metal frame to the outer plastic

  21. Polaroid One-Step 600 Teardown: passo 21, immagine 1 di 2 Polaroid One-Step 600 Teardown: passo 21, immagine 2 di 2
    • The final tab holds several spring loaded pieces together, these may pop out the moment the tab is released.

    • The final tab is located below the backside of the photo-counter dial.

    • The numbers will be right side up if you are looking in the right direction.

    • Once all four tabs are removed the plate pulls out from the slot in the rear.

  22. Polaroid One-Step 600 Teardown: passo 22, immagine 1 di 3 Polaroid One-Step 600 Teardown: passo 22, immagine 2 di 3 Polaroid One-Step 600 Teardown: passo 22, immagine 3 di 3
    • Lift the large gear away from its pin

    • The next piece is loaded with a small spring.

    • Carefully lift the "Y" shaped plastic piece from its pin and pull the spring from the pin as it is removed.

  23. Polaroid One-Step 600 Teardown: passo 23, immagine 1 di 2 Polaroid One-Step 600 Teardown: passo 23, immagine 2 di 2
    • Remove the Spring attached to the photo-counter dial.

    • Lift the photo-counter Dial off of its pin.

  24. Polaroid One-Step 600 Teardown: passo 24, immagine 1 di 2 Polaroid One-Step 600 Teardown: passo 24, immagine 2 di 2
    • Remove the spring attached to the film eject metal slide.

    • Remove the film eject metal slide

  25. Polaroid One-Step 600 Teardown: passo 25, immagine 1 di 1
    • Remove the plastic extension by pulling it from the slot in the rear of the camera.

  26. Polaroid One-Step 600 Teardown: passo 26, immagine 1 di 2 Polaroid One-Step 600 Teardown: passo 26, immagine 2 di 2
    • Remove the metal gear from the gear set.

    • Pull the "L" shaped black plastic piece off of its pin.

  27. Polaroid One-Step 600 Teardown: passo 27, immagine 1 di 2 Polaroid One-Step 600 Teardown: passo 27, immagine 2 di 2
    • There are four gears to remove.

    • The gear on the left goes first, followed by the the right.

    • The right gear has a small leaf spring between it and the gear below it.

    • Then remove the black gear and then the last white gear.

  28. Polaroid One-Step 600 Teardown: passo 28, immagine 1 di 3 Polaroid One-Step 600 Teardown: passo 28, immagine 2 di 3 Polaroid One-Step 600 Teardown: passo 28, immagine 3 di 3
    • Using the pointed end of the spudger, press the clip that is beneath all the gears next to the electric motor gear.

    • Lift the plastic box containing several long metal tabs

    • Then slide the box out.

  29. Polaroid One-Step 600 Teardown: passo 29, immagine 1 di 1
    • Pull the electric motor straight out of the plastic piece.

  30. Polaroid One-Step 600 Teardown: passo 30, immagine 1 di 3 Polaroid One-Step 600 Teardown: passo 30, immagine 2 di 3 Polaroid One-Step 600 Teardown: passo 30, immagine 3 di 3
    • Remove the spring located in the middle of the plastic mechanism.

    • Remove the two loose plastic pieces.

  31. Polaroid One-Step 600 Teardown: passo 31, immagine 1 di 1
    • To remove the metal frame, press the two tabs with the spudger and slide it forward.

  32. Polaroid One-Step 600 Teardown: passo 32, immagine 1 di 2 Polaroid One-Step 600 Teardown: passo 32, immagine 2 di 2
    • With the point of the spudger, remove the band wire from the solenoid.

    • Remove the small LED from its clip, and then lift the flat wire array and the flash compartment away from the back of the lens plate.

  33. Polaroid One-Step 600 Teardown: passo 33, immagine 1 di 1
    • Remove the solenoid from the back of the lens plate by removing the two tabs.

  34. Polaroid One-Step 600 Teardown: passo 34, immagine 1 di 2 Polaroid One-Step 600 Teardown: passo 34, immagine 2 di 2
    • Remove the lens by pressing the tab.

    • CAUTION: The lens may pop out when the tab is released.

    • Remove the back of the lens plate by unhooking the three clips that hold it together.

    • CAUTION: The Shutter leaves may fall out during this step.

  35. Polaroid One-Step 600 Teardown: passo 35, immagine 1 di 2 Polaroid One-Step 600 Teardown: passo 35, immagine 2 di 2
    • Remove the spring on the plastic bridge that attaches to the shutter mechanism

    • Remove the Shutter mechanism from the back of the lens plate.

  36. Polaroid One-Step 600 Teardown: passo 36, immagine 1 di 3 Polaroid One-Step 600 Teardown: passo 36, immagine 2 di 3 Polaroid One-Step 600 Teardown: passo 36, immagine 3 di 3
    • Remove the Clear dial by unhooking the tab at the bottom of the dial

    • Lift the light blue piece out of the mechanism.

    • Lift the black piece out of the plastic plate.

  37. Polaroid One-Step 600 Teardown: passo 37, immagine 1 di 1
    • Remove the clear green prism from the plastic plate.

  38. Polaroid One-Step 600 Teardown: passo 38, immagine 1 di 1
    • The disassembled camera.

Team

Cal Poly, Team 16-31, Maness Winter 2010 Membro di Cal Poly, Team 16-31, Maness Winter 2010

CPSU-MANESS-W10S16G31

4 Membri

6 Guide realizzate

10 Commenti

Is it possible to remove and change the camera straps for this camera?

stylencreate - Replica

Yes, after step 8 you will have the back case free then in the inside you will see the latches of the plastic plate that holds the strap, pry them carefully are 6, 2 on each side and 2 in the middle, in the middle of doing it myself have stopped since was no need for that so cannot tell you more.

eportillo5000 - Replica

Show me how to teardown the flash plz

RAW Fish - Replica

RAW Fish: Get a terminal driver or other thin device, and wedge it where you can see a line between the outer casing and front panel (where it says “Polaroid” with the rainbow logo). This will need a bit of brute force, but you will be able to seperate a right-angle of outer casing, from the back of the flash, and another right angled bit full of electrics and the front panel. DO NOT touch any of this electrical gubbins - discharging the capacitor through your fingers will HURT. From here you can take out the circuit board and do with it what you wish.

Ariane N -

Hi ! Thanks for your article ! I just bought a Barbie polaroid 600 ;) but unfortunately the flat wire between the camera the flash is disconnected (it dangles from the camera). I managed to remove the flash, that is no longer connected. Do you know how can I open the flash part to reconnect the wires ? Thanks ;)

Marie Dodue - Replica

Aggiungi Commento

Visualizza Statistiche:

Ultime 24 Ore: 6

Ultimi 7 Giorni: 59

Ultimi 30 Giorni: 298

Tutti i Tempi: 57,660