Salta al contenuto principale

Cosa ti serve

Questo smontaggio non è una guida di riparazione. Per riparare il tuo Numworks Graphing Calculator, usa il nostro manuale di assistenza.

  1. Numworks Graphing Calculator Teardown, Numworks Graphing Calculator Teardown: passo 1, immagine 1 di 1
    • Peel away the six rubber foots on the back of the calculator using your fingernails.

  2. Numworks Graphing Calculator Teardown: passo 2, immagine 1 di 1
    • Using a Torx T6 (or TR6) screwdriver, remove all six screws.

  3. Numworks Graphing Calculator Teardown: passo 3, immagine 1 di 2 Numworks Graphing Calculator Teardown: passo 3, immagine 2 di 2
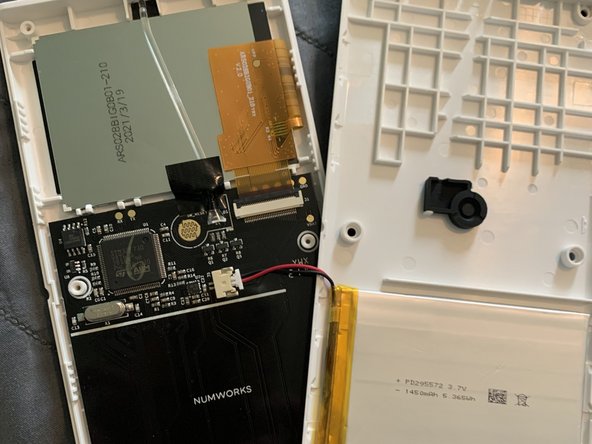
    • Carefully peel the two case parts away from each other, taking turns on each side disconnecting one at a time for all eight clips. The third row from the bottom up is more secure than the others. DO NOT JERK CASE APART, THERE IS A BATTERY CONNECTOR TO REMOVE instead, slowly open the case 180 degrees with the back facing you.

  4. Numworks Graphing Calculator Teardown: passo 4, immagine 1 di 1
    • Carefully wiggle the battery connector until it slides easily loose. You have now finished removing the Numworks Graphing Calculator's case.

JamesPi

Membro da: 03/28/24

134 Reputazione

1 Guida realizzata

0 Commenti

Aggiungi Commento

Visualizza Statistiche:

Ultime 24 Ore: 5

Ultimi 7 Giorni: 24

Ultimi 30 Giorni: 117

Tutti i Tempi: 267