Salta al contenuto principale

Questo smontaggio è in corso – Ricarica periodicamente per vedere gli ultimi cambiamenti!

Cosa ti serve

  1. Nintendo DS Lite Teardown, Part  Seperartion: passo 1, immagine 1 di 1
    • Your first step would be to unscrew all all screws on the back and take the case off. You take the case off by placing a spudger on the line edges , and then place it inward, forcing it to separate the two parts.

  2. Nintendo DS Lite Teardown, WI-FI board: passo 2, immagine 1 di 1
    • You first remove the gabbles by gently pulling them and do the same for the WI-FI board

  3. Nintendo DS Lite Teardown, Screen Removal: passo 3, immagine 1 di 1
    • You take the mother board off by flipping the upside-down and the screen should pop right off.

  4. Nintendo DS Lite Teardown: passo 4, immagine 1 di 1
    • Unscrew and gently slide wires through frame

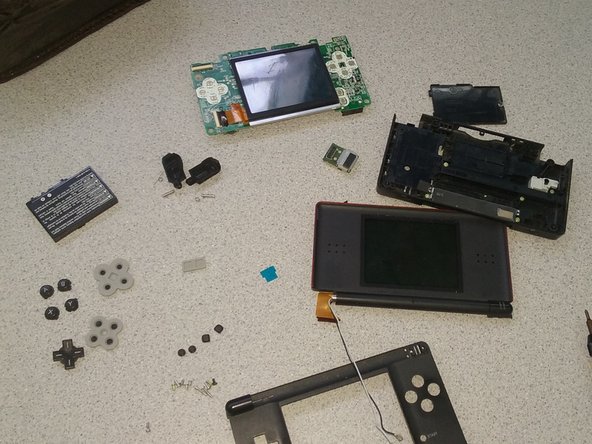
  5. Nintendo DS Lite Teardown, Final Look: passo 5, immagine 1 di 1
    • The DS should look like this and to put the DS back together simply follow steps back wards.

Isabella Sandoval

Membro da: 11/06/16

182 Reputazione

1 Guida realizzata

Un commento

Don’t like this guide. Only a few steps. Tear downs usually have 50+. Add more and in detail.

Bob - Replica

Aggiungi Commento

Visualizza Statistiche:

Ultime 24 Ore: 0

Ultimi 7 Giorni: 2

Ultimi 30 Giorni: 6

Tutti i Tempi: 1,932