Salta al contenuto principale

Cosa ti serve

Questo smontaggio non è una guida di riparazione. Per riparare il tuo Nikon Coolpix S1000pj, usa il nostro manuale di assistenza.

  1. Nikon Coolpix S1000pj Teardown, Nikon Coolpix S1000pj Teardown: passo 1, immagine 1 di 2 Nikon Coolpix S1000pj Teardown, Nikon Coolpix S1000pj Teardown: passo 1, immagine 2 di 2
    • Contents of the box include:

    • Separate instruction manuals/quick start guides in both English and Spanish. No instructions for you, French Canadians.
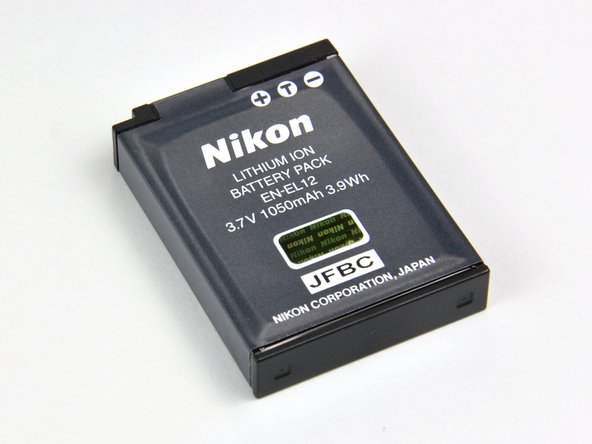
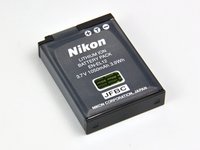
    • Battery Charger.

    • A/V and USB Cables.

    • Carrying Strap.

    • Nikon Software Suite Disk.

    • Nikon Remote, model ML-L4.

    • The remote even allows you to zoom and activate the shutter from a distance.

  2. Nikon Coolpix S1000pj Teardown: passo 2, immagine 1 di 1
    • As engineers, we decided the first thing we should do is browse through the instruction manual...

    • We're glad Nikon is looking out for the well being of the average Joe, but "Take the Camera out of the Box"? Really?

    • Common sense FAIL.

  3. Nikon Coolpix S1000pj Teardown: passo 3, immagine 1 di 1
    • The extremely simple yet nifty injection molded plastic stand tilts the camera back a few degrees to allow for projection on vertical surfaces.

    • The S1000pj sports a single lamp/single LCD panel projection system to view images in a dimly-lit room.

    • The image size can vary from approximately 5 to 40 inches.

    • According to the user manual specifications, the output resolution of the projector is VGA equivalent.

  4. Nikon Coolpix S1000pj Teardown: passo 4, immagine 1 di 1
    • We here at iFixit strongly support the work the Rebel Alliance is doing to Restore the Republic and we fully stand behind their cause.

    • "Help me Obi Wan Kenobi, you're my only hope."

    • It's a shame the S1000pj doesn't beep or whistle or stop garbage compactors from crushing future Jedi knights.

  5. Nikon Coolpix S1000pj Teardown: passo 5, immagine 1 di 3 Nikon Coolpix S1000pj Teardown: passo 5, immagine 2 di 3 Nikon Coolpix S1000pj Teardown: passo 5, immagine 3 di 3
    • The dimensions of the camera are 99.5 x 62.5 x 23 mm (4 x 2.5 x 0.9 in), and it weighs in at approximately 155g (5.5 oz.) without the battery and SD memory card.

    • Hidden behind the lens cover in the upper right corner is the Nikkor 5X wide optical zoom VR 5.0-25.0 mm 1:3.9-5.8 lens.

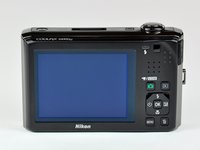
    • The back panel houses the comparatively large 2.7-inch High Resolution Bright LCD.

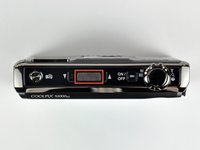
    • The slider on the third picture (boxed in red) focuses images projected from the front of the camera.

  6. Nikon Coolpix S1000pj Teardown: passo 6, immagine 1 di 2 Nikon Coolpix S1000pj Teardown: passo 6, immagine 2 di 2
    • Removing the rechargable lithium-ion battery.

    • The battery, model EN-EL12, is rated 1050 mAh at 3.7V making the power output 3.885 Wh.

    • Looks like Nikon rounds up.

    • The battery weighs approximately 22.5 g (0.8 oz) excluding the terminal cover.

  7. Nikon Coolpix S1000pj Teardown: passo 7, immagine 1 di 3 Nikon Coolpix S1000pj Teardown: passo 7, immagine 2 di 3 Nikon Coolpix S1000pj Teardown: passo 7, immagine 3 di 3
    • We're glad we can trust our good'ol Phillips screwdriver to help us remove a few screws from the battery-chamber/memory card slot cover.

    • After a few pries with a plastic opening tool, the chromed plastic side cover simply pops off the camera body.

  8. Nikon Coolpix S1000pj Teardown: passo 8, immagine 1 di 3 Nikon Coolpix S1000pj Teardown: passo 8, immagine 2 di 3 Nikon Coolpix S1000pj Teardown: passo 8, immagine 3 di 3
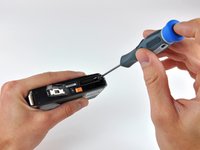
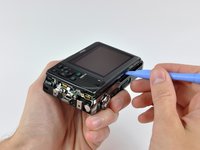
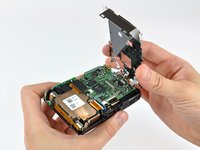
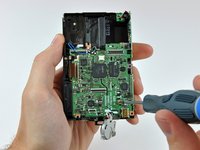
    • A few more screws secure the rear case to the body.

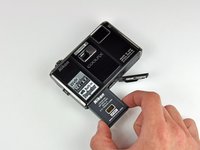
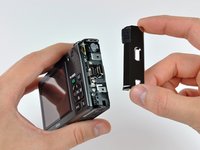
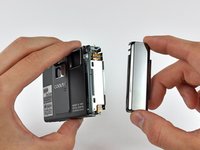
    • After prying around its perimeter, we lift the rear case off the body.

    • Surprisingly, both the front and rear outer cases are machined out of aluminum.

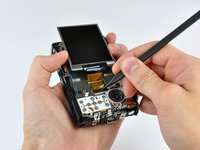
    • The button covers attach to the rear case while the electronic portion is attached to the metal shield next to the display.

  9. Nikon Coolpix S1000pj Teardown: passo 9, immagine 1 di 3 Nikon Coolpix S1000pj Teardown: passo 9, immagine 2 di 3 Nikon Coolpix S1000pj Teardown: passo 9, immagine 3 di 3
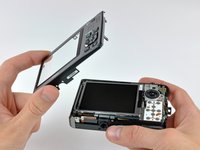
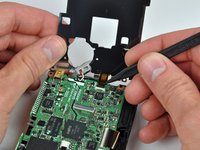
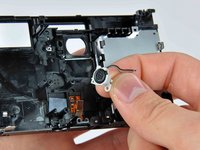
    • The display is attached to the metal shield by several fingers that apply pressure between the shield and the edge of the display.

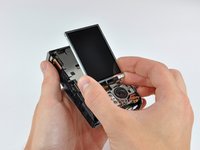
    • Flip back the ZIF cable lock and remove the display.

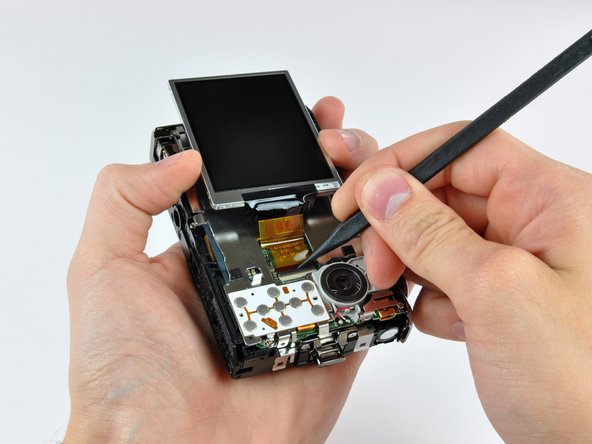
    • Use a plastic opening tool to pop the speaker assembly out of the metal shield.

    • The speaker pumps out some pretty fresh beats when the camera is in projector mode.

  10. Nikon Coolpix S1000pj Teardown: passo 10, immagine 1 di 3 Nikon Coolpix S1000pj Teardown: passo 10, immagine 2 di 3 Nikon Coolpix S1000pj Teardown: passo 10, immagine 3 di 3
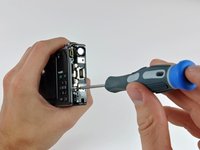
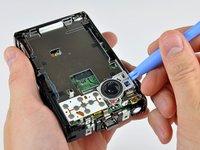
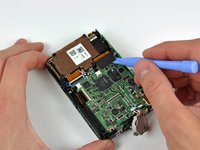
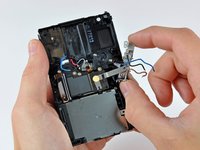
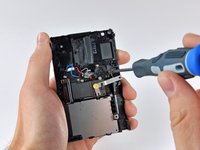
    • Remove a few screws around the perimeter of the open back of the camera.

    • After some (careful) prying, the top and right covers pop right off.

    • Interestingly, the controls along the top of the camera are attached to a board below the top cover. The top cover just houses the button covers.

  11. Nikon Coolpix S1000pj Teardown: passo 11, immagine 1 di 2 Nikon Coolpix S1000pj Teardown: passo 11, immagine 2 di 2
    • Carefully lift the protective steel panel to reveal the logic board.

    • Use the tip of a spudger to flip back the ZIF cable lock to disconnect the control ribbon cable before removing the panel.

  12. Nikon Coolpix S1000pj Teardown: passo 12, immagine 1 di 3 Nikon Coolpix S1000pj Teardown: passo 12, immagine 2 di 3 Nikon Coolpix S1000pj Teardown: passo 12, immagine 3 di 3
    • Pry the upper camera cable connector straight up off the logic board.

    • Flip back the ZIF cable lock and remove the lens assembly.

    • Copper was an interesting choice for the rear cover of the lens assembly.

  13. Nikon Coolpix S1000pj Teardown: passo 13, immagine 1 di 3 Nikon Coolpix S1000pj Teardown: passo 13, immagine 2 di 3 Nikon Coolpix S1000pj Teardown: passo 13, immagine 3 di 3
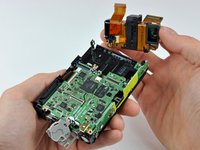
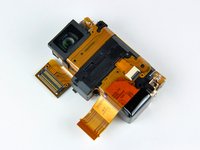
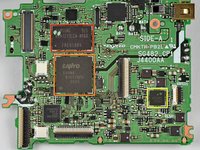
    • The camera module in all its glory.

    • Like most compact digital cameras with optical zoom that have no externally telescopic lenses, the S1000pj's internal zoom lenses move perpendicular to the front face.

    • The basic components include:

    • A few movable lenses.

    • CCD image sensor.

    • Optical zoom motor and feedback sensor to position the lenses.

    • Aperture and image stabilization modules.

    • Light has to travel through at least four glass lenses until it shines on the CCD sensor. What a journey.

  14. Nikon Coolpix S1000pj Teardown: passo 14, immagine 1 di 3 Nikon Coolpix S1000pj Teardown: passo 14, immagine 2 di 3 Nikon Coolpix S1000pj Teardown: passo 14, immagine 3 di 3
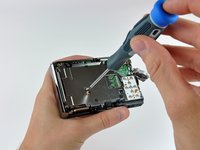
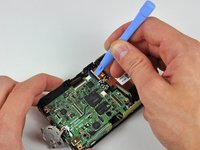
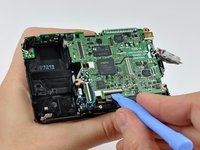
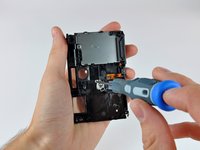
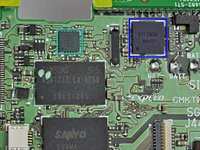
    • We had to disconnect a few additional ZIF cables and remove some screws still securing the the logic board to the main chassis.

    • Disassembling this camera is not for the faint of heart -- Nikon definitely did not intend this device to be user serviceable.

    • We even had to de-solder a bunch of components including the camera cover actuator, projector LED, and flash bulb.

  15. Nikon Coolpix S1000pj Teardown: passo 15, immagine 1 di 3 Nikon Coolpix S1000pj Teardown: passo 15, immagine 2 di 3 Nikon Coolpix S1000pj Teardown: passo 15, immagine 3 di 3
    • To remove the projector lens, first remove the flash tube.

    • After removing a few screws...

    • ...The projector assembly lifts right out.

  16. Nikon Coolpix S1000pj Teardown: passo 16, immagine 1 di 1
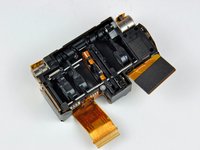
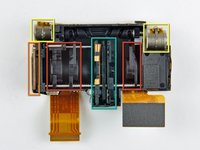
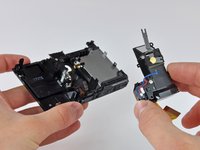
    • Here's an inside look at the projector assembly sans the protective cover.

    • Light for projecting images is supplied by a very powerful LED (shown in red) that even has its own heat sink to conduct heat to the aluminum front panel.

    • As light leaves the LED it passes through some filters and lenses (shown in orange).

    • A good deal of engineered optical reflection allows the light emitted by the LED to reflect through a tiny LCD panel (shown in yellow) and head toward the mirror.

    • Before bouncing off the angled mirror and exiting the camera, the projected image passes through a focusing lens (shown in blue) connected to the slider on the top panel.

  17. Nikon Coolpix S1000pj Teardown: passo 17, immagine 1 di 3 Nikon Coolpix S1000pj Teardown: passo 17, immagine 2 di 3 Nikon Coolpix S1000pj Teardown: passo 17, immagine 3 di 3
    • Almost there...

    • Remove the automatic lens cover door first. The lens cover is motorized and opens anytime the camera function is activated.

    • After the lens cover is out, removing the front facing microphone is a snap.

  18. Nikon Coolpix S1000pj Teardown: passo 18, immagine 1 di 2 Nikon Coolpix S1000pj Teardown: passo 18, immagine 2 di 2
    • The main players on 'SIDE-A' of the board include:

    • Samsung 925 K5W1213LCA-AK60 EDE010D5

    • Sanyo EV4MA N1U5YNPD 0925

    • D805 0921K

    • ADDI7000 BCPZ 0924 1644955.1

    • 87F283A 8KK5P

  19. Nikon Coolpix S1000pj Teardown: passo 19, immagine 1 di 2 Nikon Coolpix S1000pj Teardown: passo 19, immagine 2 di 2
    • Residing on 'SIDE-B' of the board are:

    • MAXIM 8916I TL919 +NTAS

    • HIMAX HX8852-A 005BEG 923ES06 LCOS display controller with interface compliant to MIPI.

    • Wolfson Microelectronics WM8941G 95AEKSW mono CODEC with speaker driver and video buffer.

    • RHAPSODY E1-145 923102.

  20. Nikon Coolpix S1000pj Teardown: passo 20, immagine 1 di 1
    • Nikon Coolpix S1000pj...you've just been Torn'd!

    • That's our new phrase, Torn'd.

    • That does it for this edition of iFixit's riveting teardown. Join us next time when we continue our teardown debaucheries!

0 Commenti

Aggiungi Commento

Visualizza Statistiche:

Ultime 24 Ore: 0

Ultimi 7 Giorni: 6

Ultimi 30 Giorni: 19

Tutti i Tempi: 38,431