Salta al contenuto principale
Guida Archiviata
Questa guida è mantenuta solo per scopi storici. Usa la versione aggiornata della guida per eseguire la riparazione.

Panoramica Video

Questo smontaggio non è una guida di riparazione. Per riparare il tuo Nexus 6P, usa il nostro manuale di assistenza.

  1. Nexus 6P Teardown, Nexus 6P Teardown: passo 1, immagine 1 di 2 Nexus 6P Teardown, Nexus 6P Teardown: passo 1, immagine 2 di 2
    • Remove SIM card tray.

  2. Nexus 6P Teardown: passo 2, immagine 1 di 3 Nexus 6P Teardown: passo 2, immagine 2 di 3 Nexus 6P Teardown: passo 2, immagine 3 di 3
    • Heat up back glass panel.

    • Use hobby knife to open a gap and cut the fierce sticker underneath rear glass panel.

    • The back glass panel is easily shattered and the adhesive underneath is fierce. So be careful to pry this part.

    • Remove back glass panel carefully.

    A hair dryer works well for this part.

    Tara Zieminek - Replica

  3. Nexus 6P Teardown: passo 3, immagine 1 di 3 Nexus 6P Teardown: passo 3, immagine 2 di 3 Nexus 6P Teardown: passo 3, immagine 3 di 3
    • Heat up bottom plastic panel.

    • Use hobby knife to open a gap and insert guitar picks to cut adhesive underneath.

    A hair dryer works well for this part.

    Tara Zieminek - Replica

  4. Nexus 6P Teardown: passo 4, immagine 1 di 3 Nexus 6P Teardown: passo 4, immagine 2 di 3 Nexus 6P Teardown: passo 4, immagine 3 di 3
    Attrezzo utilizzato in questo passaggio:
    Heavy-Duty Suction Cups (Pair)
    $14.95
    Compra
    • Twist off 6 Phillips screws together.

    • Insert guitar picks and plastic opening tool to separate front assembly from back cover.

    • Attention: These two parts fit tightly.It is very difficult to separate them. You can also try using heavy-duty suction cup to disassemble them.

  5. Nexus 6P Teardown: passo 5, immagine 1 di 3 Nexus 6P Teardown: passo 5, immagine 2 di 3 Nexus 6P Teardown: passo 5, immagine 3 di 3
    • Unscrew one Phillips screw.

    • Remove metal bracket securing flex contactors.

    • Release 3 flex contactors and remove it .

    • This flex is used to connect motherboard and daughterboard.

  6. Nexus 6P Teardown: passo 6, immagine 1 di 3 Nexus 6P Teardown: passo 6, immagine 2 di 3 Nexus 6P Teardown: passo 6, immagine 3 di 3
    Attrezzo utilizzato in questo passaggio:
    Plastic Cards
    $2.99
    Compra
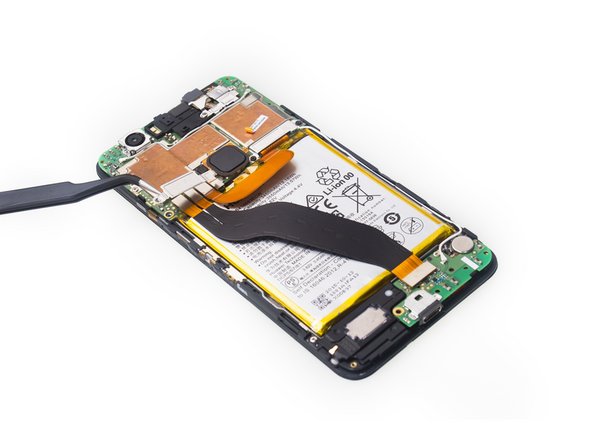
    • Release battery contactor.

    • The battery is fiercely glued in.

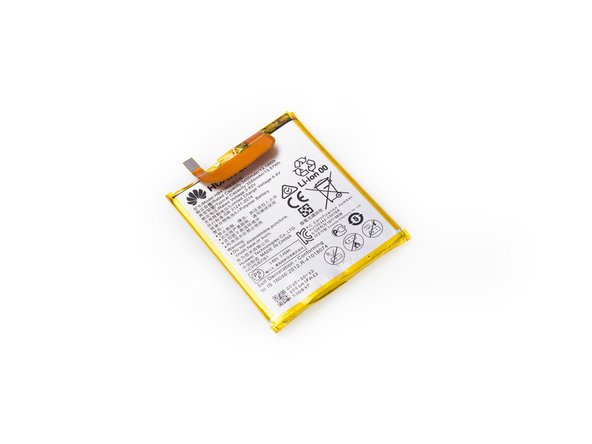
    • Use plastic card to cut strong adhesive underneath, then pry up and remove battery.

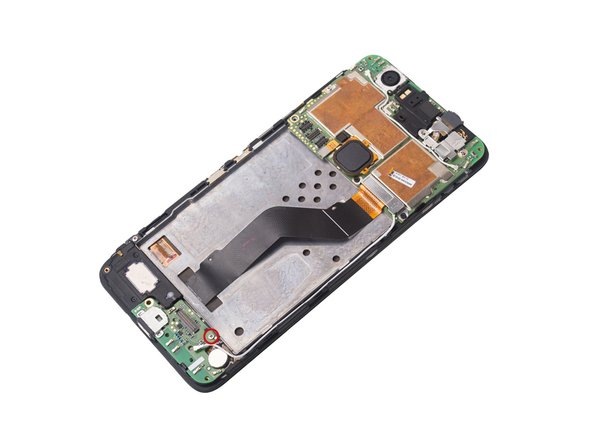
    Be careful - there are cables underneath the battery that you can easily damage.

    Tara Zieminek - Replica

  7. Nexus 6P Teardown: passo 7, immagine 1 di 2 Nexus 6P Teardown: passo 7, immagine 2 di 2
    • Here we can see the strong sticker underneath 3450 mAh battery.

  8. Nexus 6P Teardown: passo 8, immagine 1 di 3 Nexus 6P Teardown: passo 8, immagine 2 di 3 Nexus 6P Teardown: passo 8, immagine 3 di 3
    • Disconnect signal cable contactor and twist off one Phillips screw.

    • Remove daughterboard.

  9. Nexus 6P Teardown: passo 9, immagine 1 di 3 Nexus 6P Teardown: passo 9, immagine 2 di 3 Nexus 6P Teardown: passo 9, immagine 3 di 3
    • Cut adhesive underneath vibration motor, then remove vibrator.

  10. Nexus 6P Teardown: passo 10, immagine 1 di 3 Nexus 6P Teardown: passo 10, immagine 2 di 3 Nexus 6P Teardown: passo 10, immagine 3 di 3
    • Twist off one Phillips screw and remove loudspeaker.

  11. Nexus 6P Teardown: passo 11, immagine 1 di 2 Nexus 6P Teardown: passo 11, immagine 2 di 2
    • Twist off 2 Phillips screws.

    • Remove metal bracket securing front camera contactor and audio jack contactor,

  12. Nexus 6P Teardown: passo 12, immagine 1 di 3 Nexus 6P Teardown: passo 12, immagine 2 di 3 Nexus 6P Teardown: passo 12, immagine 3 di 3
    • Remove front camera.

  13. Nexus 6P Teardown: passo 13, immagine 1 di 2 Nexus 6P Teardown: passo 13, immagine 2 di 2
    • Remove audio jack.

  14. Nexus 6P Teardown: passo 14, immagine 1 di 3 Nexus 6P Teardown: passo 14, immagine 2 di 3 Nexus 6P Teardown: passo 14, immagine 3 di 3
    • Twist off 3 Phillips screws.

    • Take away metal bracket securing LCD flex contactor.

    • Release LCD flex connector.

  15. Nexus 6P Teardown: passo 15, immagine 1 di 2 Nexus 6P Teardown: passo 15, immagine 2 di 2
    • Remove signal cable.

  16. Nexus 6P Teardown: passo 16, immagine 1 di 2 Nexus 6P Teardown: passo 16, immagine 2 di 2
    • Pry up and remove motherboard.

  17. Nexus 6P Teardown: passo 17, immagine 1 di 3 Nexus 6P Teardown: passo 17, immagine 2 di 3 Nexus 6P Teardown: passo 17, immagine 3 di 3
    • Remove fingerprint scanner.

  18. Nexus 6P Teardown: passo 18, immagine 1 di 3 Nexus 6P Teardown: passo 18, immagine 2 di 3 Nexus 6P Teardown: passo 18, immagine 3 di 3
    • Remove rear camera.

  19. Nexus 6P Teardown: passo 19, immagine 1 di 2 Nexus 6P Teardown: passo 19, immagine 2 di 2
    • Here is the motherboard.

  20. Nexus 6P Teardown: passo 20, immagine 1 di 2 Nexus 6P Teardown: passo 20, immagine 2 di 2
    • Remove earpiece.

  21. Nexus 6P Teardown: passo 21, immagine 1 di 3 Nexus 6P Teardown: passo 21, immagine 2 di 3 Nexus 6P Teardown: passo 21, immagine 3 di 3
    • The sticker underneath LCD with digitizer is a little bit strong, so use heat gun to soften it for a few minutes.

    • With the help of suction cup, plastic opening tool and guitar picks, remove LCD assembly carefully.

  22. Nexus 6P Teardown: passo 22, immagine 1 di 1
    • Done.

Witrigs

Membro da: 11/24/15

69.454 Reputazione

378 Guide realizzate

9 Commenti

good jod !buddy

Kaye - Replica

Does the Nexus 6P have two antennas? I've noticed there's a two sim card slots?

sam34866 - Replica

Its single sim slot sorry

Noorulla Shariff -

Ya its haveing to sim slot but there is only 1 antina

Noorulla Shariff - Replica

There is a thin lining of plastic around the screen. Does removing it deteriorate the structural integrity of the screen or is it simply cosmetic?

Sorry if this is the wrong place to ask.

Eric Jensen - Replica

Yes, much like the iPhones. If the plastic becomes lose, the screen will be loose, as it acts as a spacer,

Adam99 -

The first time I replaced a Nexus 6P battery, everything worked fine.

The second time, the “Signal Cable” in step 15 was damaged and now the screen appears to be damaged (it still vibrates in response to touch events but is not displaying anything). Is it possible to replace this without replacing the screen?

Tara Zieminek - Replica

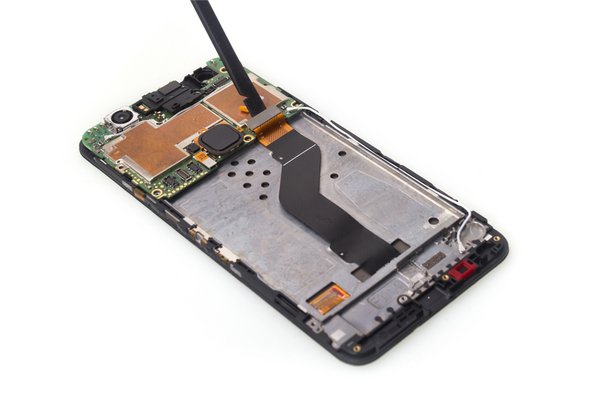
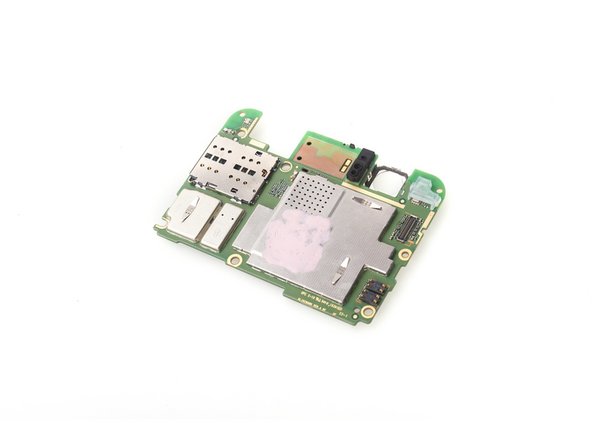
After replacing the digitizer and the battery, my proximity sensor stopped working. Can you show with a diagram where this part is? I am assuming that it’s the black plastic piece attached to the motherboard on step 19 right next to the camera. Why would it stop functioning? Could it be that something has gotten in its way?

Marcel Ferreira - Replica

What if you just want to replace the broken glass??

justine mendoza - Replica

Aggiungi Commento

Visualizza Statistiche:

Ultime 24 Ore: 0

Ultimi 7 Giorni: 1

Ultimi 30 Giorni: 5

Tutti i Tempi: 19,513