Cosa ti serve
Panoramica Video
-
-
Insert eject pin to the small hole to open a gap.
-
Use guitar picks to cut the strong adhesive underneath this rear cover.
-
Remove back cover.
Do not use the Grey Spudger when trying to pry off the back cover. Just heat up the back first with a heat gun or hair dryer and use the blue sim card removal tool that came with the phone all the way around and your nail.
The charcoal grey wood cover is surprisingly flexible. I opted not to heat the back for fear of damaging the wood veneer, and was able to peel the back off damage-free with only slow and careful peeling. Using a credit/playing card, work to get a good portion of the back peeled away at the "top right" (as looking at the back - nearest the SIM slot) to get a good initial finger hold. Then run a guitar pick / credit card down the "right" side and across the bottom. By that point, you should be able to peel the rest of the cover off by hand without endangering the flex cables along the "left" side.
-
-
-
Use T3 Torx screwdriver to twist off all 21 screws.
-
Remove 2 protective rubbers securing the flashlight flex and battery flex connector.
If you are just replacing your screen, don't bother to remove the silver screw over the volume and power buttons. That only holds the cover/retainer for the volume/power buttons. There are tiny springs that are under these buttons and you really don't want to lose these so just leave it in place.
Worst screws in any cellphone I've ever worked on. I was only able to get 1 out. The rest were stripped.
I second Joshua Grobin's comment. Don't even attempt this without a high-quality T3 driver. There are some other disassembly guides claiming T4 or even T5 screws; maybe there are different versions out there, but my phone definitely had T3 screws, and my only T3 bit was so gnarled it was useless.
Thanks Lenovo, for using such a difficult fastener. Would a #0 Phillips been so bad?
Thank you guys for posting these comments. They are the worst screws I have had to remove. T3 driver I had was brand new and the screws were so tight and soft that 5 ended up stripped and I had to use a drill press to drill them out. Plus the adhesive was so strong I broke the volume ribbon cable. I also had a bamboo back which didn’t help either!
Evil T3 screws! Don’t force down, just apply torsion force. Increase it slowly. With luck, the screw will start to rotate. I was able to open with a not so good driver with a relative large body.
Also, the point where the flat cable coming from the button meets the rest os the cable is glued to the battery. You have to detache it now, before trying to remove the battery or you may risk ripping the cable.
Thank you all for the tips!
This is my first time opening a cell phone. Apparently we all have different experiences and knowledge. Fortunately my daughter purchased a set of WERA CraftForm Micro ESD set. Didn’t know they were so expensive. They (darn) well did the trick with precision.
I know as an engineer that designs are intent to minimize unnecessary tampers. What we should all understand is that it is impossible to accommodate every possible standard of technology between other nations of manufacture. Since when is the world expected to accommodate American manufacture standards and technology.
-
-
-
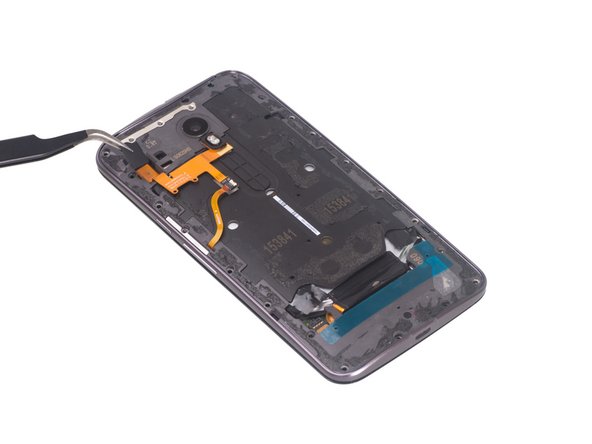
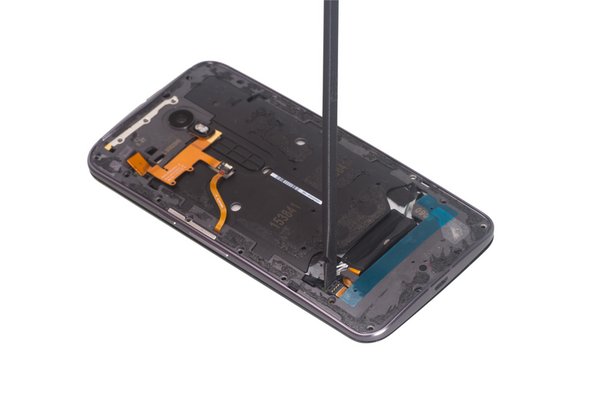
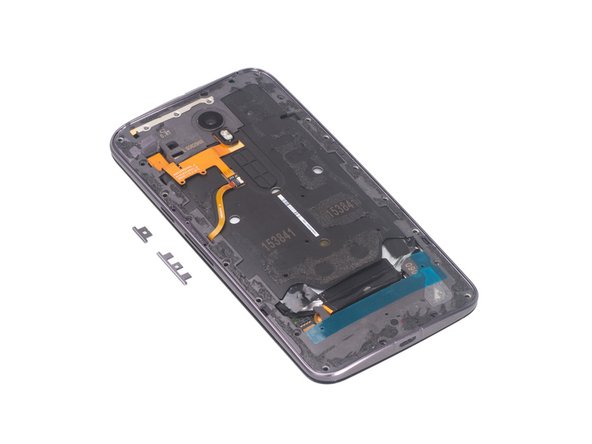
Remove metal bar securing side buttons, careful of the extremely tiny springs that provide pressure from the frame to the buttons, then be free to remove side buttons.
-
Remove middle frame bezel.
If you didn't read the advice above like me and lost 2 springs, use the remaining springs for the power button. The volume buttons will work fine without the springs.
So I made the mistake of removing this piece. Where exactly to I put the springs? At least I did not loose them!!
So I figured out where the small round spring holes are at the ends of each button. Good thing I found the 4th screw on the side of my magnetized screwdriver!
-
-
-
-
Release flashlight flex connector connecting side button flex.
-
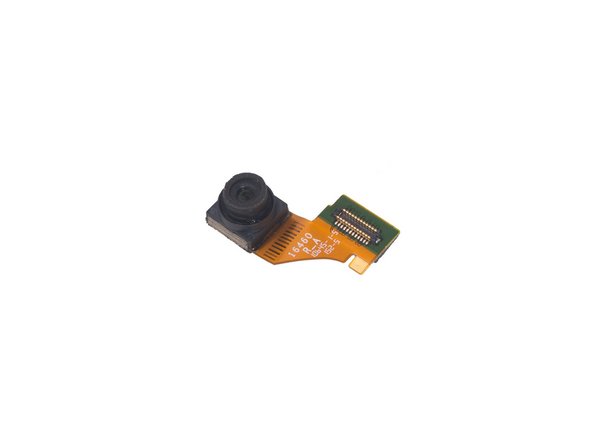
Take away flashlight flex.
I’ve gotten this far and am finding this doesn’t appear to be what I would expect in trending technology. I have seen Motorola years back where you could see they were a front runner in cellular technology. What I see is something intended to cut cost. Components are as expected for initial market entry however final assy. and design are inadequate. Given they are new in name I assumed they incorporated previous Motorola technology and design. My experience in electronics 45 years is enough to make comparative opinion of physical layout.
-
-
-
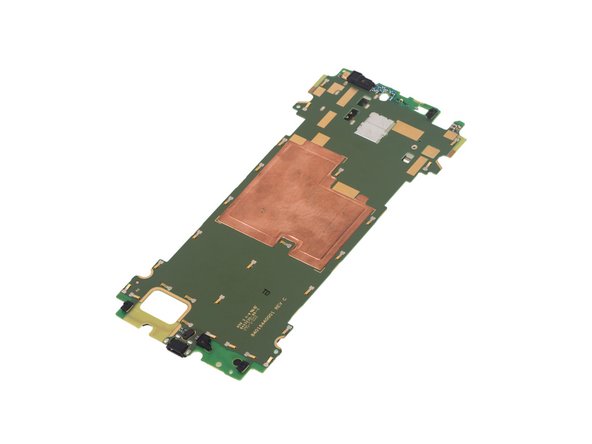
Twist off one Torx T3 screw securing motherboard.
-
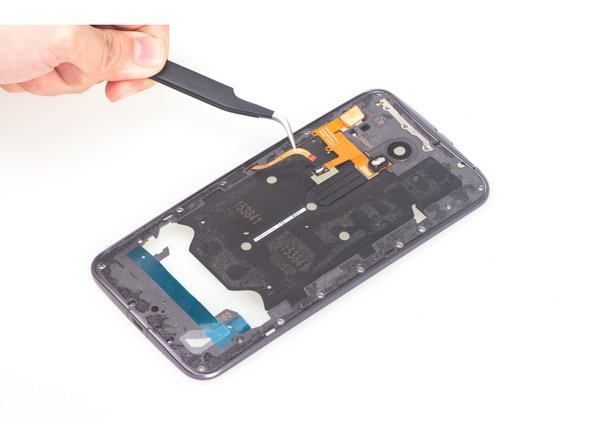
Release the LCD screen connector here.
To release the screen display ribbon cable from its connector:
1) Remove the amber-colored Kapton tape that covers the black locking flap (save the tape for reassembly).
2) Use the tip of a spudger to flip open the locking flap on the display cable’s ZIF connector.
3) Pull the display ribbon cable straight out of the connector.
-
-
-
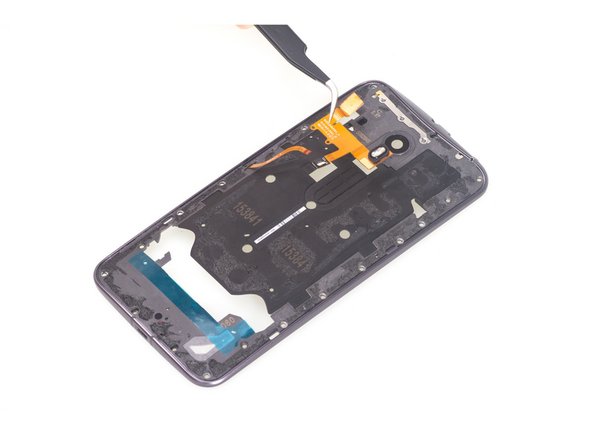
Release this connector.
-
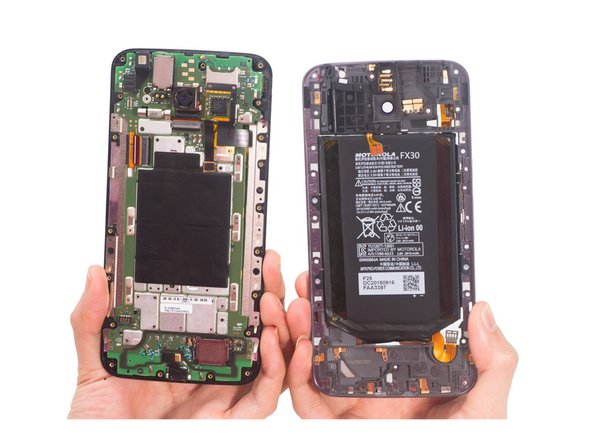
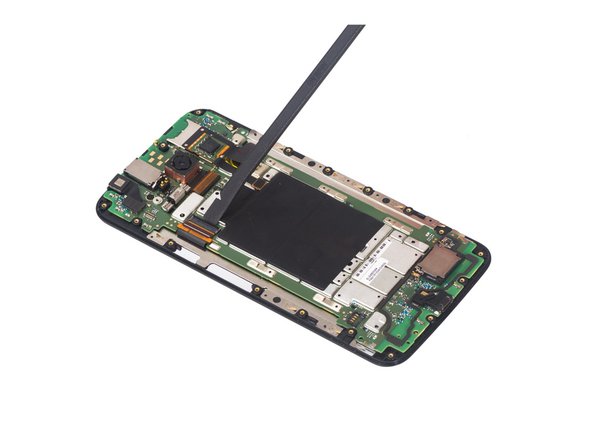
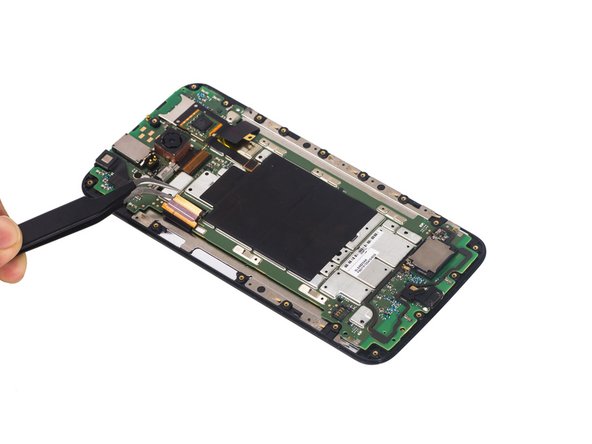
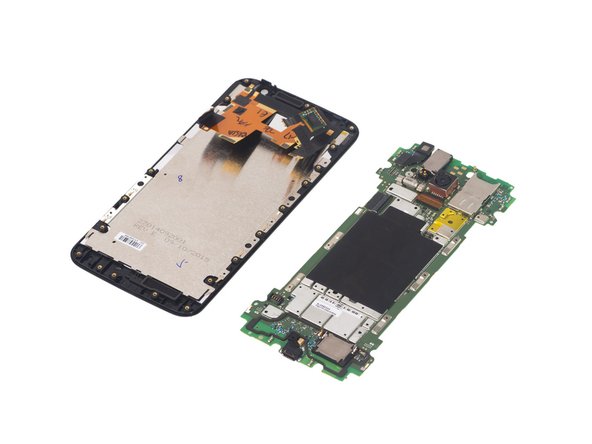
Separate motherboard assembly from LCD screen assembly.
If your replacing your screen with one from Amazon you may find the connections don't line up perfectly when you reconnect the motherboard to the new screen. If you bought a screen from Amazon they should come with 2 pieces of tape on back of the screen. Use the tape to line up the circuits over the sim card tray and LCD connector if needed.
-
-
-
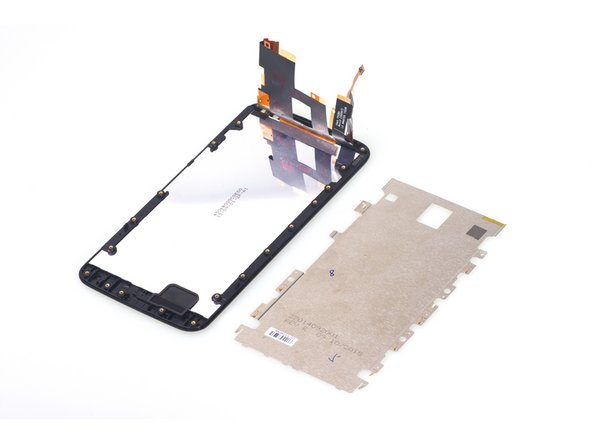
Remove the LCD shield easily.
-
Finally it leaves the LCD screen with digitizer and front housing.
When replacing the LCD screen and digitizer assembly, your new assembly will probably not have a few things you need to get off the old screen. First, the LED flash. I was able to remove mine by pushing it out from the front with some slight force. It popped right in on the new screen. Next are the speaker grills. I used an razor blade to pry the old ones from my cracked screen. They are pretty solid so you can be firm but still be careful not to bend them. To insert them in the new screen, I sort of lined them up as best I could and used some needle nosed pliers to press them into place. You may need to put a small piece of plastic or something behind the frame to prevent flex and actually get the grills seated properly. Make sure you transfer over the metal shield too. First time I did it I didn't even notice that shield. Finally, there are two rubber filters/gaskets for the speakers that need to be peeled up and transferred over. Also, when reassembling, don't forget the motherboard screw!
When I replaced my lcd assembly, the new screen has a small circular hole at the top right. I'm assuming it's over one of the IR sensors. Is it normal for this piece to be missing? Can these small parts be replaced?
Regarding Corey’s comment above, the small circular hole at the top right (when viewed from the front…top left when viewed from the rear) of the new screen’s frame is for the front camera’s LED flash. This was noted by Bud’s comments above.
Before removing the LED flash from your old frame, be sure and note the orientation of it. You can easily remove the LED flash from the old frame by gently prying it upward from it’s socket.
Obviously, it is required to transfer that LED flash from your old screen’s frame over to your new screen’s frame BEFORE installing the motherboard to the frame.
Hi guys,
I’m looking to replace my Moto X screen with a new LCD and digitiser with the frame. I have already changed this once before however shortly after I “fixed it” exactly half the screen on the right hand side wouldn’t turn on! I’m about to attempt to give this phone a new breath of life as i’m going to try and fix it again using your tutorial this time! My only concern is that i do not have the metal heat shield! - I think i must have forgotten to remove it from my old cracked screen and that is long gone now.. Is there anything you can recommend putting between the LCD and motherboard to reduce the heat transfer instead, and is the Heat shield absolutely necessary?
Any help appreciated!
-


Annulla: non ho completato questa guida.
Altre 36 persone hanno completato questa guida.

78 Commenti
Can anybody help with how you replace the speaker grills? As it is not included in the replacement assembly screens?
I believe they are underneath the 'housing frame' which is the piece of plastic around the edge of the glass.
Hi just take them off with tweezers
Can anyone tell by looking at the board if the X Pure has a FM chip that is wired? Currently all anyone is saying on forums is that the phone isn't FM enabled (which could only mean it isn't turned on), not that is is missing the chip or that the chip hasn't been wired to allow the FM to be enabled.
Does anybody know what lengths the 21 screws are?
2.5mm I think
Can anyone identify the where the flash memory is on the motherboard?
Can you telling me if the us version has dual chip readers? Because they have 02 sim slots, but the second sim comes with a plástico glued to it. I wodered if the phone came with the "reader"for the second sim. Thanks
I have one and the us version doesn't. For some reason the tray can hold 2 but if u shine a flashlight into the empty hole after removing sim tray,u will see that on the circuit board there is one connector(reader) missing
The Moto Pure and Style are not dual SIM phones. The tray holds the SIM card on 1 side while the other side holds a memory card.
you can anytime solder in some pongo pins for the second SIM connector. Also, you have to use the dual sims version firmware in order for the phone to work with the second connector. Alternatively to the firmware, you could try some build.prop edits to enable dual sim in the modem (which btw supports it, but software disabled)
Does anyone know where 2 very small springs go? I had both of them drop in my hand as I was separating the motherboard assembly from LCD screen assembly. Thanks.
Take a look at step 5
The springs are for the volume button. They go into the side of the phone where the power and the volume buttons are. ;-)
jovast -
Firmware genuine. Bi probem withvthe fone
I replaced the screen on my Moto after it broke. Completely successful the first time around, but I opened it back up the adhere the screen to the screw frame more securely and the touch started to malfunction. Any ideas as to why that might be? Is it possible I damaged the digitizer in some way?
I think touch screen flex is loosen.
Witrigs -
Is the digitizer integrated into the glass?
I'm not sure if I have to buy the whole LCD+Digitizer+Glass Package or just the glass.
LCD is normal and the only problem is the digitizer and the glass panel.
anyone know where i can purchase just the speaker grills?
Is it the one you want? http://www.witrigs.com/oem-earpiece-mesh...
Witrigs -
Just wanted to say thanks for the guide. Pretty easy phone to replace the digitizer assembly on this phone, There are a lot of steps you can skip when replacing the digitizer as you go through this guide. The only thing that wasn't obvious to me at first was not to take out the silver screw that retains the volume and power buttons. I added a few comments to the guide that you may want to look at if you are just replacing the digitizer assembly.
I agree. I would not remove the screw that holds the volume button.
jovast -
Replaced LCD and now microphone isn't working any suggestions
Could you please double check whether you secure microphone flex cable?
Witrigs -
Did you find a solution? I'm having the same issue with my phone. The microphone doesn't work while using speakerphone
I may have lost the front-facing flash during this process.. is there a way to replace it or does it come with the screen/frame?
i'm curious about this as well since it looks like it doesn't and we threw it away....
We replaced the LCD and assembly but only half of the screen works properly. The other half is shrunken and has snow/noise at the bottom. Any clue where we went wrong?
Oh and now need to replace anything that was on the original assembly that should have been transferred independent of the motherboard...like I'm guessing the front facing flash. What else did we miss (speaker gills??) and where can I get them?
Could you please send a picture of defective screen to support@witrigs.com?
Witrigs -
One of the pins on the LCD PFC adapter broke and only half the screen works for me..
Can anyone tell me which PFC replacement I need to purchase (and maybe where?)
Thanks,
ido -
My moto x pure screen is popped out. What to do. ?
I have the bamboo case and am concerned about the heat gun just making this a total fail. Has anyone had success? Thoughts or suggestions? TIA
I did it with the bamboo case (I'm a total novice) and damaged it slightly. Not a total issues, esp since I usually have a case but it wasn't as easy as on a tear down video nor was it as pliable.
I suggest that you can use some soft plastic spudger.
Witrigs -
I really need help!! I've replaced my LCD assembly before and everything was great ! And now I did it again and my phone won't power on at ALL!! I rechecked all the connections, and everything looks great ! I did accidentally mess with the "Power/Volume" flex cable. But idk if that can be it ? If it is I will buy it .... and also the only thing that comes on is the white LED light when I connect it to the charger... PLEASE HELP
are you referring to the white led from the top speaker grill ?
That light turns on when the battery is too much depleted that the screen can't come on to give you status on the charging process. It might also be that the battery connection is loosen , I would check that first, and also the ribbon cables around it.
I am having the same problem. Tried 2 different batteries and have tried to check all of the cables. Can't figure it out. The phone will go to the boat loader screen when you hold the power button and volume down button at the same time. So screen works, but it you can't select any options except for restart boot loader.
I bought a replacement screen today however when I went to install it I noticed there is no front facing flash. Is it easy to removed the flash from the old phone or possible to buy a new screen with the part on it?
Any help is appreciated
I don't know where to find a new one. I took my front flash off of the damaged screen. It just sits in their no screws.
So I tried to replace my screen with one i bought which had the bezels, so i detached plastic frame from the old one using a heat gun, and attached the new screen to that frame, but when i plugged in the ribbon flex cable I accidentaly broke the black clip, and bent a few connectors. Is this an issue? Screen unresponsive
I also did this. Anyone have any ideas on how to fix?
Shens -
can i change vibration motor?
Great tutorial! I used it recently to replace the failing battery in my Moto X Pure and everything went great, but I seem to have killed my NFC in the process. I had quite a bit of trouble getting the NFC flex connector off the old battery (scratched the old battery quite a bit attempting to get underneath the connector) but don't believe I caused any damage to the NFC connector or cable (at least as far as I can see). Is it possible I simple didn't stick it back in the right spot on the battery when I reassembled? It looks like it needs to line up with two prongs on the motherboard, but I can't figure out how to make sure I get it lined up exactly and it's tedious taking the thing apart over and over.
Any advice?
Hi Derek, I have same problem.. did u manage to solve
What do I do after stripping all the screws on my phone. T3 too small, T4 too big.. I can't win.
Hi, I have the same situation, how did you managed to do it? i did unscrew a couple but the third started to strip.
ANDRES -
Hey guys, I stripped three of them and was pretty !#^&@@ off. I had to drill mine out halfway and then used a pair of needle nose pliers for the other half; once you get the screw head out, you can pop that inner case off and then have room to get some pliers on the stump that' s left.
Hi, did you guys found some replacement screws ? Can you please tell me the size? thanks a lot
Did anyone ever figure out the screw size??
Is the lcd attached to the digitizer?
i just replaced my cracked screen with a new screen digitizer and housing setup and my touch capabilities work but now the screen is acting as if the baclight is not working. Very dim illumination at first but shortly after no illumination at all? Certain issue with repair or possibly a defective screen. old screen illuminated fine but front display was cracked and touch capabilities were not functioning.
After repair, I realized the touch was not functioning quite right, sometimes requiring a lot more pressure to register a touch, and the screen had some light bleed at a few edges.
I got rid of the light bleed by adjusting screw tightness. The Moto X Pure really requires a delicate touch, perfect ribbon placement, and nearly proper screw torque to have a good replacement screen work perfectly. At least, that's been my experience so far.
I don't think it's a good idea to throw away your old screen until you're 100% sure you got every part you need from it (plus, it deserves to be properly recycled like other electronics).
Also, when replacing only the screen, there is no need to completely tear down every part of the phone. Don't disassemble or disconnect the volume and power buttons assembly and ribbon. Save yourself time and frustration. The battery can stay connected to the backing, etc.
So I replaced my battery. The phone charges perfectly. The problem is that my the power button and volume buttons are unresponsive and the phone doesn't turn on or go to recovery. I tried tinkering with the power ribbon cable but no go. Does it snap on like the flash ribbon and battery ribbon? Anyone have any ideas?
You might have probably resolved this by now. I ran into the same issue and struggled with it for a while. For anyone running into this issue, check the step 8. My side button flex had slipped off while I was changing the battery. To resolve this, I had to open the latch and push the flex inside. Once I did this, the power and volume started working fine.
Vijay -
Same question : Anyone know if the charger port is replaceable? Or would I have to replace the whole motherboard?
Same Question : Anyone know if the charger port is replaceable? Or would I have to replace the whole motherboard?
The charging port Is not replaceable
Can you please advise on how to remove the Bamboo back cover. I need to replace my LCD.
My moto x pure edition screen has vertical lines that come and go and that phenomena seems to pulse. Battery? Digitizer? Any suggestions?
RLR
Does anyone know where the TOP Speaker can be purchase? I have purchased two on ebay and neither were right.
My front screen is completely smashed and not functioning at all. Unable to even unlock the screen, not taking the touch response at all.
If I buy “New Original LCD Display Touch Screen Digitizer Assembly Motorola Moto X Style” as given by eBay, is it possible to replace it exactly as written above?
Is it worth my purchase, and will it function properly afterwards?
My SIM card got jammed way down in the slot and I can’t retrieve it. How much of the phone has to come off to get it out?
how to buy and replace a sim reader? is broken and not detect a sim card. Tranks!
how to buy and replace a sim reader for xt1575? is broken and not detect a sim card. Tranks!
Thankx for the video it was very clear!! After that i got a problem with the accelerometer, the phone can sense the movement, I install an app to discover the sensor installed in the phone and for some reasons The accelerometer doesnt work, I dont think that it could be software, anyone knows where the sensor is in the hardware? Thanks
Might anyone know where I can purchase a replacement motherboard for the phone?
I too would like to know more details on replacing the sim reader for xt1575? The copper contacts were damaged when trying to remove a SD card that was jammed inside. I would guess the entire thing would need to be de-soldered.
Thanks
We replaced the LCD screen and digitizer. My fiance put everything back together the way that this tutorial says. It is charging and has been charging and we actually did have it restart by doing the down key on the volume button and the power button but the battery drained and then the phone shut completely off and hasn't started since then. Can anyone help me figure out what is wrong?
I almost exited without comment of the author’s writeup. I surely appreciated the accumulation, layout, and composite. There are some details missing and needing improvement however so don’t 90 percent of most other. That’s what we are here for to assist us all in our interpretations. Thanks Mr Witrigs and contributors. This is my first and beginning with appreciation.
This guide is perfect!!! I was able to take my Motorola moto x and put it back together easily thanks to this guide. I replaced a shattered screen. I dropped my phone again and had to replace my LCD screen again because it blacked out. When I replaced the screen the 2nd time only the left side came up. It is split right down the middle. The right side was scrambled like an old tv. Does anyone know how to fix this? Did I buy a bad LCD screen? Do I need another motherboard? Is there a component I can replace?
Thanks for any help.
Note that this guide details the COMPLETE TEARDOWN of the Moto X Style/Pure Edition phone. If you are planning to only replace your phone’s display screen/frame assembly, then you can use the associated guide found here:
Sostituzione gruppo schermo LCD e digitizer Moto X Pure Edition
thegmanis - Replica