Introduzione
It has finally come: Microsoft's all-new Surface Pro 3—all-new in the sense that it's third in a trilogy of devices. Where the second was actually just a rehashing of the original, the third is showing some promise of striking out on its own. Good for you, Surface Pro 3! Time to confirm or deny the only way we know how—it's teardown time.
Alternative names that Microsoft probably considered for the Surface Pro 3:
- Surface Pro: Return of the King
- Surface Pro III: The Search for Spock
- Sufrace Pro: With a Vengeance
- Surface Pro and the Last Crusade
- Surface Pro: Rise of the Machines
- Surface Pro: Revolutions
Surf over to our Facebook, Twitter, and Instagram pages to stay up to date, Pro-style.
Cosa ti serve
Panoramica Video
-
-
The Surface Pro 3's beauty isn't just skin deep—which is just as well, because we're not stopping until we hit bone. Innards include:
-
12" ClearType Full HD Plus IPS LCD with a resolution of 2160 x 1440 pixels
-
4th-generation Intel Core i3, i5, or i7 (i5 on our model)
-
Wi-Fi 802.11ac/802.11 a/b/g/n and Bluetooth 4.0 Low Energy
-
64 GB/128 GB storage with 4 GB RAM, or 256 GB/512 GB storage with 8GB RAM
-
5.0 MP/1080p front and rear-facing cameras
-
Full-size USB 3.0 port, microSD card reader, and Mini DisplayPort
-
-
-
The Surface Pro 3 comes bundled with a new version of the Surface Pen, courtesy of N-trig.
-
What happened to the old pen? We like to think it now adorns a Mercedes.
-
If it ain't broke, don't fix it. Microsoft sticks to the kickstand design so prominent in past revisions of the Surface Pro—with the addition of a 150° angle option, allowing the Surface to lay nearly flat.
-
-
-
True to its name, this threequel brings its hardware in triplicate:
-
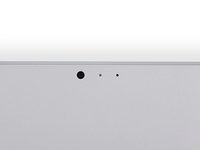
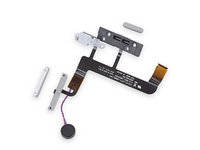
Arrayed across the back, we find the rear-facing camera, accompanied by two additional specks—a status LED and a microphone.
-
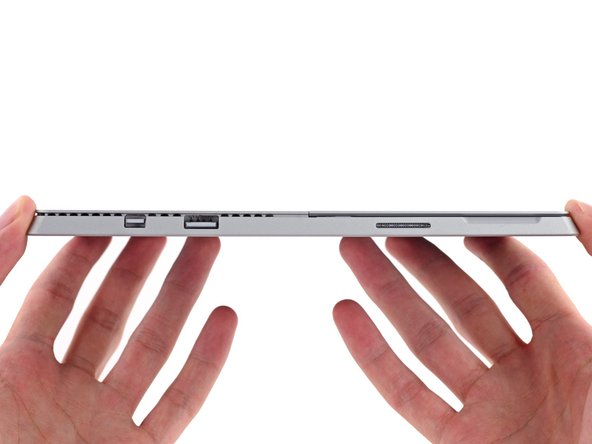
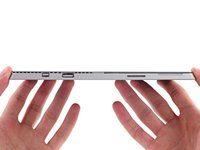
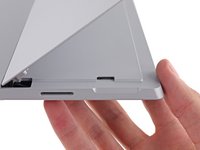
And along the edge, another trio, this one for connectivity: a full-size USB 3.0 port, Mini DisplayPort, and the charging port.
-
Hiding beneath the kickstand is the microSD card slot, good for up to 128 GB of additional storage.
-
-
Attrezzo utilizzato in questo passaggio:iOpener$17.99
-
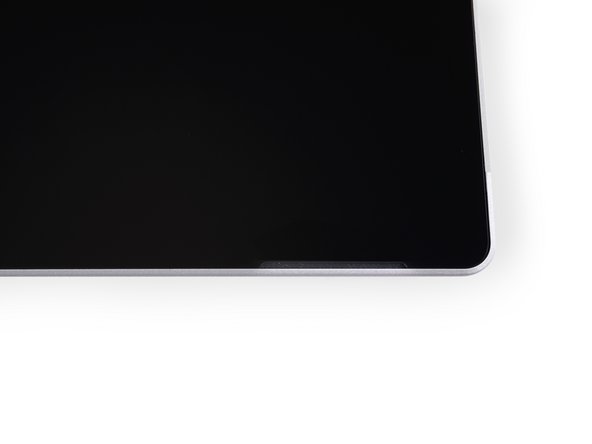
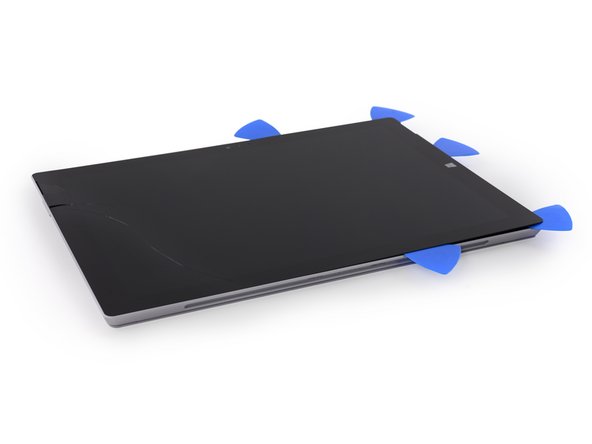
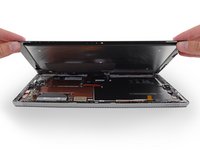
A cursory look is all it takes to tell us we're gonna need to bring the heat for a display-first invasion. Out comes the trusty iOpener.
-
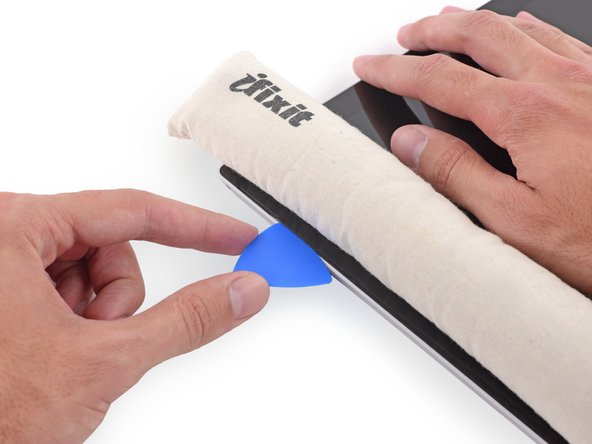
If the old Surface Pro 2 is anything to go by, we're gonna need picks—oodles and oodles of picks.
-
These speaker cutouts give us a handy point of access.
-
Picks, away!
-
-
-
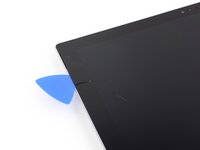
Whoops.
-
Unfortunately, the Pro 3's weak point is just that—a point of weakness.
-
Our teardown engineer carefully heated and pried up the glass at the edge of this device, but the cooling adhesive alone was enough to crack the glass on our photo table.
-
We'll just work down here as that crack spreads quicker than an army across Westeros...
-
-
-
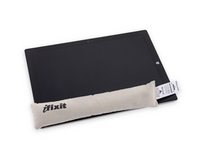
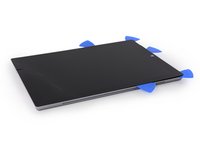
We stick it to this unruly device—tape, that is—to keep all the pieces together while we pry everything up.
-
Much more heat, and plenty of gentle prying and cutting, and the glue starts to give...
-
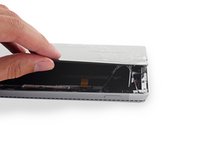
Defenses breached, we get our first look beneath the Surface's surface. This gooey glue certainly fought hard to keep the Pro 3's innards a secret. Time will tell if this extra security was warranted...
-
-
-
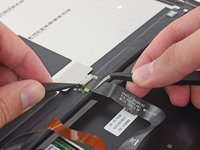
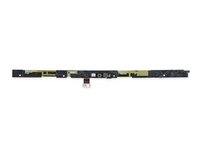
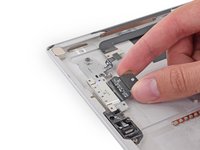
While we're storming the castle—er, display, we find something new: a springy metal bracket pinning the display connector in place. It's not the friendliest of chums, but with a little convincing from our spudger, it agrees to let the connector go.
-
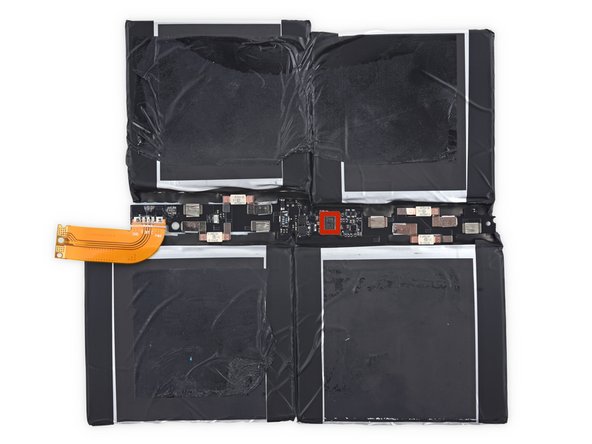
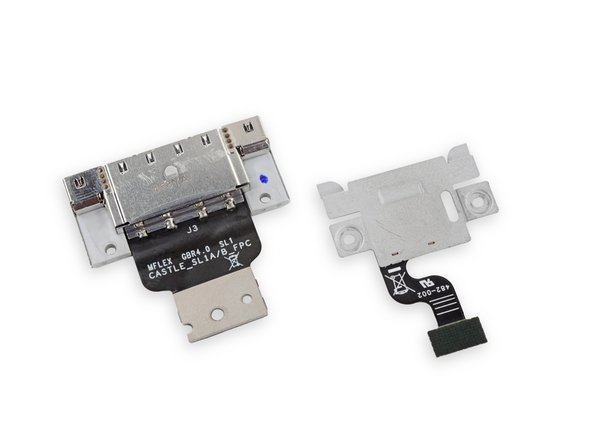
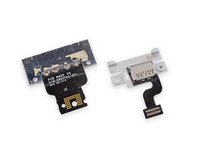
At the other end of the cable, another dubious connector with a sliver of a contact board in tow. Because, why not?
-
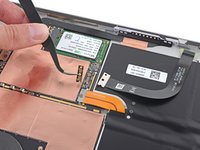
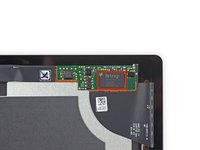
Hugging the back of the display is an N-trig DS-P4196 touch controller, providing the necessary tech to go with the pressure-sensitive Surface Pen.
-
-
-
-
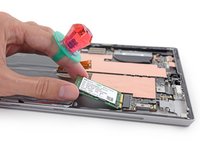
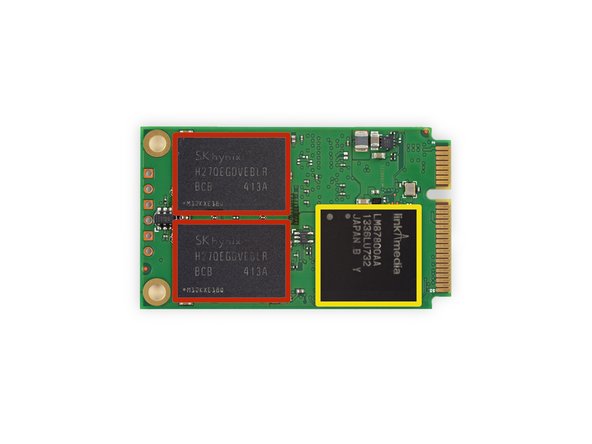
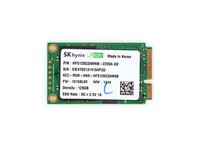
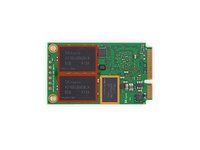
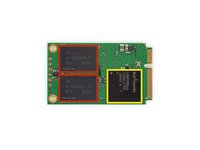
Reprising its starring role in the Pro 2 is this SK Hynix HFS128G3AMNB 128 GB mSATA 6.0 Gbps SSD, featuring the following hardcore hardware:
-
SK Hynix H27QEGDVEBLR 32 GB NAND Flash (four ICs for 128 GB total)
-
SK Hynix H5PS2G63JMR 32 MB DDR2 SDRAM
-
Link A Media LM87800AA SSD Controller
-
-
-
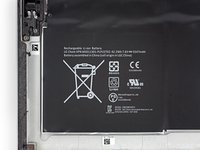
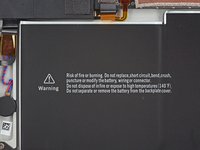
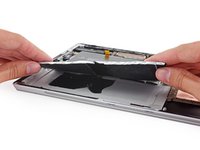
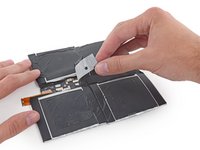
We have reached the battery. This Surface is packing a 42.2 Wh, 7.6 V, lithium ion time bomb.
-
All batteries die, making battery replacement a necessary repair for any device. Before we take a stab at disarming the bomb, we read all the warnings that we plan to ignore, including the very clear instruction that we are not to replace this battery. Well isn't that just swell.
-
At first pry, we notice lots of resistance, leaving us with the feeling there's a
n off-chancehigh likelihood we'll destroy this battery during removal—which makes us as nervous as the wicked witch around a bucket of water (that she has to pry open). -
Time to get our pry on *insert high-brow joke about prions*
-
-
-
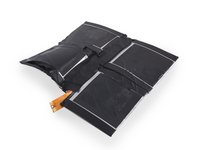
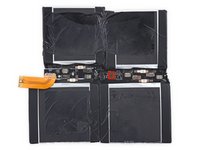
This battery is stuck like a mastodon in a tar pit.
-
The tar-like adhesive makes removing the battery without severe warping nigh impossible.
-
The battery is out, but it looks like it passed through a fun house mirror to get free. We're not so fond of clowns who believe in glued-in batteries.
-
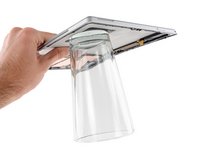
Think we're joking about the cling factor of this adhesive? Think again. This little party trick is what we call a sticky situation.
-
-
-
This device seems to be a never-ending story of dark sticky adhesive.
-
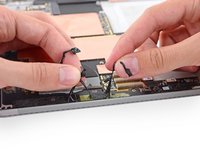
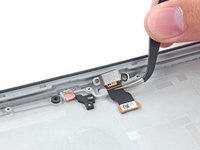
We quickly vanquish the goop and free a slim peripheral board.
-
This thin little board seems to be home to the front facing camera and a few other goodies, including some residual adhesive. Gross.
-
-
-
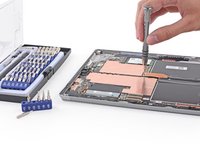
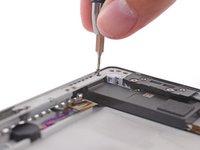
Working our way towards the motherboard, we encounter some strange magic: a random hex bolt standoff.
-
Accio bolt! Fortunately, we come prepared: with our Pro Tech Toolkit, any hex is quickly lifted.
-
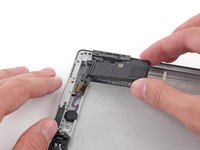
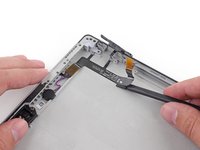
We have to keep working our magic to free the motherboard. Not only is it captive to the case, but it's covered in copper shielding, a counter-curse to outside magic.
-
-
-
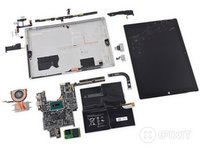
With the mobo out, we caught a whole gaggle of ICs in the middle of a board meeting:
-
Samsung K4E8E304ED-EGCE 8 Gb (1 GB) LPDDR3 RAM (total of 4 * 1 GB = 4 GB) Two front, two back
-
Atmel AT24C16 two-wire serial EEPROM
-
Marvell 88W8897 WLAN + BT4.0 + NFC Combo Chip (with no NFC support on the device)
-
QIC1832-B98B
-
Winbond 25X20CL1G 2M-Bit Serial Flash Memory
-
Winbond 25Q128FVPQ 128M-Bit Serial Flash Memory
-
-
-
The rest of the cars on the front side of this chip train:
-
Infineon SLB 9665 TT2.0 Security Cryptocontroller for Trusted Platform Modules
-
NXP CBTL06GP213 Six-Channel Multiplexer
-
Realtek RTS5304
-
Atmel UC256L3U 256KB Flash, 32-bit AVR Microcontroller
-
ITE IT8528VG
-
-
-
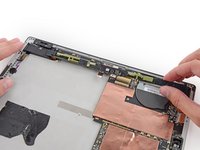
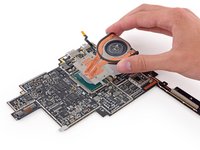
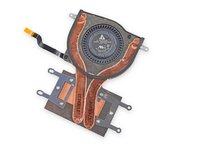
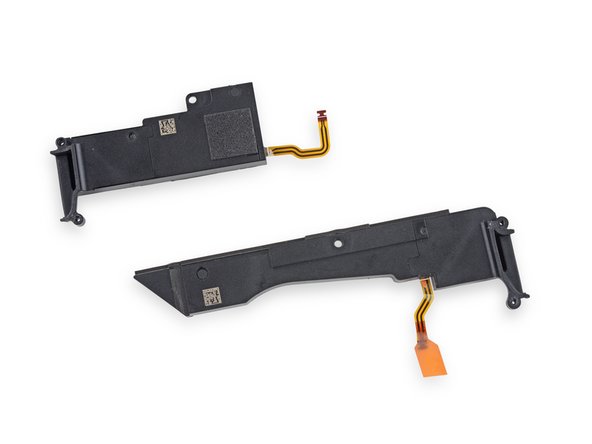
Yo-ho and blow the fan down! Next we plunder the fan/heat sink combination.
-
Taking a closer look at our treasure, we see a cooling system more akin to one found in a laptop than a tablet, with a heat sink that draws into the fan.
-
If you're keeping count, this is exactly one-half the fannage we found in Pros 1 and 2. Both the mobo and cooling system exhibit dramatic redesigns.
-
-
-
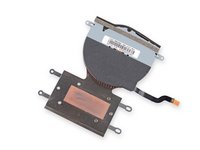
Beneath the heatsink we find...BRAAAAINS! Or in this case the CPU.
-
Microsoft equipped this iteration with a 4th generation Intel Core i3, i5, or i7 processor depending on the model.
-
Our model features a dual-core, 1.9 GHz Core i5-4300U with Intel HD Graphics 4400.
-
Tech zombies that we are, we'll have to be content to leave this CPU in place, as it is not coming off the board.
-
Millions of upgrade junkies suddenly cried out in terror, and were suddenly silenced.
-
-
-
With a quick twist and shout, the stereo speakers are out!
-
Fun fact: the pitch on these particular screws make them look more like wood screws than metal screws. No wood in this tablet, however.
-
A pair of unidentified Dolby speakers come out for closer inspection.
-
-
-
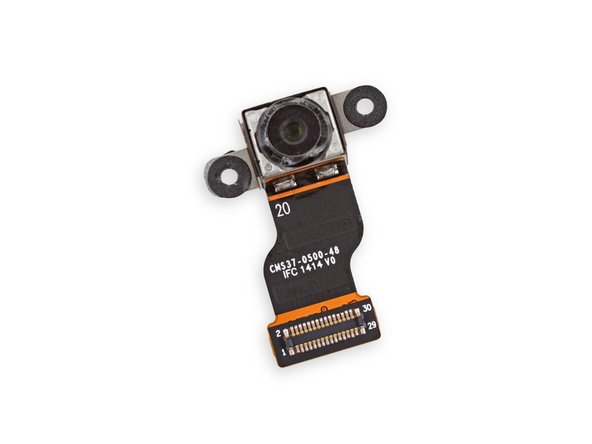
Next, we come upon a baby rear-facing camera in its natural habitat. This small creature watches its prey, waiting to strike at any moment.
-
Both cameras on this Surface safari are 5.0 MP, a lackluster spec in the current world of mobile device photography. However, we are just fine with that, as we aren't fond of tablet selfies.
-
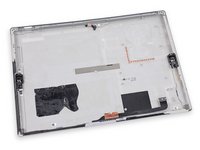
As the sun sets on another teardown, we're left alone with our thoughts... and the rear case.
-
-
-
Microsoft Surface Pro 3 Repairability Score: 1 out of 10 (10 is easiest to repair).
-
The SSD can be replaced, but not without first risking damage to the tablet simply by opening it.
-
The battery is not soldered to the motherboard, but very strong adhesive makes removal and replacement a hazardous chore.
-
Non-standard connectors make for tricky display removal.
-
The display assembly consists of a fused glass panel and LCD, and is extremely difficult to remove and replace.
-
Tons of adhesive hold everything in place, including the display and battery.
-
The delicate and arduous opening procedure leaves no room for mistakes: one slip-up, and you'll be out a screen.
-


56 Commenti
A easier way to a cracked screen is what we get for complaining about a mountain of torx screws. Thanks N-trig for that thinner glass. Maybe a "Surface-sized" iOpener bag is needed that covers the entire periphery of the screen. Something with a long flat sharp edge (like a plastic ruler) might speed up things.
There is no NFC function in surface pro 3...... You may miss this in"step 15"
Yeah, I was hopping for a bit more on the kick stand friction hinges... and if I can somehow mod them into a SP2
Any comments on the grade of thermal paste in use?
!@#$%^ padding? Decent AS5? Puurrrfect PK-3?
Interested in knowing if thermal paste replacement could boost the life and cooling of this unit (after its warranty expires of course)!