Introduzione
July 21 brought us a bountiful harvest of Apple produce! Today, Apple released updates to the 11" and 13" MacBook Airs, as well as an updated Mac mini.
Although today is an exciting day for consumers, it is a sad day for consumer repair. Apple decided that the "svelte and sexy" MacBook Air would replace the "simple and serviceable" white plastic MacBook (for consumers at least-- the white plastic MacBook is still available for educational use). While this means that your book-bags will be significantly lighter, it will also mean that you won't be upgrading or servicing your computer anytime soon.
Join us today as we take a look inside this game-changing piece of equipment.
Cosa ti serve
-
-
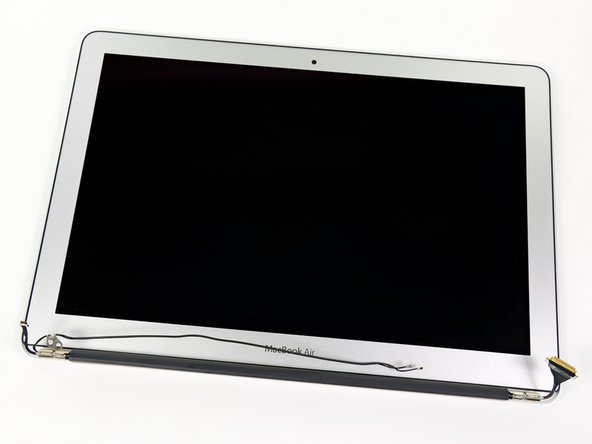
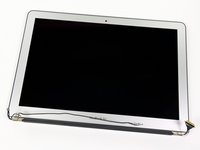
Here we have Apple's freshest fruit: the updated MacBook Air!
-
The drool-worthy specs of the 13" Air include:
-
Core i5 or Core i7 Processors
-
128 or 256 GB Flash Memory
-
4 GB DDR3 SDRAM
-
Intel HD 3000 Graphics with 384 MB RAM (shared with system RAM)
-
Thunderbolt Port and SD slot
-
The dimensions on this MacBook Air are exactly the same, so if you need to cut some cake, you should be okay.
-
-
Attrezzo utilizzato in questo passaggio:P5 Pentalobe Screwdriver Retina MacBook Pro and Air$5.99
-
Luckily, this MacBook Air uses the same pentalobe screws as the previous generation on the lower case.
-
In fact, from the outside, there is not very much to differentiate this model from the previous one.
-
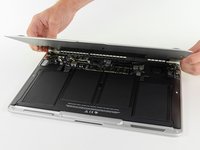
Looks like we'll just have to open it up!
-
It should be noted that this generation of Airs did not ship with an OS install stick. As of Lion, Macs ship with a Internet Recovery feature in firmware that will re-download and install the OS, even with a corrupt system drive.
-
-
-
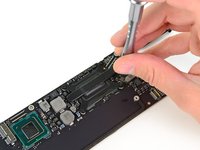
Just like in the mid-2010 MacBook Air, the SSD is not soldered to the logic board. Thankfully this means you can upgrade the SSD for more storage, but you're still out of luck if you need extra RAM.
-
Seeing as how the RAM is not user-serviceable, it might be worth it to buy the nicer model from the get-go (all models except the base 11" come with 4GB).
-
-
-
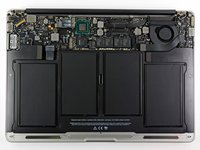
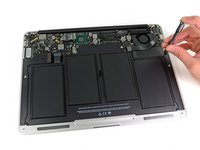
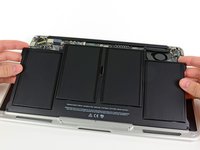
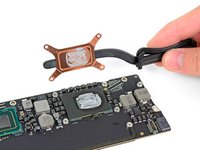
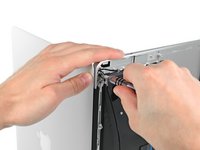
The battery is held in place by a few Torx screws.
-
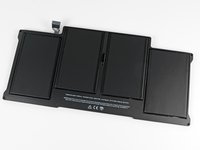
Although this battery is rated the same as last year's model, it has a different model number: A1405. Last year's 13" battery was model A1377
-
With a battery like this, the 13" MacBook Air will last for up to 7 hours of constant web use, or up to 30 days in standby.
-
-
-
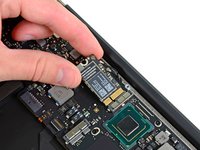
-
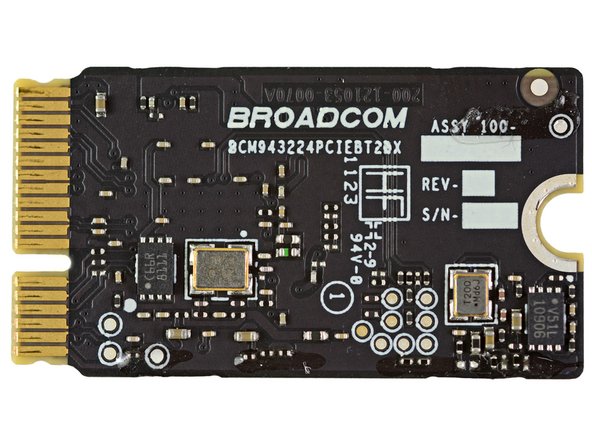
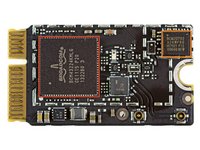
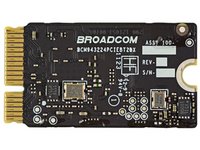
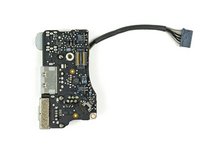
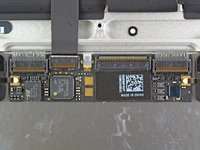
The main chips on the mini-PCIe wireless card include:
-
Broadcom BCM4322 Intensi-fi® Single-Chip 802.11n Wi-Fi Transceiver
-
Broadcom BCM20702 Single-Chip Bluetooth 4.0 Processor with Bluetooth Low Energy (BLE) support
-
It's interesting that there's a spot for stamping the revision and serial number, but that Apple chose not to stamp a unique number on it.
-
-
Attrezzo utilizzato in questo passaggio:T5 Torx Screwdriver$5.49
-
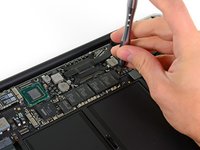
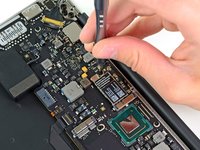
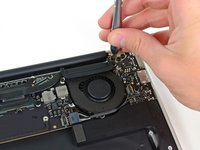
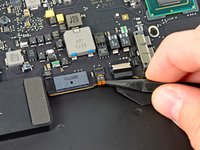
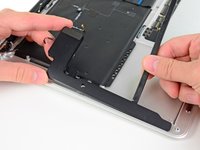
The cable being disconnected in the first picture is the new keyboard backlight ribbon cable.
-
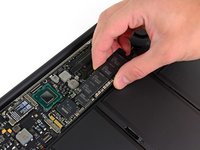
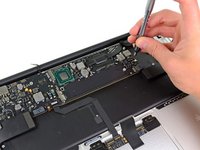
After disconnecting all the cables we could find, we moved on to the T5 Torx screws holding down the logic board.
-
-
-
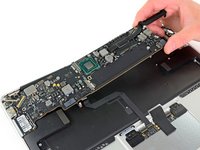
Major Players on the top side of the logic board include:
-
Intel Core i5 Processor-2557M with integrated Intel HD 3000 graphics
-
Intel E78296 01PB10 / E116A746 SLJ4K Platform Controller Hub. We're guessing this includes an integrated Thunderbolt controller. It's not this part, but it's similar.
-
Genesys Logic 822 SD-slot controller
-
DSL2310 L123TA46 Eagle Ridge SFF Thunderbolt controller
-
Linear Technology 3857
-
Shifting to integrated graphics on the processor freed up a lot of room on the board—enough for Apple to add the sizeable Thunderbolt-capable PCH.
-
If you're interested in more information on Intel's mobile chipsets, Wikipedia has a lot of interesting information.
-
-
-
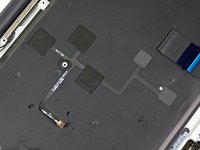
Next, we turn our attention back to the upper case.
-
Here's a big surprise: the circuit board attached to the back of the trackpad is identical to the one on last year's Air.
-
A new addition to the upper case is the network of LEDs attached to the keyboard backlight cable. A couple LEDs transmit light through fiber optic channels to evenly illuminate the keys on the keyboard.
-
-
-
MacBook Air 13" Mid 2011 Repairability: 4 out of 10 (10 is easiest to repair).
-
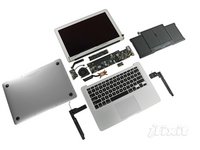
Once you manage to take off the bottom cover, all the parts are pretty easily replaceable.
-
Opening the bottom cover is quite difficult if you don't have the right screwdriver. It's clear that Apple didn't want people to open their machine.
-
All the components -- including RAM and SSD -- are proprietary, meaning that no off-the-shelf parts will work in it without serious rigging.
-


12 Commenti
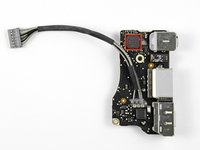
I'm surprised that Apple didn't move the Thunderbolt connector to be adjacent to the Magsafe connector so that both heads of the dual power/Thunderbolt cable in the new Cinema Display would connect on the same side of the Air. As it is, you have to plug cables onto both sides. Surprisingly ungainly for Apple.
you were very smart thinking of that! i'm asking me the same. perhaps the cable is enough long to plug it on both sides
Hey -- I have a few questions.
1.) What interface is the SSD? Is it's PCIe or SATA? If PCIe, is it PCIe 1.0 or 2.0? If SATA, is it SATA 3gbps or SATA 6gbps?
2.) Do you see any way of upgrading the RAM to 8gb...even if you get a professional to carefully solder it in? Would you guys consider doing it for a price? I ordered the 11" i7 with 4GB ram and 128GB SSD.
Let me know, thank you for your wonderful site!
My understanding is that it's some sort of modified SATA to be smaller. As for the RAM, honestly, I wouldn't even try soldering it in. First of all, for all we know, the motherboard can only handle 4 GB, which is unlikely, but possible. The costs of 8GB of ram and soldering service.... I wouldn't want anyone to screw up my motherboard My guess is that if it was feasible, Apple would have allowed it but for a hefty price. I guess we'll have to wait for next generation. The SSD should help mitigate some of the RAM bottlenecks because it's a faster scratch disk, unless you're doing a lot of VMs, in which case you shouldn't have gotten a MacBook Air. OtherWorldComputing has some very fast SSD upgrades for the MacbookAir you can install yourself easily. Hope this helps :)
In step two, you say this model uses the same pentalobe screws as the gen2, but you show them being taken out with your bit-driven screwdriver (which is an excellent set!), as opposed to the dedicated pentalobe screwdriver! Fess up! Is there a set of pentalobe bits available?! IAC, thanks for the teardown!