Salta al contenuto principale

Cosa ti serve

Questo smontaggio non è una guida di riparazione. Per riparare il tuo Lightsaber, usa il nostro manuale di assistenza.

  1. Lightsaber Teardown, Lightsaber Teardown: passo 1, immagine 1 di 1
    • Listen up, nerfherders: We've got a lightsaber on the teardown table. Before we dive in, let's take a look at the specs:

    • Manufacturer: Obi-Wan Kenobi

    • Crystal: single blue Adegan crystal

    • Production date: 22 BBY (Before Battle of Yavin)

    • Length: 15.8 cm

    • While historians debate which was the most effective saber design, our teardown unit hails from the old school: single blade, fixed length. No fancy crossguards here.

  2. Lightsaber Teardown: passo 2, immagine 1 di 3 Lightsaber Teardown: passo 2, immagine 2 di 3 Lightsaber Teardown: passo 2, immagine 3 di 3
    • Do you have the death sentence on twelve systems? Do you frequent wretched hives of scum and villainy? Then you probably don't want to see this saber firing up.

    • If only we were Force adepts, we could release this interior clasp with a simple wave of the hand. Instead, we nudge it free with the tip of a spudger, revealing the crystal chamber.

    • Seeing as this is his third lightsaber, Master Kenobi must have had long-term repairability in mind during its construction—it's incredibly easy to access the crystal chamber, with its single Adegan crystal.

  3. Lightsaber Teardown: passo 3, immagine 1 di 3 Lightsaber Teardown: passo 3, immagine 2 di 3 Lightsaber Teardown: passo 3, immagine 3 di 3
    • We'll get back to that crystal chamber a bit later. For now, we set out to open the saber itself.

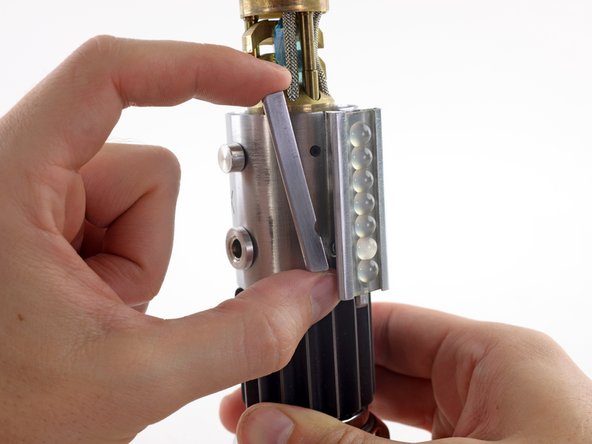
    • Let's start by unscrewing this clamp pin that secures the switch housing cover.

    • With the pin removed, we're able to lift the clamp brackets out with no trouble.

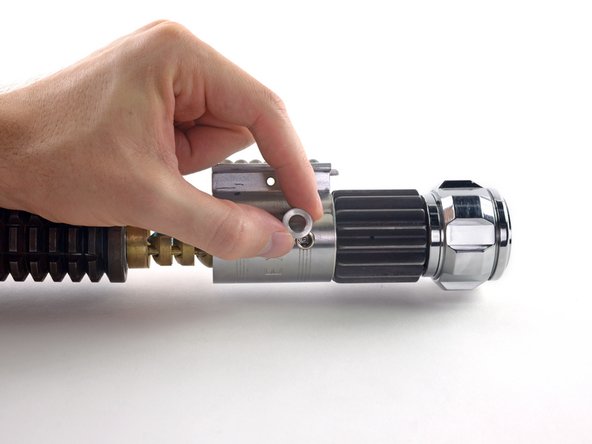
    • It seems Obi-Wan saw fit to include a charging port on his lightsaber. Lucky for us, he decided to use a standard DC barrel jack connector.

    • Unscrewing this small retaining ring loosens the port from the housing cover.

  4. Lightsaber Teardown: passo 4, immagine 1 di 2 Lightsaber Teardown: passo 4, immagine 2 di 2
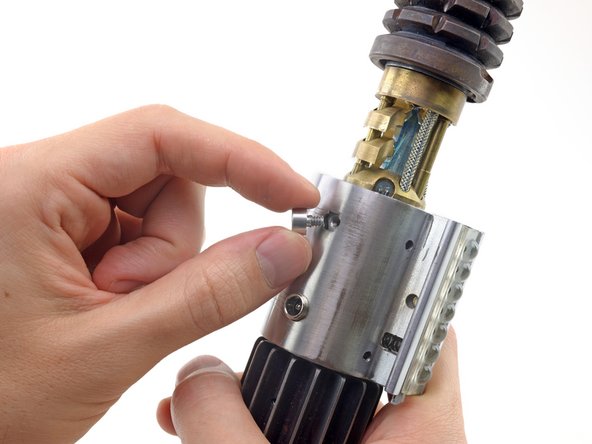
    • We quickly dispatch a few tiny set screws securing the clamp to the body of the lightsaber.

    • With the set screws removed, we extract the activation stud.

    • Pro tip: Sith happens. Fortunately, it's now impossible to ignite this saber by accident. For safety's sake, those of you tearing down a lightsaber at home should follow a similar procedure.

  5. Lightsaber Teardown: passo 5, immagine 1 di 3 Lightsaber Teardown: passo 5, immagine 2 di 3 Lightsaber Teardown: passo 5, immagine 3 di 3
    • Turning our attention to the top of the saber, we release the emitter shroud for inspection.

    • The shroud appears to contain some sort of magnetic stabilizing ring.

    • We're not 100% sure what a non-magnetically stabilized lightsaber beam does, but we're guessing it would be wise to put this back when we're done.

  6. Lightsaber Teardown: passo 6, immagine 1 di 3 Lightsaber Teardown: passo 6, immagine 2 di 3 Lightsaber Teardown: passo 6, immagine 3 di 3
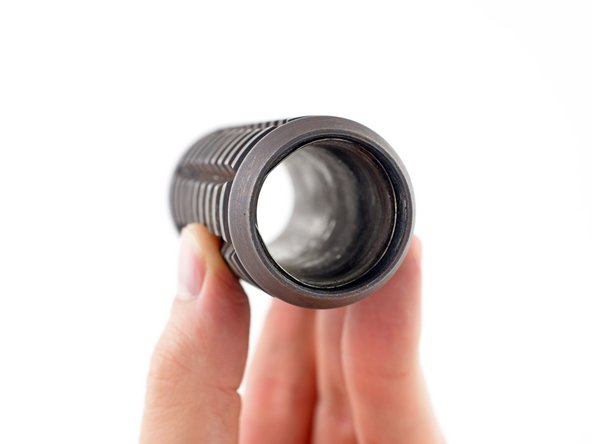
    • At first, we're a bit stumped by the crystal chamber cover. Turns out it's quite easy to remove with a half-twist and some well-targeted pressure.

    • We subject the cover to a small battery of tests; it's made of an unknown material that is both nonmagnetic and nonconducting.

    • With its smooth inner surface and segmented exterior, this looks designed to protect the wielder from the saber's extreme energy output, while possibly providing a small measure of cooling for the internals.

  7. Lightsaber Teardown: passo 7, immagine 1 di 2 Lightsaber Teardown: passo 7, immagine 2 di 2
    • With the shroud removed, the blade emitter comes into full view.

    • Some say this ancient weapon is no match for a good blaster at your side. Whichever view you take, you have to respect this kind of craftsmanship.

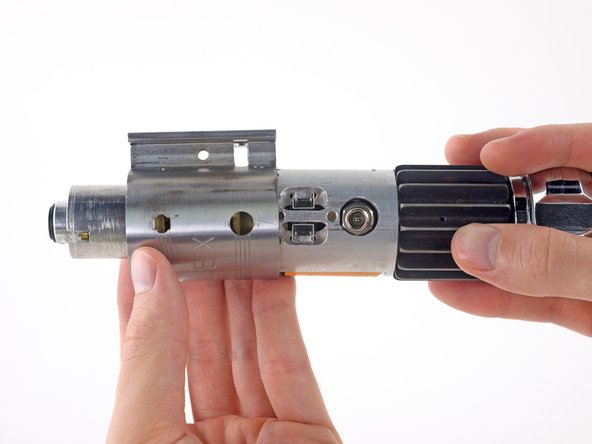
    • At this point, we've cleared the way to slide the clamp free and expose the switch housing.

    • Being photography buffs, we can't help but notice this clamp bears a striking—but entirely coincidental—resemblance to a 3-cell Graflex flash handle.

  8. Lightsaber Teardown: passo 8, immagine 1 di 3 Lightsaber Teardown: passo 8, immagine 2 di 3 Lightsaber Teardown: passo 8, immagine 3 di 3
    • We carefully remove the activation stud control bar.

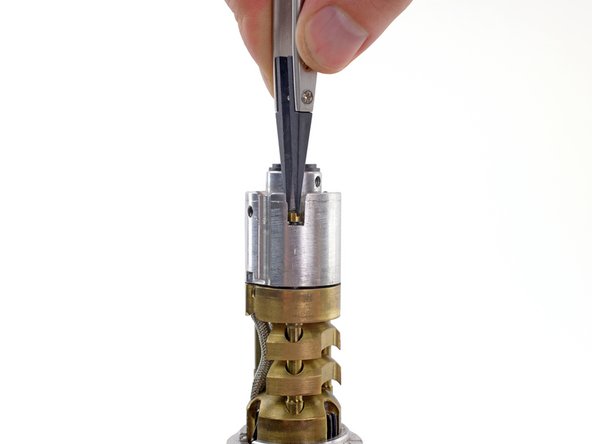
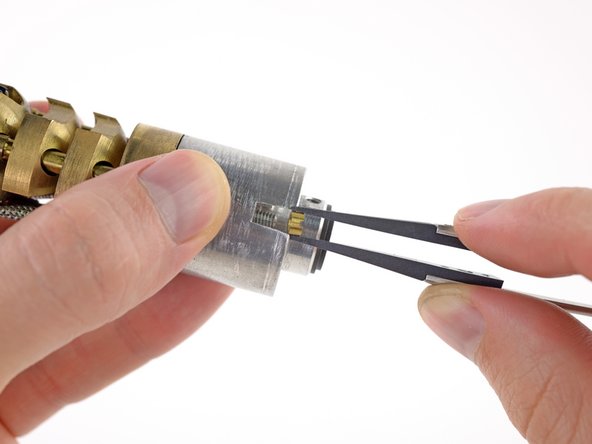
    • Stay on target...stay on target... We use our tweezers to make a trench run and take out a few nuts, loosening the next stage of the cylinder.

  9. Lightsaber Teardown: passo 9, immagine 1 di 2 Lightsaber Teardown: passo 9, immagine 2 di 2
    • You won't find any regular old lithium ion batteries here! This lightsaber features a diatium power cell.

    • The Force is strong with this one—the recharge port seems a tad redundant, as a properly-maintained diatium power cell will last indefinitely.

    • The parabolic blade continuously recycles the power cell's energy output whenever the saber is not in contact with other objects.

  10. Lightsaber Teardown: passo 10, immagine 1 di 3 Lightsaber Teardown: passo 10, immagine 2 di 3 Lightsaber Teardown: passo 10, immagine 3 di 3
    • We had a slight weapons malfunction, but everything's perfectly all right now. We're fine—we're all fine here now, thank you.

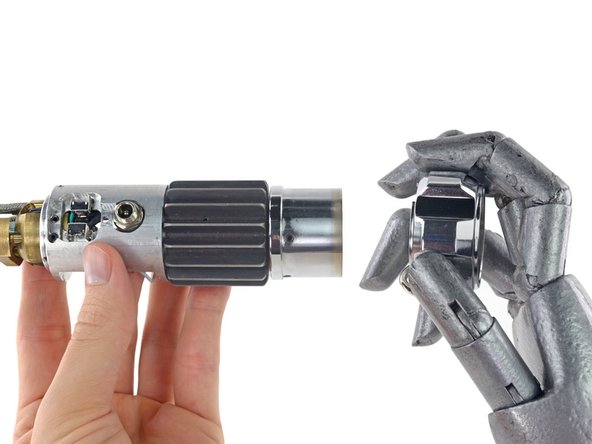
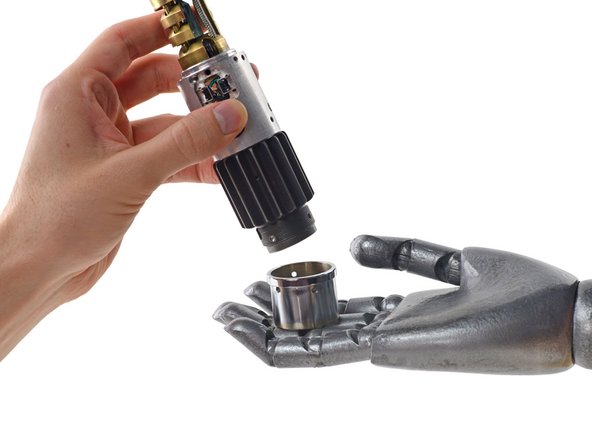
    • In case of any more surprises, we get a hand from a friend.

    • Lightsabers are the leading cause of dismemberment in the quadrant; be sure to take precautions during repairs.

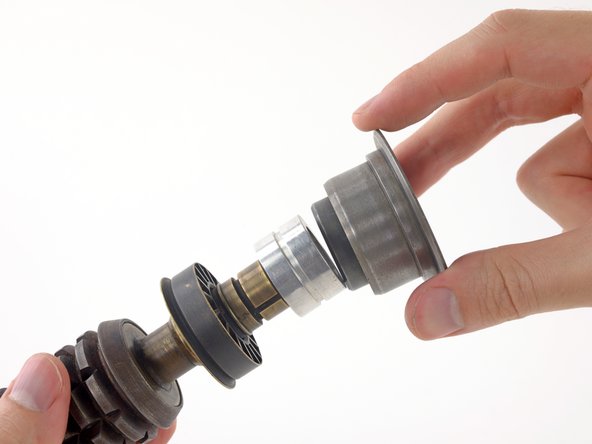
    • Next we unscrew the pommel cap, hoping to find a backup power cell.

    • No luck—we're able to remove an intermediary collar, but we don't find a reserve power cell.

    • Time to get a closer look at that crystal chamber.

  11. Lightsaber Teardown: passo 11, immagine 1 di 3 Lightsaber Teardown: passo 11, immagine 2 di 3 Lightsaber Teardown: passo 11, immagine 3 di 3
    • That's no moon—it's the focusing crystal.

    • We gingerly remove both the cycling field energizer and the focusing crystal activator from atop the crystal chamber.

    • Misaligned crystals could cause a lightsaber to explode the instant it's powered on.

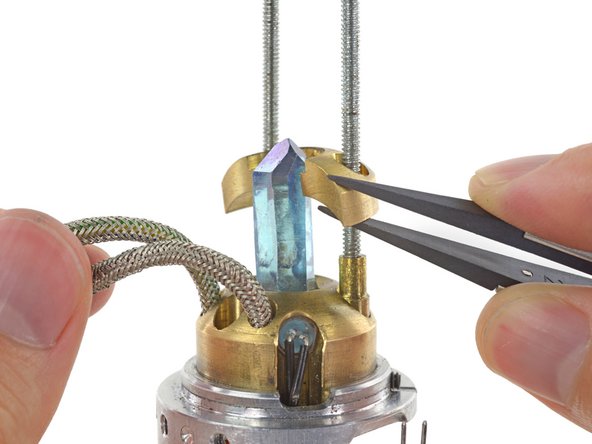
    • Excited to get an unobstructed view of the primary crystal, we pull back the energy modulation circuits—and lift away the crystal chamber cooling fins.

  12. Lightsaber Teardown: passo 12, immagine 1 di 2 Lightsaber Teardown: passo 12, immagine 2 di 2
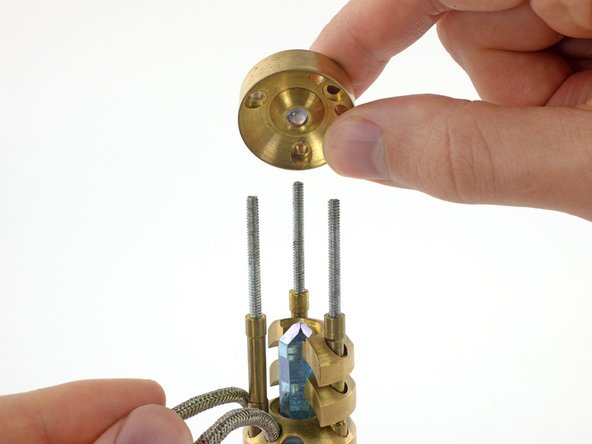
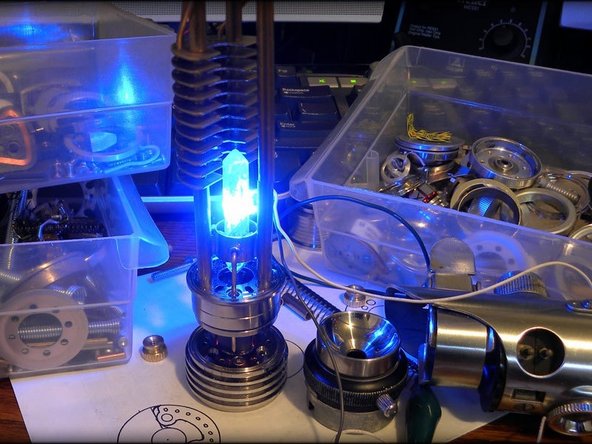
    • We finally arrive at the heart of the lightsaber, the primary crystal.

    • This particular lightsaber uses a blue Adegan crystal, typical of a Jedi. Sith lightsabers are commonly made with synthetic red crystals.

    • Arguably the most important component, Adegan crystals are known for their Force-sensitive properties. Once properly attuned to the Force, a crystal is built into the lightsaber. Over time, the crystal will form a special bond with its wielder.

    • We peel away the three neatly packed crystal energizers from the primary crystal housing.

  13. Lightsaber Teardown: passo 13, immagine 1 di 2 Lightsaber Teardown: passo 13, immagine 2 di 2
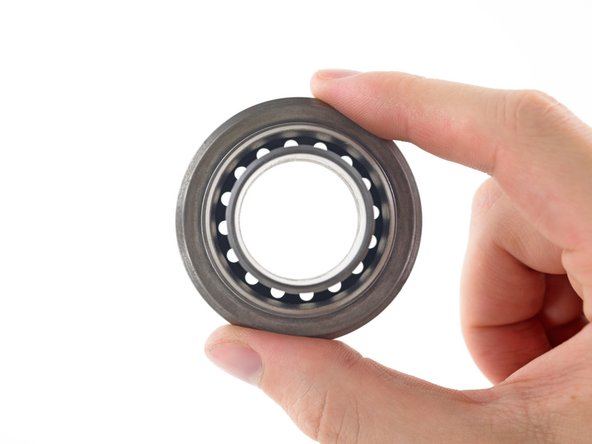
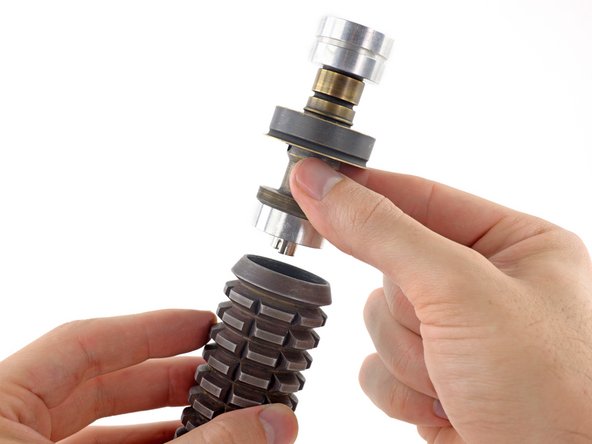
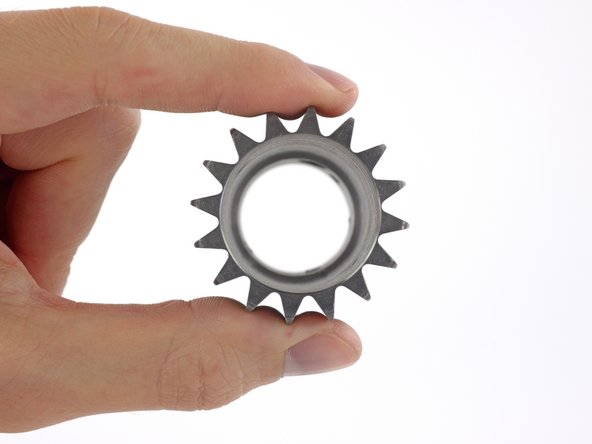
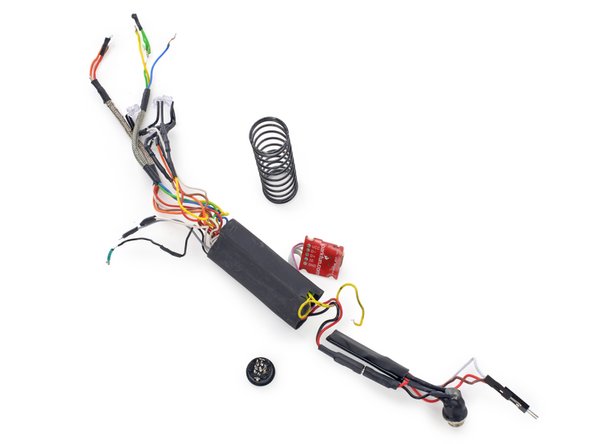
    • We slide the rear grip and inert power insulator from the hilt.

    • Though the rear grip resembles a heat sink, this design avoids the dramatic overheating problems seen in early lightsabers.

    • Looks like the extra space down here might be for upgrades, or possibly for the expert balance Obi-Wan surely requires of his saber.

    • With the disassembly complete, how will this beautifully crafted weapon fare in the repair arena?

  14. Lightsaber Teardown: passo 14, immagine 1 di 2 Lightsaber Teardown: passo 14, immagine 2 di 2
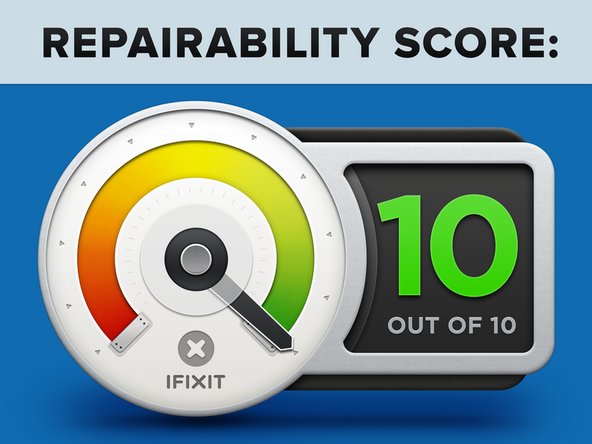
    • Lightsaber Repairability Score: 10 out of 10 (10 is easiest to repair)

    • Extremely durable components make the need for repair unlikely outside of severe combat damage.

    • Robust diatium power cell lasts the life of the device.

    • Recharge port allows for topping up the power cell in extreme circumstances.

    • No adhesive anywhere; all components are removable with basic tools.

    • Replacing the rare Adegan crystal requires a trip to remote star systems, or paying a hefty fee to an enterprising smuggler.

    • Lack of published repair documentation means you'll have to rely on your Jedi abilities to figure all this out. (But the Force has a strong influence on our weak minds, so we're still giving it a 10/10.)

  15. Lightsaber Teardown: passo 15, immagine 1 di 3 Lightsaber Teardown: passo 15, immagine 2 di 3 Lightsaber Teardown: passo 15, immagine 3 di 3
    • And now for the bits we didn't show you—because while lightsabers exist in a galaxy far, far away, this particular piece of Jedi kit was built by a true sabersmith here on Earth.

    • Many thanks to the amazingly talented Brad Lewis, who generously loaned us one of his hand-crafted, better-than-movie-accurate lightsaber replicas for this teardown. You can see his complete build log for this lightsaber, and many others, at SlothFurnace.com—or, check him out on Facebook or Twitter!

    • Thanks Brad! And may the Force be with you—always.

Geoff Wacker

Membro da: 09/30/13

89.828 Reputazione

89 Guide realizzate

20 Commenti

Where can I buy this lightsaber???

gladgura - Replica

There are a few websites with light sabers... www.ultrasabers.com or www.saberforge.com

Bill -

Nice Teardown. Have the tools but no Lightsaber :(

Bernhard Grohs - Replica

Finally, I found out how to repair mine!!!

May The Force be with you!

Adrian - Replica

A joke a day keeps the doctor away........This is good for 14 days :-)

info - Replica

Aggiungi Commento

Visualizza Statistiche:

Ultime 24 Ore: 2

Ultimi 7 Giorni: 16

Ultimi 30 Giorni: 90

Tutti i Tempi: 131,415