Introduzione
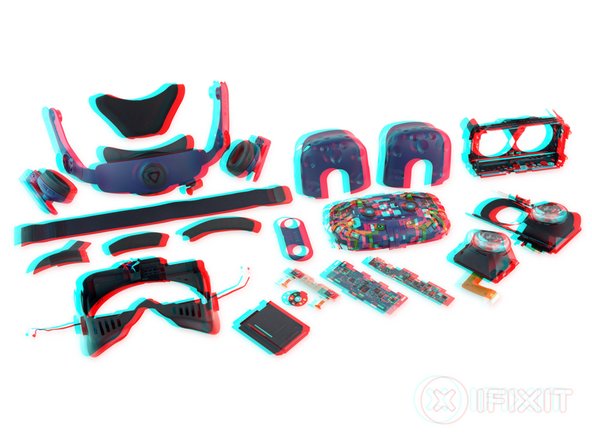
With the lightning pace of tech releases, it's hard to believe nearly two years have passed since our first Vive teardown. Today HTC brings you the first headset in what's bound to be VR's v2.0, and we're bringing you the pieces. Drop your wands and grab your spudgers—it's time for a teardown.
Join us in the virtual world by liking us on Facebook, Instagram, or Twitter for all the future tech that's fit to type. Or for a more personal experience, check out our newsletter.
Cosa ti serve
Panoramica Video
-
-
The Vive Pro seems to come equipped with some new spectacles. What other specs is it packing?
-
Two 1440p AMOLED displays for a combined resolution of 2880 × 1600
-
90 Hz refresh rate
-
Built-in dual front-facing cameras, dual microphones, and headphones
-
Accelerometer, proximity, gyroscope, and IPD sensors
-
360-degree headset tracking via up to four Lighthouse 2.0 base station IR emitters
-
Wireless capability with the not-yet-released Vive Wireless Adapter
-
We kick things off with an epic X-ray overview of the entire headset, courtesy of the magicians at Creative Electron. This is our roadmap for the teardown ahead.
-
-
-
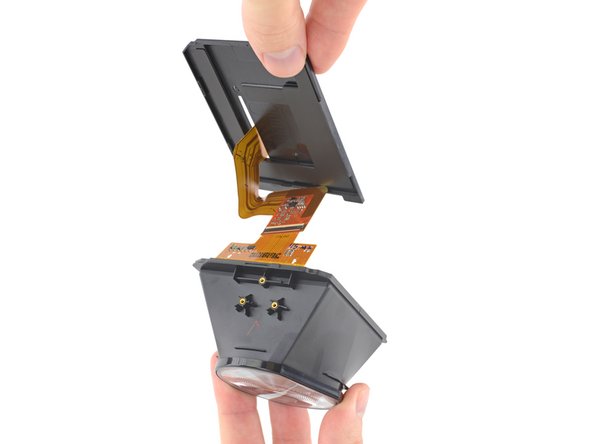
The original Vive impressed us with its ease of disassembly, and we have high hopes for the Pro model.
-
Though the Pro looks a lot like the original Vive, we're noticing some important differences right away.
-
The resolution isn't the only thing that increased—the Pro doubles the number of microphones and front cameras.
-
Looks like HTC borrowed some strap adjusting tech from Sony, but did away with the button, using just a dial to tighten or loosen the headgear.
-
-
-
We haven't even started disassembly, and already we're seeing some repair-friendly features!
-
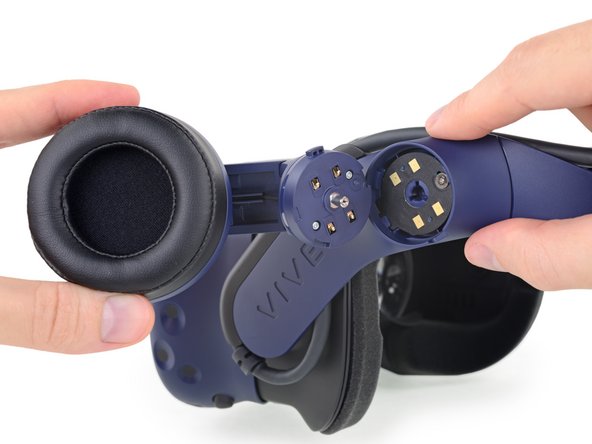
Spring contacts and standard Phillips screws connect the modular headphones to the headset, making for easy removal and replacement.
-
We peel off a couple foam pads and unsnap a plastic compartment cover to find the end of the Vive Pro's fancy custom cable.
-
Though a completely wire-free experience is not yet available, HTC managed to fit all the power and data lines for the Vive into a single cable that routes neatly up and over your left ear—a big improvement from the heavy multi-cable ponytail that dangled from the original.
-
-
-
These audio cables connect to the twin headphone contact boards via a standard connector—another bonus for non-destructive disassembly.
-
After unthreading the headphone cables and removing a couple Torx screws, the strap lifts off the headset like a hat. Or maybe a helmet?
-
While pulling off the headband we happen to notice the model number: 2Q29100.
-
-
-
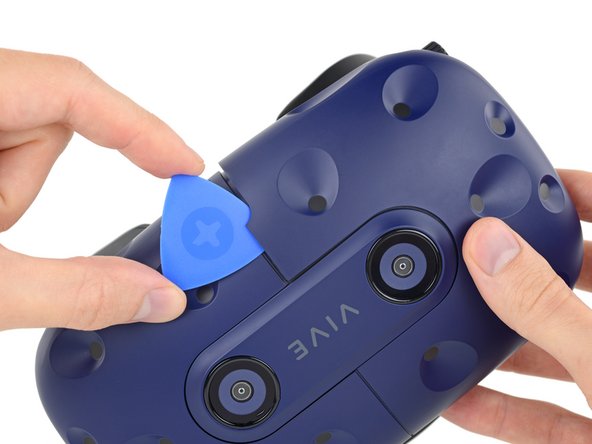
Wading through the sea of divots in the front cover, we find a couple (or four) that actually hide Torx screws!
-
While we're not huge fans of hidden or tamper-evident screws, they're a much better option than glue or proprietary heads.
-
After a bit of fancy work with an opening pick to pop the hidden clips free, the outer shell splits down the middle and slides off.
-
The Vive Pro's unsettling new gaze makes us feel a little bad about peeling its face off—sorry, Johnny
ViveFive.
-
-
-
-
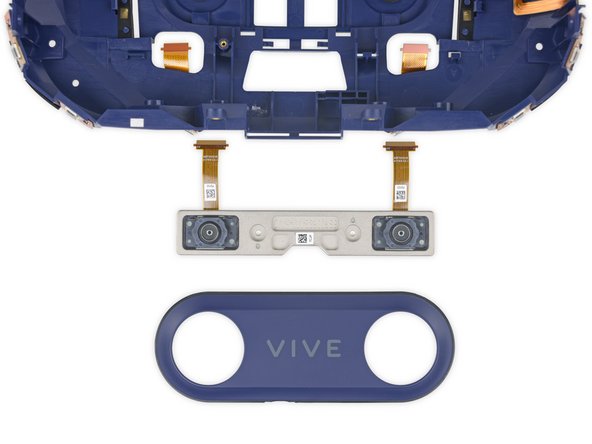
Inside the covers, we spot familiar IR-friendly windows. All these purply dots are a bit like sunglasses for the IR sensors underneath—helping to filter out visible light so the sensors can more easily spot the IR beams from the Lighthouse base stations.
-
Much like on the original Vive, there's a spiderweb of photodiodes lying just under the sleek surface of the Pro—32 of them in total.
-
Unlike the Oculus Rift, this headset is looking for IR light—not emitting it.
-
A couple more screws and we have faceplate liftoff—IR sensor array separation complete.
-
-
-
First component on the menu: the dual microphone assembly near the bottom of the face plate.
-
Where the original Vive got by with a single mic, the Pro's twin mics offer improved noise cancellation during online play.
-
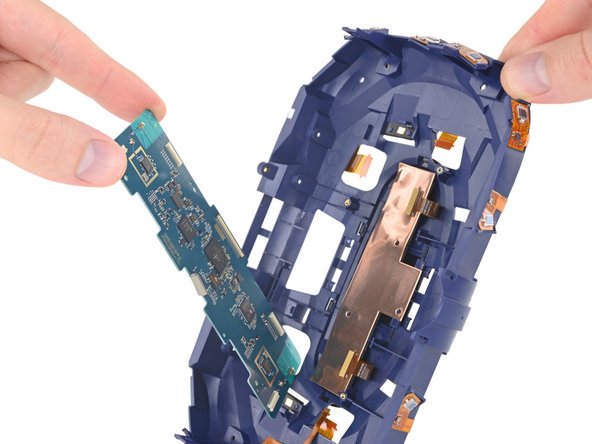
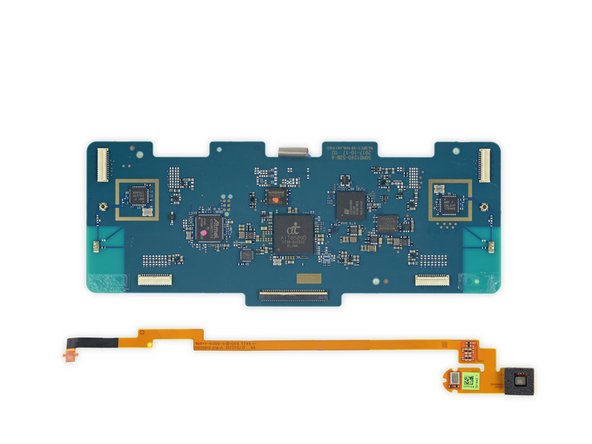
Next we snag the faceplate-mounted mainboard, which wrangles signals from the IR sensor arrays, cameras, and microphones.
-
Beneath the board, we find a hefty slab of copper foil, likely used for EMI shielding as well as keeping things cool. (Passive cooling would be the way to go, to keep this device lightweight and quiet enough to wear on your face!)
-
And under that we find the cameras! Two separate units with no identifiable markings. HTC says the additional camera makes for an improved Chaperone feature, as well as some basic hand tracking.
-
-
-
Scan complete—chips identified:
-
Two Nordic Semiconductor NRF24LU1P Ultra Low Power 2.4 GHz RF SoC
-
Atmel SAM G55J 32-bit microcontroller
-
Two Winbond 25Q32JV1Q 4 MB flash memory
-
Alpha Imaging Technology AIT8589D—likely an updated version of the Image Signal Processor we saw in the first Vive
-
Lattice Semiconductor iCE40HX8K Ultra Low Power FPGA
-
TDK (formerly Invensense) MPU-6500 3-axis accelerometer/gyroscope
-
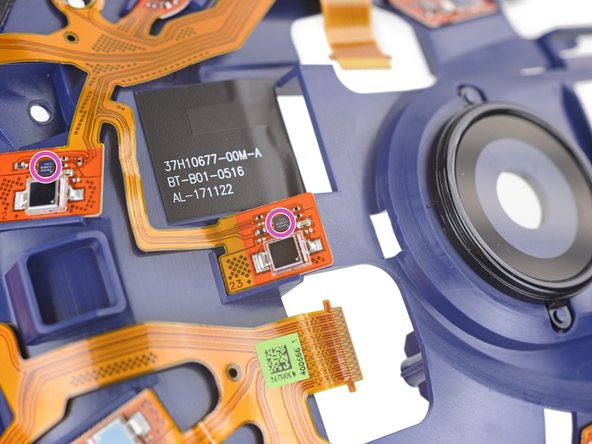
In the third image: A Triad Semiconductor TS4231 Light-to-Digital Converter IC nestles close to each IR sensor, ready to convert IR light pulses into digital signals.
-
-
-
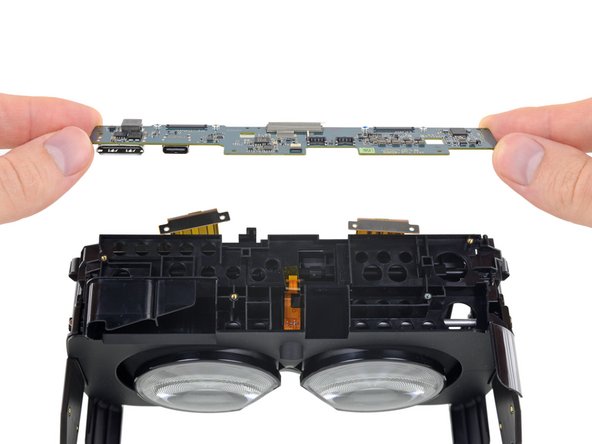
After that brief board break, we continue our journey into the headset.
-
Now tethered by just two headphone interconnect cables, the headset is easily lifted away and set aside.
-
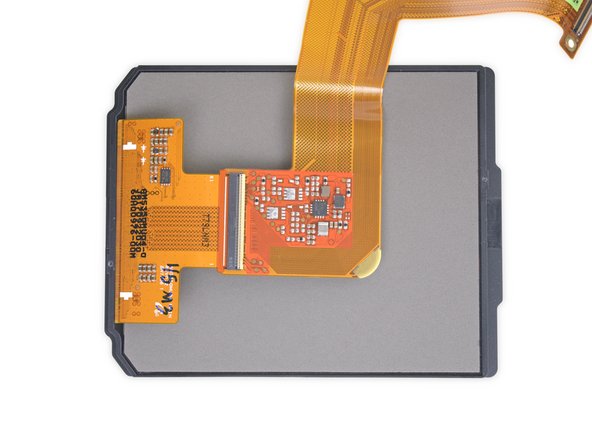
Where the original Vive kept nearly all its onboard silicon clustered onto a single board, the sequel uses two smaller boards. This daughterboard services the displays, I/O, and one or two other things we'll show you in just a moment.
-
This board also hosts the little linear potentiometer that formerly lived on its own FPC. That small slider tracks where you position the displays when making IPD adjustments.
-
-
-
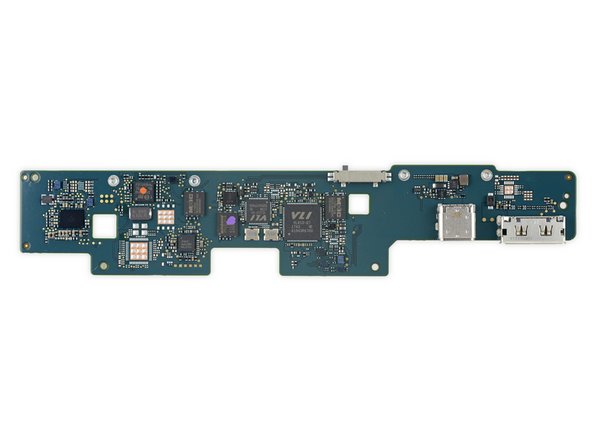
We been hearing this headset is overpriced, but maybe we'll strike gold amongst all this silicon?
-
Analogix ANX7530 Slimport (4K Ultra-HD) Receiver
-
Cirrus Logic CS43130 High Performance DAC
-
Cmedia CM6530N USB 2.0 Full Speed Audio Chip
-
Texas Instruments TPS54541 Step-Down DC Converter
-
ON Semiconductor FSA2275UMX audio analog switches
-
ON Semiconductor FSA4476UCX and FUSB340TMX USB analog switches
-
Texas Instruments TXB0104 4-bit voltage-level shifter
-
-
-
We're treated to even more chips on the back side:
-
Cirrus Logic CS47L90 Hi-Fi Audio Codec
-
STMicroelectronics STM32F072RBH6 ARM Cortex-M0 Microcontroller (same as before)
-
Lattice Semiconductor LP4K81 Ultra Low Power FPGA
-
Macronix MX25V8035F 8 Mb CMOS flash
-
Winbond 25Q32JV1Q 4 MB flash memory
-
Macronix MX25L4006E 4 Mb CMOS flash
-
-
-
Trying to get a look at those fancy displays, we hinge the whole optics assembly out of the midframe.
-
These lenses have the same concentric rings as the standard Vive, and are likely the same Fresnel design.
-
We get our greedy hands on one of the lens/display assemblies and carefully thread the display cable out.
-
The display is a Samsung AMS350MU04 AMOLED panel, reportedly the very same that Samsung uses in their own Odyssey mixed reality headset.
-
-
-
But wait—there's more!
-
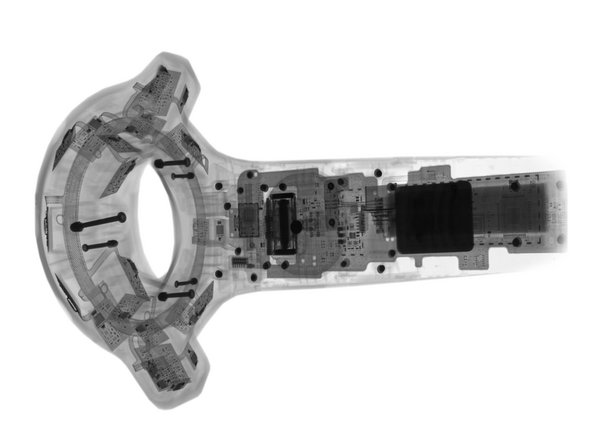
We didn't take apart the earphones, but our pals at Creative Electron got us a glimpse of the innards and we wanted to share. Feast your eyes.
-
Bonus round: a closeup of the reassembled HMD, and the controller—which we tore down for you last time.
-
- Disassembly with standard tools is straightforward, nondestructive, and free of booby-traps.
- Newly added earphones are completely modular and come with instructions for removal and installation.
- Standard Phillips and Torx screws secure most components. High-wear comfort pads are secured with Velcro.
- Compatibility with existing controllers and base stations means you may already know how to repair the required accessories.
- Adhesive is used very sparingly, securing the lenses, microphone, and sensor arrays.
- This is an unusually complex device with a lot of delicate bits, and the manufacturer does not provide a service manual—so use extra caution if attempting a repair.


Considerazioni Finali
Punteggio Riparabilità


(10 è il più facile da riparare)

14 Commenti
Any idea whether the headstrap to the original VIVE could be put on the Pro? I’m a minority, I’m sure, but I hate the deluxe audio strap. There’s a ton more plastic and it feels like my head is suffocating when I tighten it enough to keep it firmly in place. It’s harder to put on and take off. I’d love to remove it and put on the strap from the original.
Where’s the pictures of the back of the board in Step 8? Is it just empty?
And you didn’t open the Link Box either?