Salta al contenuto principale

Questo smontaggio è in corso – Ricarica periodicamente per vedere gli ultimi cambiamenti!

Cosa ti serve

  1. Game Boy Color Teardown, Game Boy Color Teardown: passo 1, immagine 1 di 2 Game Boy Color Teardown, Game Boy Color Teardown: passo 1, immagine 2 di 2
    • Start with a game boy color.

  2. Game Boy Color Teardown: passo 2, immagine 1 di 3 Game Boy Color Teardown: passo 2, immagine 2 di 3 Game Boy Color Teardown: passo 2, immagine 3 di 3
    • First, you will want to remove the battery cover and take out the batteries if you have any in the unit.

    • Next, unscrew all six tri-wing screws from the back cover. Two are located at the top, two in the middle, and two at the bottom (behind the battery cover).

  3. Game Boy Color Teardown: passo 3, immagine 1 di 2 Game Boy Color Teardown: passo 3, immagine 2 di 2
    • Then once all the screws have been removed just gently take off the back cover of the game boy and set it aside .

  4. Game Boy Color Teardown: passo 4, immagine 1 di 2 Game Boy Color Teardown: passo 4, immagine 2 di 2
    • Now that you have taken off the cover on the botom half there are three screws that need to be taken out. One of them is behind the metal part on the left and it is a little hard to see but it is simple to get out.

  5. Game Boy Color Teardown: passo 5, immagine 1 di 2 Game Boy Color Teardown: passo 5, immagine 2 di 2
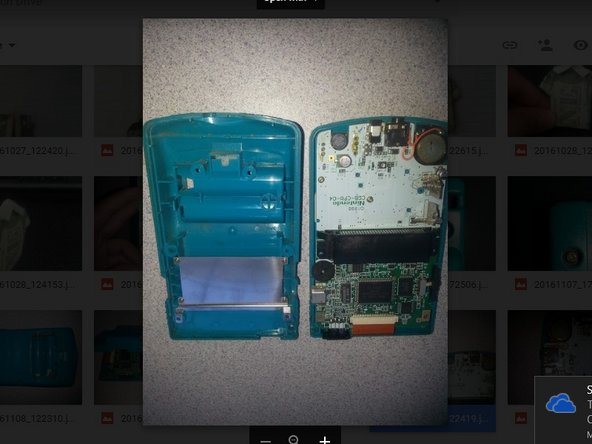
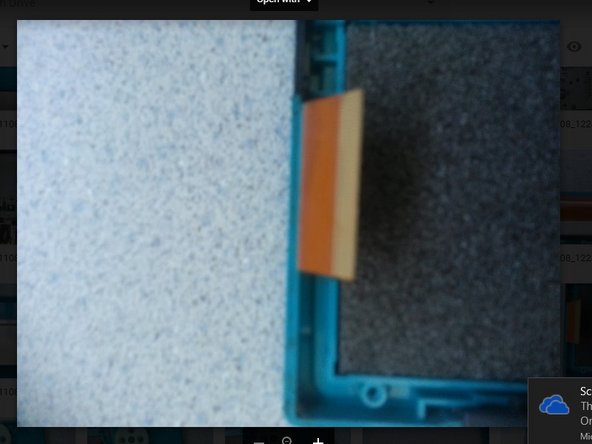
    • Now don't go immediately taking off the mother board because there is a orange film (this is the LCD ribbon cable) at the top that needs to be taken out first.

    • All you have to do is look carefully at each side of it. There are two little pieces of brown plastic that need to be loosened, but not taken out.

    • Using either your fingernail or something small and stiff, preferably made of hard plastic or metal that won't bend, gently push the brown pieces in the direction of the orange film.

    • The cable will just slide out with a little bit of force, but be careful not to tear or bend the cable when sliding it out.

  6. Game Boy Color Teardown: passo 6, immagine 1 di 1
    • Now the buttons will simply fall out so when taking them out just don't throw the game boy upside and make everything fall out.

  7. Game Boy Color Teardown: passo 7, immagine 1 di 1
    • The last thing you're going to do is to remove the metal plate from the back piece that you set aside.

    • All you need to do is unscrew the four screws holding down the metal plate. The screws are easily removed with an appropriately size phillips head screwdriver.

  8. Game Boy Color Teardown: passo 8, immagine 1 di 2 Game Boy Color Teardown: passo 8, immagine 2 di 2
    • Once you have finished the last step you are now done ,and to put it back together just undo the process in the same order just backwards.

Bryan Trevizo

Membro da: 11/03/16

178 Reputazione

1 Guida realizzata

Un commento

Almost a perfect teardown, except of the part you didn't say how to remove the screen.

Michelle Fernandez - Replica

Aggiungi Commento

Visualizza Statistiche:

Ultime 24 Ore: 0

Ultimi 7 Giorni: 5

Ultimi 30 Giorni: 32

Tutti i Tempi: 2,968