Salta al contenuto principale

Cosa ti serve

Questo smontaggio non è una guida di riparazione. Per riparare il tuo Car and Drivers Auto HandHeld Vacuum Bagless, usa il nostro manuale di assistenza.

  1. Car and Drivers Auto HandHeld Vacuum Bagless Teardown, Car and Drivers Auto HandHeld Vacuum Bagless Teardown: passo 1, immagine 1 di 3 Car and Drivers Auto HandHeld Vacuum Bagless Teardown, Car and Drivers Auto HandHeld Vacuum Bagless Teardown: passo 1, immagine 2 di 3 Car and Drivers Auto HandHeld Vacuum Bagless Teardown, Car and Drivers Auto HandHeld Vacuum Bagless Teardown: passo 1, immagine 3 di 3
    • Locate the four screws locate outer gray shelll

    • ''I REMOVED THE SCREWS WITH PH #OO SCREWDRIVER FROM (IFIXIT)

    • New PLace four screws to the side

  2. Car and Drivers Auto HandHeld Vacuum Bagless Teardown: passo 2, immagine 1 di 1
    • Here are the four screws from vacuum

  3. Car and Drivers Auto HandHeld Vacuum Bagless Teardown: passo 3, immagine 1 di 3 Car and Drivers Auto HandHeld Vacuum Bagless Teardown: passo 3, immagine 2 di 3 Car and Drivers Auto HandHeld Vacuum Bagless Teardown: passo 3, immagine 3 di 3
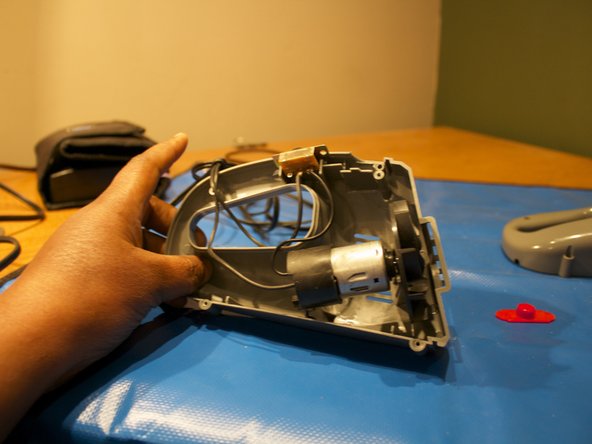
    • Remove the top grey shell of the vacuum

    • Place a red tab to the side

    • Let start looking at the 9volt motor with wire and on/off switch.

    • I remove the outer shell . I remove the motor and wires and on/off switch.

  4. Car and Drivers Auto HandHeld Vacuum Bagless Teardown: passo 4, immagine 1 di 1
    • This it complete teardown on Car and Driver HandHeld Vacuum bagless!

kempc8

Membro da: 11/22/13

899 Reputazione

7 Guide realizzate

Team

K and K Fixit Membro di K and K Fixit

Business

1 Membro

11 Guide realizzate

0 Commenti

Aggiungi Commento

Visualizza Statistiche:

Ultime 24 Ore: 3

Ultimi 7 Giorni: 7

Ultimi 30 Giorni: 17

Tutti i Tempi: 1,023