Salta al contenuto principale

Cosa ti serve

Questo smontaggio non è una guida di riparazione. Per riparare il tuo Apple DVI to ADC Adapter, usa il nostro manuale di assistenza.

  1. Apple DVI to ADC Adapter Teardown, Remove Sticker Screw Cover: passo 1, immagine 1 di 3 Apple DVI to ADC Adapter Teardown, Remove Sticker Screw Cover: passo 1, immagine 2 di 3 Apple DVI to ADC Adapter Teardown, Remove Sticker Screw Cover: passo 1, immagine 3 di 3
    • Turn the device upside down so that the information printed on the back is visible.

    • Carefully peel the sticker using a screwdriver from an edge. This will reveal two Phillips screws.

  2. Apple DVI to ADC Adapter Teardown, Bust the Plastic Housing Open: passo 2, immagine 1 di 3 Apple DVI to ADC Adapter Teardown, Bust the Plastic Housing Open: passo 2, immagine 2 di 3 Apple DVI to ADC Adapter Teardown, Bust the Plastic Housing Open: passo 2, immagine 3 di 3
    • Begin to open from the cable side. Carefully lift the side up like you would a hinge. The clips should un-clip themselves.

    • There are plastic clips that hold the casing together on the other side.

  3. Apple DVI to ADC Adapter Teardown, Removing the Shielded PSU: passo 3, immagine 1 di 3 Apple DVI to ADC Adapter Teardown, Removing the Shielded PSU: passo 3, immagine 2 di 3 Apple DVI to ADC Adapter Teardown, Removing the Shielded PSU: passo 3, immagine 3 di 3
    • Remove all four screws on the edges of the PSU.

    • To remove the last screw, remove the shielding tape.

    • Be careful not to pull on the PSU too hard. there is a connection to the logic board.

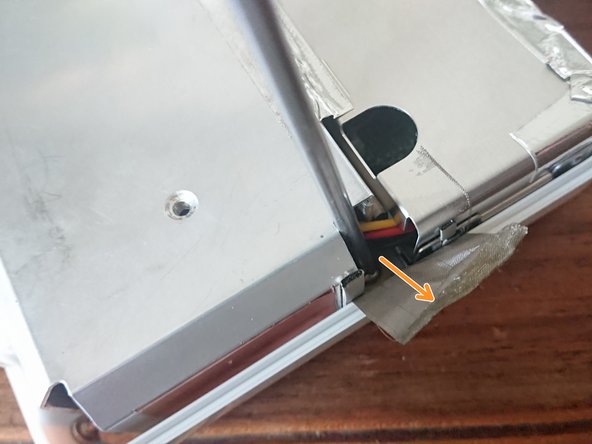
    • Carefully peel the shielding tape to release the PSU from it's place

  4. Apple DVI to ADC Adapter Teardown, Release the PSU and Deshield the Logic Board: passo 4, immagine 1 di 3 Apple DVI to ADC Adapter Teardown, Release the PSU and Deshield the Logic Board: passo 4, immagine 2 di 3 Apple DVI to ADC Adapter Teardown, Release the PSU and Deshield the Logic Board: passo 4, immagine 3 di 3
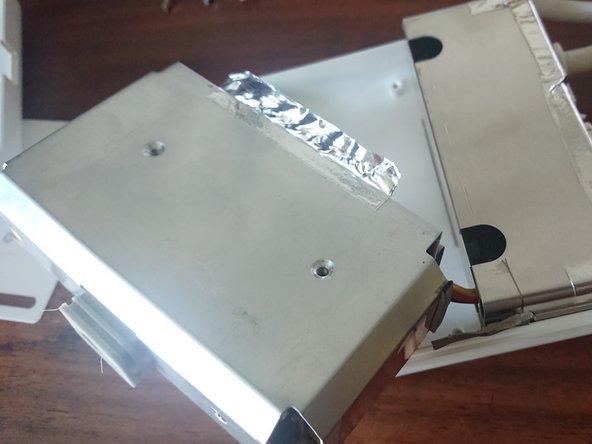
    • Pull the shield towards the cable side and it should pop open. (Some force is required).

    • Disconnect the PSU connector.

    • PSU is free.

  5. Apple DVI to ADC Adapter Teardown, Removing the Logic Board: passo 5, immagine 1 di 1
    • Unscrew the logic board and pull it out

alienozi

Membro da: 02/17/20

146 Reputazione

1 Guida realizzata

Un commento

Great teardown and history lesson! I didn’t know what ADC was—a proprietary Apple interpretation of DVI. Apple hasn’t changed a bit, for better or worse. The world is a better place for it though :)

iEvan - Replica

Aggiungi Commento

Visualizza Statistiche:

Ultime 24 Ore: 1

Ultimi 7 Giorni: 7

Ultimi 30 Giorni: 28

Tutti i Tempi: 2,165