Salta al contenuto principale

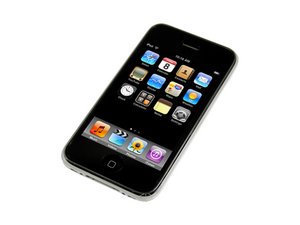
Seconda generazione di iPhone. Modello A1241/8 o 16 GB di memoria/plastica posteriore bianca o nera. La riparazione è più semplice rispetto al primo iPhone. Richiede l'uso di cacciaviti e strumenti di leva e distacco con ventose.

1158 Domande Visualizza tutte

Ear piece not working, but ribbon 3 is inserted.

Hi everyone, this is my first post but I have been reading around the site for a while and recently used used the guide to change my cracked screen.

First time round I just changed the screen and digitizer and kept my LCD, but a threaded screw meant a bit of force damaged the LCD so I had to replace this aswell.

After just changing my glass and digitizer the ear piece was still working (although it was hard to see how to test it through the wrecked LCD).

However now after changing my LCD the ear piece will not work along with the proximity sensor however speakerphone does work.

Now I've read that this is obviously the ribbon #3 which wasn't inserted fully. However I've had many goes and I'm confident it is in as far as it will go (not all the way but as far as I've seen in videos).

So is this a damaged ribbon? If I took it into an apple store would they laugh me out of the store after replacing the screen myself and it being out of warranty or would they give it a go trying to fix it?

Any help welcomed. Thanks a lot, Will

Risposto! Visualizza la risposta Anch'io ho questo problema

Questa è una buona domanda?

Punteggio -1
1 Commento

Right everyone I've changed the ribbon now and still no banana :( do you think the block it plugs into might actually be damaged? Im worried that I'm not sliding it in far enough but in videos I've seen it doesnt slide in all the way but only partially....

any suggestions?

Thanks, Will

da

Aggiungi un commento

1 Risposta

Soluzione Prescelta

iPhone 3G Earpiece Speaker Replacement I wouldn't go so far as to replace the small speaker (afterall, you have none of the functions working for that cable). Just replace the cable/flex. this is one option but there are plenty out there, this was just the cheapest. By the look of the new part you would have to keep the old metal retainer clip, but otherwise it's an easy repair..no solder! BTW, I think apple would replace the whole display rather than just the cable..it might cost a lot more than $2.54

Questa risposta è stata utile?

Punteggio 3

6 Commenti:

thanks for your reply! that tutorial looks easy enough but what would be the next step after the tutorial ends? How does ribbon actually come away? thanks, Will

da

it's just double sided adhesive, nothing messy if you get only the flex and not the rest of the housing. Most proximity flex that you buy will come ready just to clip in place..honestly that's all it is, a clip and you should be up and running (or listening!)

da

Right looks like I will have to give this a go! To be honest I don't really understand what to do but I'm sure it will make sense once I've actually got the front assembly off... Big thanks for your help! Will

da

Just to clarify, I remove the induction flex cover by unclipping it, take the old proximity flex off the flex cover which will be stuck by double sided adhesive, then stick the new proximity flex to the cover using new adhesive which will come attatched ready to peel and place on, and then replace the cover? Thanks

da

yep, it's that easy.

da

Mostra 1 altro commento

Aggiungi un commento

Aggiungi la tua risposta

Will Griffith sarà eternamente grato.
Visualizza Statistiche:

Ultime 24 Ore: 0

Ultimi 7 Giorni: 0

Ultimi 30 Giorni: 0

Tutti i Tempi: 1,556