Salta al contenuto principale

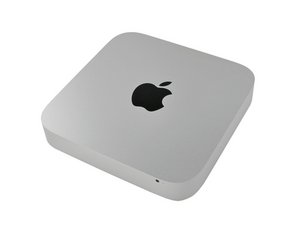
Released on July 21, 2011. Core i5 or Core i7 Processor. Thunderbolt. This unit is also used to run the Mac mini Server configuration.

203 Domande Visualizza tutte

Can't secure wi-fi antenna plate properly

I added second hard drive , using this kit.

Everything works fine, but I'm not able to secure wi-fi antenna plate back, like it was before.

Antenna plate secured by 4 screws, but I can tighten only one of 2 5mm T8 torx screws - remained screw just doesn't fit to the hole. I tried to remove and reinstall antenna plate many times, but things doesn't change - it's impossible to align holes in antenna and in the case exactly

Risposto! Visualizza la risposta Anch'io ho questo problema

Questa è una buona domanda?

Punteggio 4
Aggiungi un commento

11 Risposte

Soluzione Prescelta

I had this same problem and was baffled. Here's my best explanation of the solution:

You'll notice a small groove on the arced edge of the aluminum body of the Mac Mini where it meets the wi-fi plate. The perforated part of the plate rests above/within this groove. I noticed that if you push the plate into place and use a hook tool hooked through a perforation hole in the plate along the edge and pull up, it rests properly. You may need to do this little by little throughout the arc of the plate as you're pushing the plate into place. Eventually it will seat correctly.

Questa risposta è stata utile?

Punteggio 15

2 Commenti:

I had the same problem and Kevin's answer did the trick.

da

I had the same problem too and a small little groove on edge not found on my mac mini but today, I fix this problem with easily trick using bend down the below edge of antenna plate with little force (the edge that black cable attached) then assemble with the edge of aluminum body. It will easily seat on position.

da

Aggiungi un commento

Like Kevin said the problem was the little ridge running along the back of the antenna plate. However, instead of using a hook tool I just bent the lower edge of the gap with my fingers to widen it a little and that did the trick. It must have gotten bent when I removed it.

Questa risposta è stata utile?

Punteggio 4
Aggiungi un commento

For me, the plate just snapped back into place. Wasn't easy but with some delicate maneuvering the perforated edge eventually snapped back into it's original position.

Observe how the antenna plate fits as it is removed, remember not to bend or tweak the plate and there should be little trouble although the process is not like the guide by any means.

Ok the other design change in the Late 2012 model is the antenna connector is hidden under the case, so unlike as indicated in step 10 you can not see it let alone remove it until the Logic Board has been eased out an inch, so just lay the antenna plate upside down on top of the case while the rest of the screws are removed and the logic board is eased out some which will provide access to the connector. same deal on the return.

Questa risposta è stata utile?

Punteggio 2
Aggiungi un commento

Had the same problem with a late 2012 Mac Mini who's grill would just not line up with the screw holes. I had read another comment on the ifixit instructions for swapping out the hdd suggesting a paperclip to hook through a hole in the grill, but I found that a paperclip was not stiff and sturdy enough as a lever. What did work for me was using one end of the Mac Mini logic board tool hooked into a hole in the grill, and gently working the grill up and in along the rim it was resting on. The grill moved right into place with an audible snap. Thanks Kevin!

Questa risposta è stata utile?

Punteggio 2
Aggiungi un commento

The tolerances on that grill are amazing. I had the same problem and the same solution works: Pull Up on the Grill - I used tweezers and pulled up seting that grill into the groove. My eyes are not good enough to even see the groove but it must be there as I could not get the second grill dog ear into the impression ( right and left ) until I did this pull up exercise.... And don't be afraid of applying a bit of force to get this thing in place.

My procedure after a dozen failures to get the last screw in ( four screws involved ) Put one of the left or right short T-6 screws in one of the dog ear tabs but do not totally tighten it down. Then screw in both of the long T-6 screws used to attach the HDD/SSD to the grill. Now use the upward pressure to giggle the grill into the slot until the final unscrewed dog ear tab is nicely centered its impression. Stop and 'Jump for Joy' :-) FInally, put in the last T-6 screw and tighten all of the screws.

And one more think: thank and curse Apple for such amazing precision.

Questa risposta è stata utile?

Punteggio 2

1 Commento:

In addition, I used a pair of needle nose pliers and gently pulled up on the grill in several places, by putting the jaws into 2 adjacent holes, and 'click' there it went :)

da

Aggiungi un commento

REATTACHING grate - The tiny perforations on the grate rest ON TOP of the lip of the case, while the remainder of the grate slides UNDER the lip. It is very hard to see - I used a magnifying glass.

To get it into place, I used a trick mentioned by "al dente" in the comments from the replacement writeup (the same as Kevin's, above):

Create a tiny hook on the end of a paperclip. Moving along the edge of the grate, lift a perforation with the hook to help it slip into place. Keep moving along the edge until entire grate is shifted into place.

Questa risposta è stata utile?

Punteggio 1
Aggiungi un commento

If it doesn't fit

you could have the wrong screws. The correct diameter and length are required. If you can not align the plate with the case you're replacing it incorrectly. You must first reconnect the antenna to the board, then tilting the plate from the front position it. Check that other parts are not blocking the three holes. Try inserting a toothpick into the holes to check for obstructions before placing the plate. You may have stripped the screw holes, in that case a drop of lock-tight on the screws may fill the gaps enough to secure (you're not holding Elephants), you just want to secure the plate so that it won't short out. The bottom will help keep it in place once you get it on.

If this answer was helpful please remember to return an mark it Accepted.

Questa risposta è stata utile?

Punteggio 0
Aggiungi un commento

Done this a few times. Turn the whole grid a bit anti-clockwise, then try to get the right-had side (furthest away from cable connector) seated in properly. While still applying pressure, rotate the grid slowly clockwise, ensuring the groove & ridge mate. As you rotate, the holes will line-up and seat flush. The problem area is the center part near the black circular antenna pod. Very thin groove in grid that needs to seat in very narrow ridge in aluminium body.

Questa risposta è stata utile?

Punteggio 0
Aggiungi un commento

I found this step so difficult. I have only three screws in but it works thus far

Questa risposta è stata utile?

Punteggio 0
Aggiungi un commento

OK... I had this problem with my 2012 Mini 6,2. I fixed it "my way."

First of all, there's no "groove" for the curved part of the antenna to fit into. It fits UNDER the lip of the main case. You can see no groove would work, as part of the curved antenna edge is clamped to hold the antenna wire. It is too wide to fit a groove.

Another problem is that the little screws only have about two threads to hold those things. I'll bet Apple saved about a tenth of a cent per unit by saving on screw length. I guess for Steve Jobs, "length mattered."

First, I removed the antenna and its wire. I thought I'd broken the wire off the connector, so I took that as a warning. Who wants to solder such a small connector?

I used a small leather awl on a multi-blade knife to elongate one hole on the antenna into a slot. I then inserted the antenna as best I could, slightly turned one screw to hold it, then aligned the 2nd, elongated hole and jiggled the antenna until the screw turned. I still had to use a "hook" as described above, to bend and unbend the antenna so its length would be correct.

This still made a 45 minute job take about 2 hours.

Ironic, since I'm doing this so I'll have a 2nd drive to install Linux as a dual-boot. Eventually, OSX is going bye-bye. I'm sick of the bugs, and won't "upgrade" beyond Mtn Lion, to a version that requires me to let the "cloud" suck stuff off my computer! Knowingly, anyway.

Next upgrade will be to an all-Linux, generic PC I can configure, upgrade and work on without feeling like I'm doing an eye transplant on a hummingbird.

Hope this helps someone.

Questa risposta è stata utile?

Punteggio 0
Aggiungi un commento

Hi, I had a similar problem while upgrading my 2012 Mac Mini's hard drive to an SSD. I finally managed to place the plate properly aligned, but now my problem is that the two hex screws will not thread into their holes properly. They can be perfectly screwed on when the plate is removed, but not when it's in place.

Any suggestions?

Questa risposta è stata utile?

Punteggio 0
Aggiungi un commento

Aggiungi la tua risposta

victormikhailov77 sarà eternamente grato.
Visualizza Statistiche:

Ultime 24 Ore: 0

Ultimi 7 Giorni: 4

Ultimi 30 Giorni: 14

Tutti i Tempi: 9,479