Salta al contenuto principale

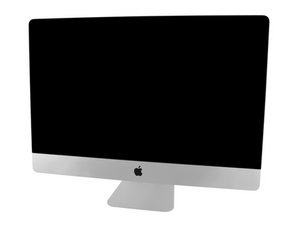
Modelli A1419 / Fine 2012 / Processori 2.9 & 3.2 GHz Core i5 o 3.4 GHz Core i7, ID iMac13,2

330 Domande Visualizza tutte

How to get myself up and running

Hey there!

Recently had a HDD fail on me (it was a Fusion HDD/PCIe Blade combo)

I physically installed the new HDD and am really unsure of why i can't progress..

Booted into recovery mode and tried to restore from time machine back up. My External HDD was recognised and all, but when it got to the step to choose what i would assume to be 'Macintosh HD' to restore to, there was no such option and i couldn't progress.

Have i gone too far?

Are there steps I've missed?

Help please

Risposto! Visualizza la risposta Anch'io ho questo problema

Questa è una buona domanda?

Punteggio 0
Aggiungi un commento

1 Risposta

Soluzione Prescelta

You missed a few steps and just down the wrong path ;-}

Your new drive needs a special cable as its not an 'Apple custom drive'. Here's the cable you'll need: OWC In-line Digital Thermal Sensor for Hard Drive Upgrade for 27" iMacs 2012 and Later without it your system struggle to keep its fan under control as the sensor the system needs is not accessible on your replacement drive. Once you've got in installed your hardware issues should be resolved.

Next, is getting the virgin drive setup using Disk Utility but we've put the cart in front of the horse here as you need to first boot up your system to gain access to this utility. We'll need to have access to the internet so you can boot your system up using Apples macOS Recovery services. The older version allowed you to select from the recovery partition on your drive (in this case not present yet) and Internet recovery. The newer one automatically choices depending on what it found.

Next, we need to prep the HDD with a single partition Disk Utility for macOS Sierra: Partition a physical disk using Disk Utility and format the partition. Once this is done we can move forward on installing the MacOS make sure you install the same one you are currently using. This will in turn will finish getting the drive ready for the next step.

Up until this point we've focus on the HDD but we still have the SSD to rejoin with the HDD to re-establish the Fusion Drive set here's that step: How to fix a split Fusion Drive.

After that is done I would recommend you next go to the Apps store and make sure your system has all the needed updates for that release before restoring your TimeMachine backup.

Questa risposta è stata utile?

Punteggio 2

8 Commenti:

Hey Dan,

Thanks for the speedy reply!

I have indeed installed my new HDD with the aftermarket OWC Thermal Sensor.

I'll go through these instructions! if i hit any snags, i'll hit you up!

Thanks for your time, really appreciate it!

da

Hey Dan,

So on the second last step when attempting to pair my 2 drives again for the Fusion setup as per the 'How to split Fusion drive' instructional link you provided,

I get this message:

'Started CoreStorage operation

Error: -69720: There is not enough free space in the Core Storage Logical Volume Group for this operation'

Now after this, last step says to Quit Terminal and reinstall the OSX etc. etc.

But i feel this might not be appropriate as that error message makes me quite uneasy about whether the pairing of the two drives was even successful..

help please!

da

Let's try this: How to split up a Fusion Drive. I'm wondering if your old drive is still linked to the SSD which is why you got the error. See if we tell the SSD it needs to be independent first and then run the command again to rejoin the drives.

da

Hey Dan,

I tried telling the SDD to be independent again via the instructions in latest link you sent me, I am still receiving the same error message as previously, this is very peculiar!

da

Have you tried reformatting it yet? Remove the partition then create it again just leave it as GUID Journaled and try again.

da

Mostra altri 3 commenti

Aggiungi un commento

Aggiungi la tua risposta

michael mai sarà eternamente grato.
Visualizza Statistiche:

Ultime 24 Ore: 0

Ultimi 7 Giorni: 0

Ultimi 30 Giorni: 0

Tutti i Tempi: 80