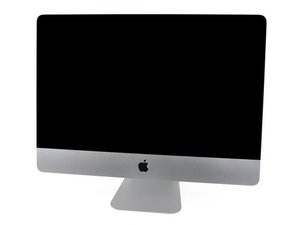
This sounds to me like a failed backlight board, Apple part #661-5537 because of the working external monitor. Check the diagnostic LEDs to the right go the RAM slots.
LED Functions
LED #1
• Indicates that trickle voltage from power supply has been detected by logic board. This LED will remain ON whenever the iMac is connected to a working AC power source. The LED will remain on even when computer has been shut down or put to sleep. The LED will turn off only if AC power source is disconnected or power supply is faulty.
LED #2
• Indicates that logic board has detected power from power supply when computer is turned on. This LED will be ON when computer is turned on and power supply and voltage regulators are working correctly.
LED #3
• Indicates that computer and video card are communicating. This LED will be ON when computer is communicating properly with video card. If LEDs 1 and 2 are ON and you heard the startup sound, but LED 3 is OFF, then video card might be installed incorrectly or need replacement. Note: LED #3 is not present on models with integrated graphics.
LED #4
• Indicates that computer and LCD panel are communicating. This LED will be ON when computer is turned on and video signal is being generated. If LED 4 is ON and there is no image on display, then LCD panel, LED backlight board, or cables between might be installed incorrectly or need replacement.
Here is what APple suggest:"
Symtoms:"
No Power, Dead Unit
• No power
• No fan spin
• No startup chime
• No image on external display
• No hard drive or optical drive activity
Quick check:
1. Verify power source.
2. Verify power cable.
3. Listen closely for signs of activity from system including: rotating fans, hard drive or optical drive activity, startup chime, etc.
Deep Dive
1. Power ON system. Verify if there is any indication that the system has powered up (fan rotation, hard drive or optical drive noise, backlight turns on).
Yes The symptom is powering up. Go to Won’t Start Up symptom flow.
No Go to step 2.
2. Locate diagnostic LEDs in bottom case vents. Plug AC cord into system. Verify if
diagnostic LED #1 turns ON.
You may alternately check for presence of a 12V DC signal between pin 4 and pin 1 of
logic board.
Yes Standby power voltage being supplied by power supply.
Go to step 3.
No Replace power supply
3. Press power button while monitoring diagnostic LEDs.
Verify if LED #2 turns ON and remain ON after pressing the power button. You may alternately check for a power request signal between pin 12 and pin 1 of logic board.
Yes Power supply functioning and logic board detects supply voltages. Go to Won’t Start Up symptom flow.
No Go to step 4.
4. Disconnect AC cable then remove power supply and carefully inspect connectors
between AC inlet and power supply, then DC connectors and cables between power supply and logic board, for damage or poor connections.
Yes Replace damaged part.
No Go to step 5.
5. Inspect power button and verify if it is properly connected to the logic board.
Yes Go to step 6.
No Reconnect power button.
6. Disconnect power button from logic board. Inspect cable and connector for damage. Verify continuity between the two pins of power button when it is pressed.
Yes Power button is functioning correctly. Reconnect power button to logic board and
go to step 7.
No Power button faulty. Replace rear housing (which includes power button).
7. Press power button and Verify if system turns ON. You may alternately check for presence of a 12V DC signal between pin 11 and pin 1 of logic board when power button is pressed.
Yes Power supply functioning. If system still won’t boot, go to Won’t Start Up symptom
flow.
No Replace DC power cable.
Go to step 8.
8. Press power button and verify if system turns ON.
Yes Issue solved with replaced DC power cable.
No Replace power supply.
Go to step 9.
9. Press power button and verify if system turns ON.
Yes Issue solved with replaced power supply.
No Reinstall power supply and replace logic board
Questa risposta è stata utile?
Votato
Annulla
Punteggio
3
Annulla
Scorri questo thread per trovare il posto appropriato per questo commento. Quindi, fai clic su "Allega commento a questo post" per spostarlo.

 1
1 
 1,1k
1,1k  2,6k
2,6k 