
Getting the screen off your tightly sealed phone or tablet feels like sweet victory. So does replacing the battery, swapping the display, or fixing a loose connection inside. You’re a mad tinkerer, living on the edge, getting things done…
Then it comes time to stick your screen and other stuff back in. If your device is popular enough—like the Google Pixel XL, the iPhone 7, or the Moto X Pure—we make a one-piece adhesive kit for it and your task is dead simple. If you’re fixing a phone without pre-cut adhesive, it’s up to you, a square of clear non-expanding adhesive tape, and whatever sharp instruments and rulers you think you can manage.
Until now, that is. We recognize that measuring and cutting stuff is hard, and making neat corners is even harder, and so we present to you: The Precut Adhesive Card!

That is not the most exciting name to put after a drum roll. But if you plan to take the glued-on front or back off a device and put it back on after your repair, you’re going to appreciate this.

This card is made of genuine Tesa 61395 Tape, the kind known and sought after by repair experts. It is die-cut into easily removed segments of different widths. The card has widths of 1 mm, 2 mm, 3 mm, and 5 mm for securing the long sides of your device—that covers most device frames, as well as frames with multiple widths. There are also rectangles for putting individual components back into place.
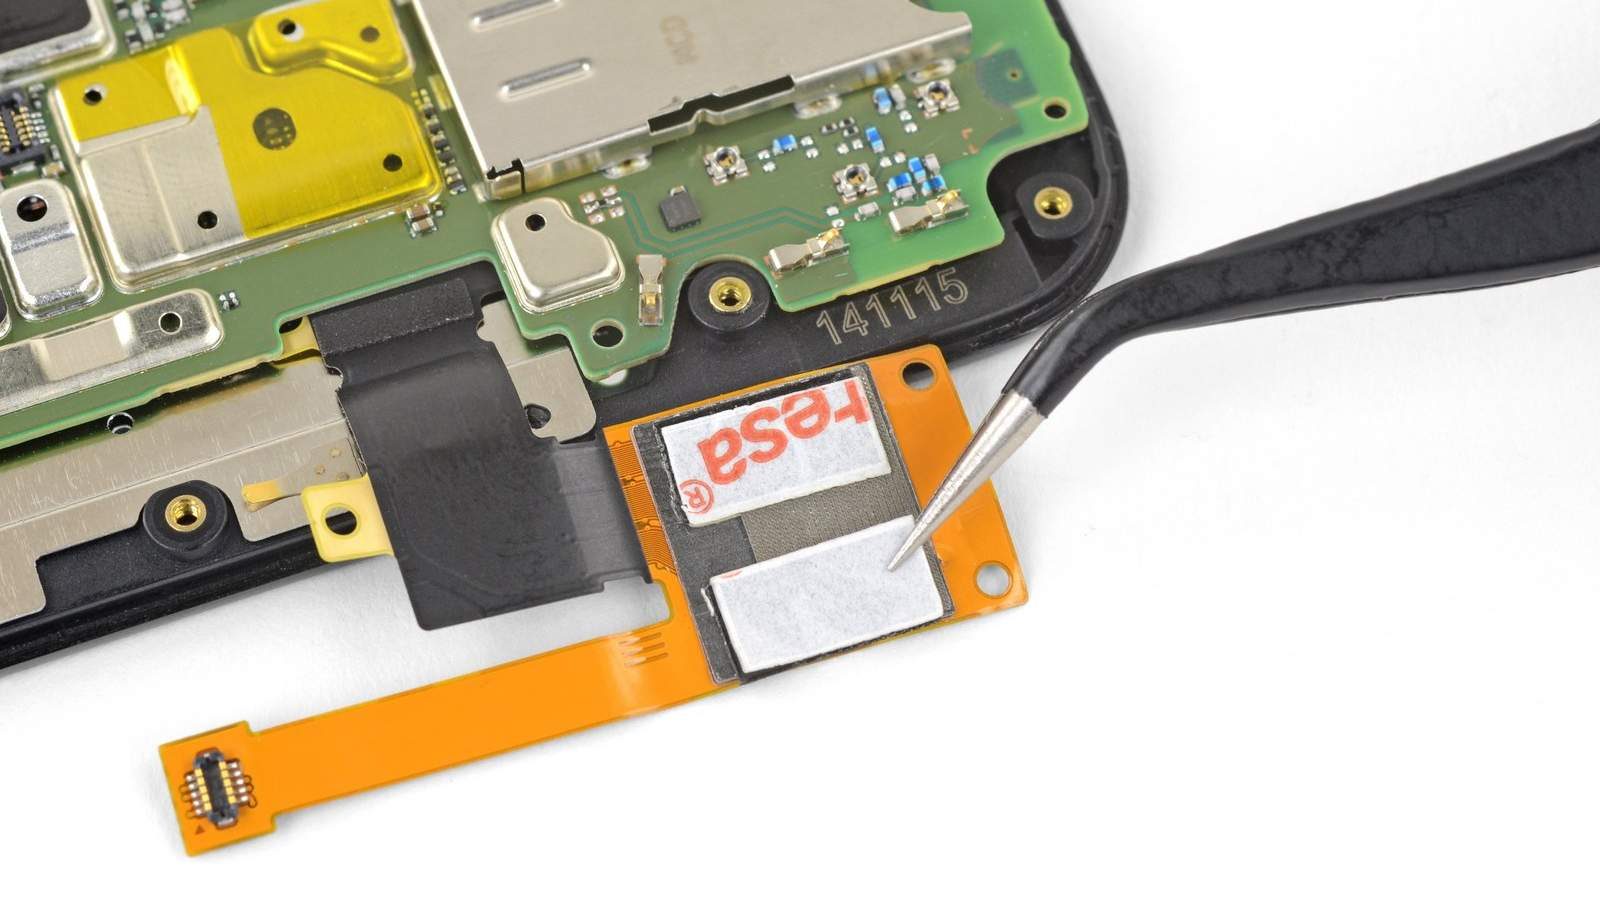
Most helpfully, there are 2 mm corners cut to 90 degrees, with a selection of different radius lengths. Rounded corners are the default design in gadgets nowadays. While they are friendly to hands and look nice, they are not easy to cover in a single unbroken layer with clear tape.

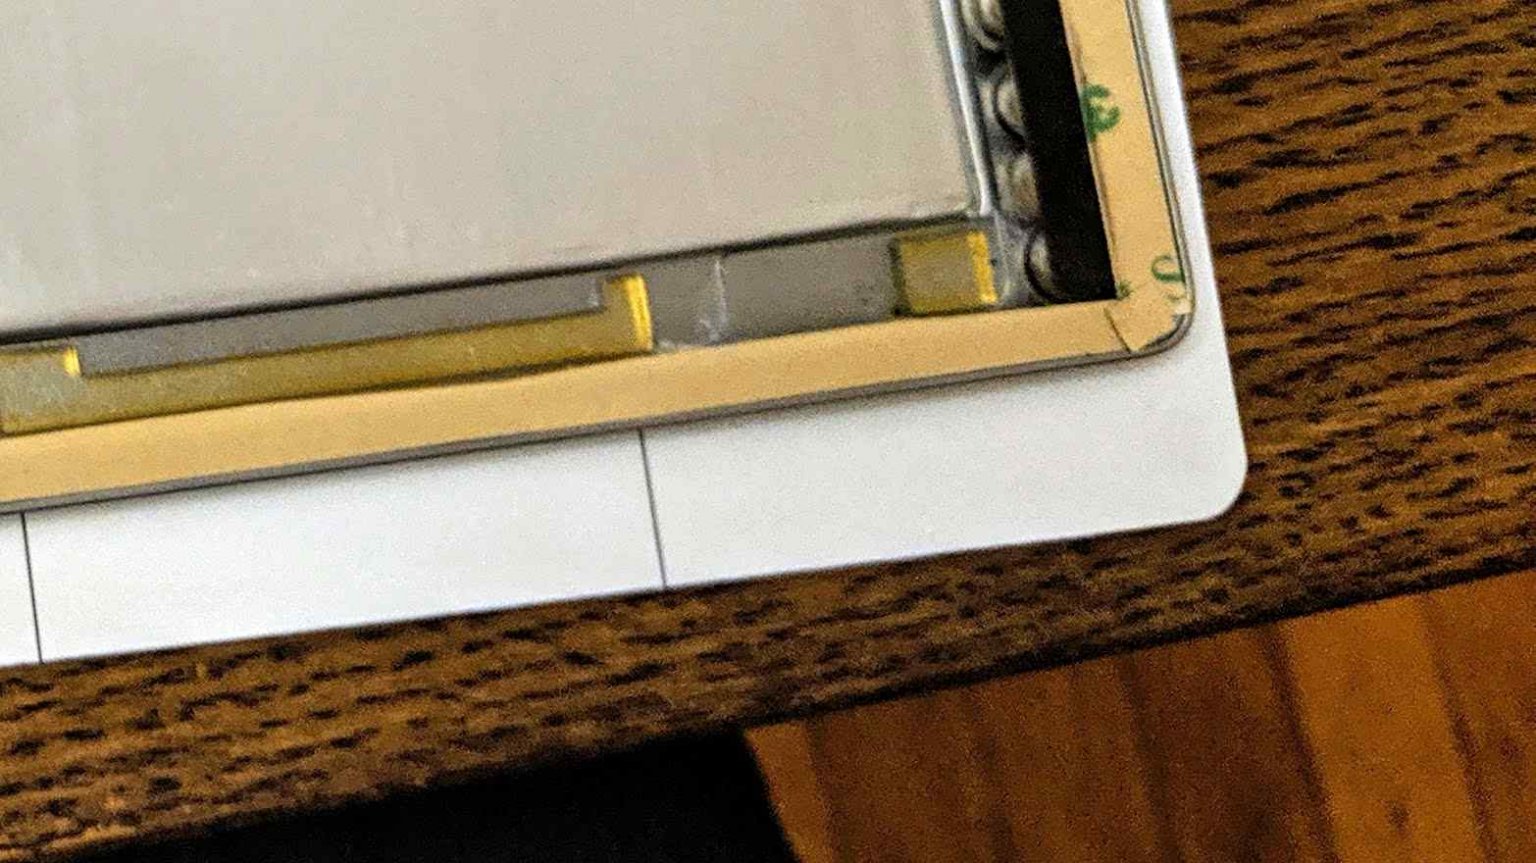
I can testify to this because I recently replaced the screen on a Google Pixel C tablet. I had my own square of uncut adhesive, a ruler, and my large, dumb hands. In some corners, I just left the farthest bit of the corner without adhesive. On another corner, I ran two strips of adhesive over one another to get more coverage. In the stupidest corner, I tried applying a small scrap of leftover adhesive to the spot I couldn’t quite cover.
Spoiler: every time I use this tablet now, I run my finger around that corner and feel how the glass sticks up slightly higher than the bezel. It’s a few millimeters of defeat in an otherwise inspiring bit of triumph.
You may be smarter than me, or have more patience, or simply know how to use a protractor, pencil, and scalpel to better effect. But may I remind you: we have now done this for you, on this card, which you can buy for a remarkably small sum. It’s a great add-on to the parts and tools you need to fix your device—in fact, we already include pre-cut tape cards in many of our Android fix kits.
Using your trusty iFixit ESD-safe tweezers, you can elegantly remove the strips, corners, and squares from this card and lay them on your device’s frame. Just don’t forget to scrub off the old adhesive first.


0 Commenti