
Hard drives fail. It’s a fact of life. When moving parts inside the drive wear out, you’ll hear the signature “death whine” of a failed bearing, or the clatter of a dying drive head. Even if your hard drive is happily purring along, hard drive prices have fallen enough that it might be time to upgrade. New 320 and 500 GB drives are readily available for the MacBook Pro, but there’s a few things you should know prior to installing one in your computer.

Whether or not things take a turn for the worse, we can show you how to replace your drive with something newer, more robust, faster, and with higher capacity. However, we cannot recover your lost data. Backups are your friend—nobody but you can save your complete and unabridged collection of Lost episodes.
Apple released three major versions of the MacBook Pro prior to the current Unibody design. We have written detailed information on each model and how to differentiate between them: Core Duo, Core 2 Duo Model A1211, and Core 2 Duo Models A1226 & A1260. Each of these has slight internal differences that impact the way you disassemble them. We took photos of a Penryn (Model A1260) for this article, but the general approach applies to all of Apple’s older MacBook Pros.
Safety comes first. Remove all power sources for this procedure, including the battery. Apple uses sliding switches on these machines rather than the coin-operated MacBook battery latch, which is fortunate, because you’re probably all out of coin from upgrading to the higher-end Pro model. However, the Pro’s dual latches do not make battery removal easy for one-armed people.
Removing the battery exposes the RAM shield, which is held in place by three Phillips screws. This is a great time to “check under the hood” and possibly upgrade the RAM while you’re at it. MacBook Pros come with only 1 or 2 GB RAM standard. Depending on your model, you can easily upgrade to 2 GB (Core Duo), 3 GB (Model A1211), or 6 GB (Models A1226 and A1260).

You’ll need to remove 18 screws to open the top case: four on each side, two on the back, and eight on the bottom case. The screws look quite similar to one another, but will not fit correctly if inserted into the wrong hole. Try printing out the handy FixMat to keep track of all the screws. Alternatively, egg cartons or ice cube trays can also be useful for this purpose.

Once you’ve removed the screws, you can carefully pull up the upper case. The case still has a cable that attaches the keyboard to the logic board, so it’s not a wise idea to pull it off quickly.

A spudger is a flat plastic prying tool that can be very useful under the right circumstances. Taking the trackpad/ribbon cable off the logic board is one such situation. The spudger’s flat tip—not unlike a flat-blade screwdriver, but with less destructive potential—can squeeze itself in-between the board and male connector. A gentle twist of the spudger will separate the male connector from the socket without harming anything inside the computer. Make sure that the yellow tape is peeled back before removing the ribbon cable.

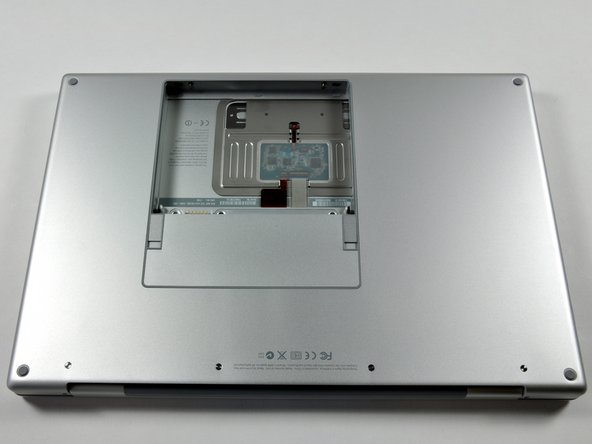
And just like that, the upper case is off and you have access to the logic board, optical drive, fans, speakers, and most importantly, the hard drive. The drive is cleverly held in place by a screwed-in retaining bracket on the right side. Removing two Torx screws (Apple used Phillips screws for the bracket in some models) releases the bracket, allowing the drive to slide out of the rubber bumpers on the left side.

Once the drive is out, the hard drive cable needs to be detached from the drive. The cable has a somewhat flimsy backing to it, so it’s a good idea to hold it gently and wiggle it side-to-side while detaching. The other side of the cable is still connected to the computer via two small connectors. Don’t yank the cable away from the rest of the computer, as that will undoubtedly break something important. Not wake-up-the-President-of-the-United-States important, but definitely spend-a-lot-more-money-trying-to-fix-the-laptop important.

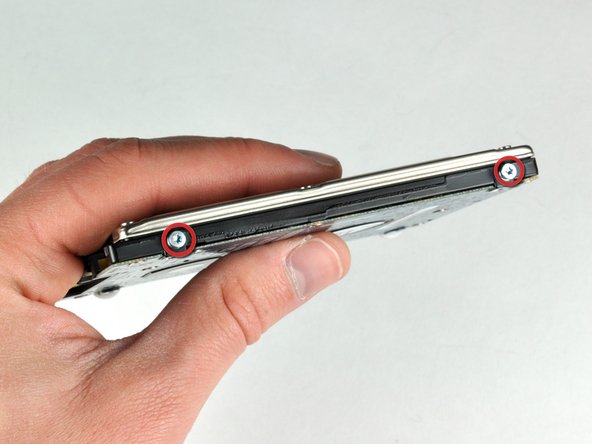
Four Torx screws hold the drive in place when it’s installed in the laptop. The silver T6 Torx screws slide out of the rubber bumpers on the left side, while the right-side T6 Torx screws still have the bumpers attached. The four screws need to be moved from the old drive to the new one so it will fit securely into place.
As with any repair job, disassembly is only half the battle. Thankfully, all you have to do is follow the disassembly instructions backwards to completely reassemble the MacBook Pro once the new drive is mounted.
MacBook Pro 15" Core 2 Duo Models A1226 and A1260 Hard Drive Replacement
You can install hard drives up to 9.5mm thick.

Power it up to make sure everything is connected properly. But powering on the machine isn’t the end of your journey. The new drive has no operating system or data on it. You have a couple of options, depending on the state of the old drive. You can clone the old one (if it still works) by installing it into a FireWire enclosure and using Disk Utility to clone. Once you’re done, you can use the enclosure and old drive as a Time Machine backup, in case the new drive ever fails — or as external storage. The other option is to start from scratch with a fresh install from a Mac OS X install disk; this is a cleaner but more time-consuming process. We offer Leopard install instructions on how to perform either procedure, so the choice is up to you. Just make sure the partition is set to the Intel-native “GUID Partition Scheme,” otherwise you may encounter some very interesting problems.
People who’ve had drives fail know how terrible it can be to lose all your data. Do yourself a favor, and make sure you have current backups of everything. Mounting your old drive in an external enclosure after your MacBook Pro hard drive upgrade is a simple and inexpensive strategy.


0 Commenti