Introduzione
Tripped over your power cord? Hey, At least you don't have to replace the entire logic board.
Cosa ti serve
-
-
Lay your iBook upside down on a flat surface.
-
Use a coin to rotate the battery locking screw 90 degrees clockwise.
-
Lift the battery out of the computer.
-
-
-
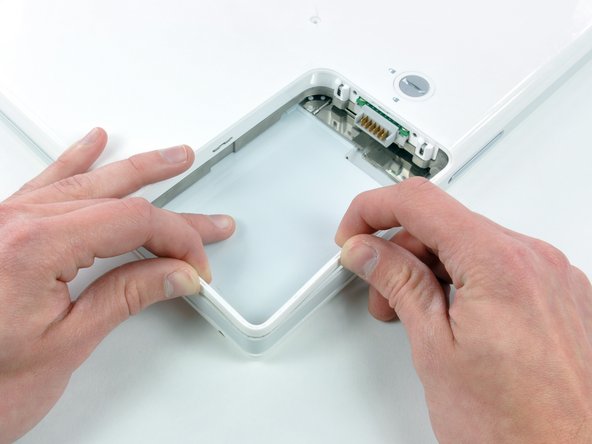
Use a spudger or small flathead screwdriver to remove the three rubber feet from the lower case.
-
-
-
-
Remove the following 4 screws from the bottom shield:
-
Two 3 mm Phillips.
-
Two 7.5 mm Phillips.
-
-
-
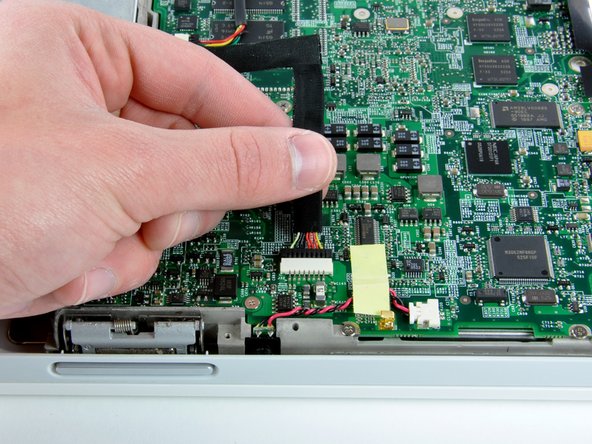
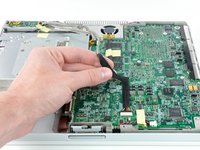
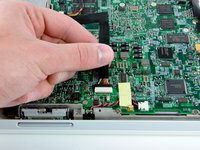
Remove the two Phillips screws securing the DC-In board, removing tape as necessary.
-


To reassemble your device, follow these instructions in reverse order.
Annulla: non ho completato questa guida.
Altre 66 persone hanno completato questa guida.
Documenti Allegati

2Commenti sulla guida
A HUGE thank you! I took my old iBook G4 into the Apple store a couple years ago to ask about getting my computer fixed - the pin/needle to the charger broke off inside and I could not remove it - and they told me I could try a toothpick and superglue and try to remove the pin, otherwise they couldn't fix it. But after researching for a few hours and because of this website, I was able to purchase a new DC-in Board AND replace it myself! I'm no handy-woman whatsoever and this was very easy. A little intimidating as soon as you pull of the bottom shield, but actually replacing the DC-in Board was definitely the easiest part. Thank you so much for your step by step manual with photos. I can not thank you enough.
I did this procedure twice on 9 June 2019; to remove a working DC-In Card from a “hanger queen” 12”iBook, and install it into an operational G4 iBook with a bad DC-In Card. I lack mechanical expertise as well as strength in my hands, but wanted to try doing this because having someone else fix my iBook would cost 3 or 4 times as much as the iBook is currently worth! Anyway, after researching the take-apart steps here and on YouTube, I first bought a toolset and spudgers from my local Micro Center before attempting the DC-In Card removal and replacement. My “hangar queen” iBook was easier to take apart since it had been worked on previously before being declared “dead.” I really had trouble separating the back cover from the working iBook because it had not been opened for a very long time. I kept at it, and was finally able to separate the back cover, remove the metal interior cover, install the “good” DC-in Card back into my working iBook, and put it back together. My iBook is now charging as it should.