Salta al contenuto principale

Replacing Nokia Classic 2600c-2b Faceplate

Cosa ti serve

  1. Replacing Nokia Classic 2600c-2b Faceplate, Faceplate: passo 1, immagine 1 di 2 Replacing Nokia Classic 2600c-2b Faceplate, Faceplate: passo 1, immagine 2 di 2
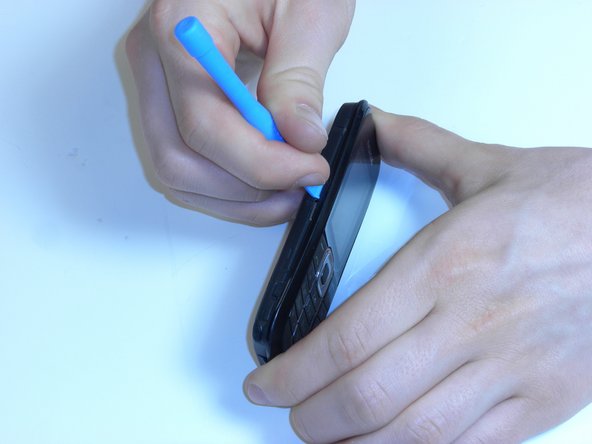
    • Press down on the button located at the bottom of the phone, using the center ridge as a guide.

    • Pull the phone apart from the bottom, keeping the button pressed down.

    • CAUTION! The plastic opening tool may be used to gain leverage. Some force is required to open.

  2. Replacing Nokia Classic 2600c-2b Faceplate: passo 2, immagine 1 di 1
    • Remove the back cover to expose the battery.

  3. Replacing Nokia Classic 2600c-2b Faceplate: passo 3, immagine 1 di 2 Replacing Nokia Classic 2600c-2b Faceplate: passo 3, immagine 2 di 2
    • Place a finger or plastic opening tool in the gap between the battery and the phone.

    • Gently lift the battery out.

  4. Replacing Nokia Classic 2600c-2b Faceplate: passo 4, immagine 1 di 2 Replacing Nokia Classic 2600c-2b Faceplate: passo 4, immagine 2 di 2
    • Locate the plastic latches on the left and right sides of the phone.

    • Insert the plastic opening tool or a fingernail into each latch and pry them open individually.

    • CAUTION! Some force is required.

  5. Replacing Nokia Classic 2600c-2b Faceplate: passo 5, immagine 1 di 1
    • Remove the faceplate with the number pad attached.

  6. Replacing Nokia Classic 2600c-2b Faceplate: passo 6, immagine 1 di 1
    • Turn the faceplate so the number pad faces downward.

    • Lift the number pad out of the faceplate.

    • Apply new faceplate.

    • Follow the instructions in reverse order to reassemble the phone.

Conclusione

To reassemble your device, follow these instructions in reverse order.

Ian VanZandt

Membro da: 02/14/12

654 Reputazione

5 Guide realizzate

Team

0 Commenti

Aggiungi Commento

Visualizza Statistiche:

Ultime 24 Ore: 0

Ultimi 7 Giorni: 0

Ultimi 30 Giorni: 1

Tutti i Tempi: 384