Salta al contenuto principale

Removing Dell Inspiron 1150 Optical drive

Cosa ti serve

  1. Removing Dell Inspiron 1150 Optical drive, Removing Dell Inspiron 1150 Battery: passo 1, immagine 1 di 3 Removing Dell Inspiron 1150 Optical drive, Removing Dell Inspiron 1150 Battery: passo 1, immagine 2 di 3 Removing Dell Inspiron 1150 Optical drive, Removing Dell Inspiron 1150 Battery: passo 1, immagine 3 di 3
    • Place the laptop upside down on a clean, flat surface.

    • Locate the battery release button with the padlock symbol above it.

    • Slide the battery release button towards the padlock symbol and hold it there. Note that the button is spring loaded and will return if released.

    • The battery is now released from the battery compartment.

    • Gently remove the battery from the side of the laptop.

  2. Removing Dell Inspiron 1150 Optical drive, Removing Dell Inspiron 1150 Palm Rest: passo 2, immagine 1 di 2 Removing Dell Inspiron 1150 Optical drive, Removing Dell Inspiron 1150 Palm Rest: passo 2, immagine 2 di 2
    • Position the computer upside down.

    • Remove the twelve M2.5 x 8-mm screws.

    • Remove the M2.5 x 4-mm screw from the battery bay

  3. Removing Dell Inspiron 1150 Optical drive: passo 3, immagine 1 di 2 Removing Dell Inspiron 1150 Optical drive: passo 3, immagine 2 di 2
    • Position the computer keyboard side up.

    • Remove the two M2.5 x 5-mm screws from the top of the palm rest.

    • Disconnect the mouse pad cable from the main board.

    • Separate the palm rest from the base by lifting its inside edge. Start at the back center.

    • Be careful to avoid damaging the palm rest while separating it from the base.

  4. Removing Dell Inspiron 1150 Optical drive, Removing Dell Inspiron 1150 Optical drive: passo 4, immagine 1 di 3 Removing Dell Inspiron 1150 Optical drive, Removing Dell Inspiron 1150 Optical drive: passo 4, immagine 2 di 3 Removing Dell Inspiron 1150 Optical drive, Removing Dell Inspiron 1150 Optical drive: passo 4, immagine 3 di 3
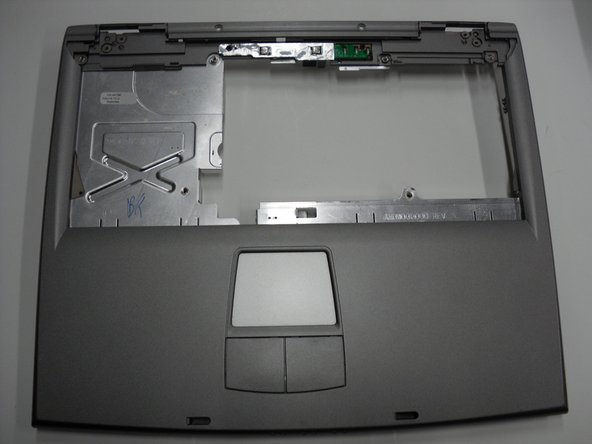
    • Locate the optical disk drive on the bottom left hand side of the laptop.

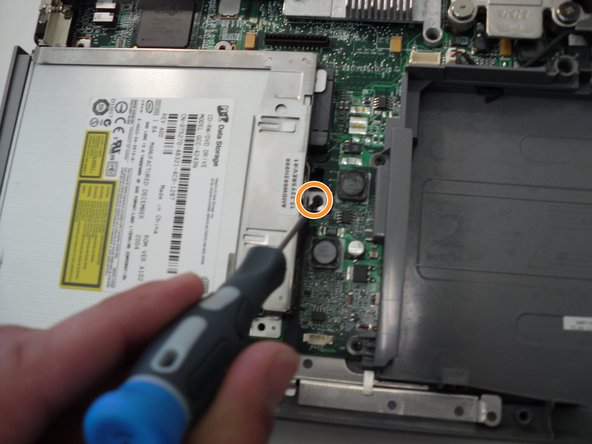
    • Remove the single screw holding the optical disk drive in the chassis.

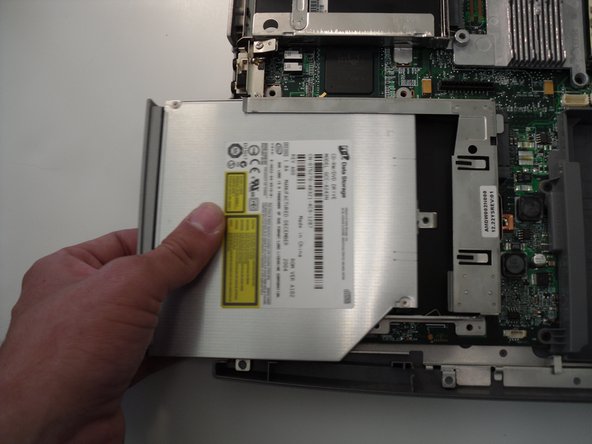
    • Remove the optical disk drive by gently pulling on the outer edge.

Conclusione

To reassemble your device, follow these instructions in reverse order.

Daniel

Membro da: 04/25/10

87 Reputazione

2 Guide realizzate

Team

Cal Poly, Team 16-2, Maness Spring 2010 Membro di Cal Poly, Team 16-2, Maness Spring 2010

CPSU-MANESS-S10S16G2

4 Membri

9 Guide realizzate

Un commento

This guide is incorrect, please see http://support.dell.com/support/edocs/sy... for a version that will actually take the promised two minutes.

Nick - Replica

Aggiungi Commento

Visualizza Statistiche:

Ultime 24 Ore: 0

Ultimi 7 Giorni: 0

Ultimi 30 Giorni: 1

Tutti i Tempi: 5,869