Introduzione
Removing the microphones will allow you to replace them or fix up the connections if your phone is not picking up sound.
Cosa ti serve
-
-
Flip the device over. Using a Phillips #00 screwdriver, remove the black 10mm screw on each three legs of the phone.
-
Using a Phillips #00 screwdriver, remove the two silver 7mm screws as pictured.
-
-
-
-
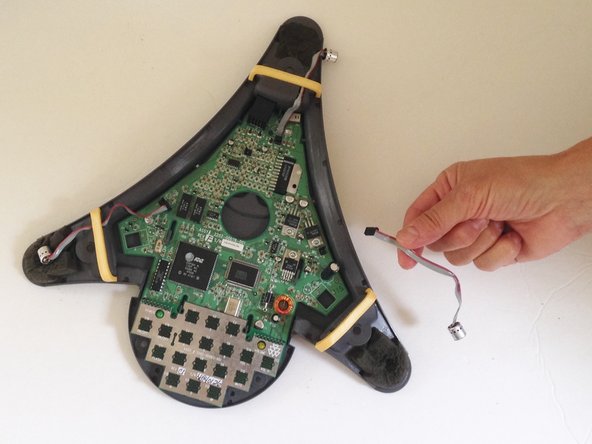
Gently remove the yellow padding that covers the red and gray microphone wire on each phone leg.
-


To reassemble your device, follow these instructions in reverse order.
To reassemble your device, follow these instructions in reverse order.
Annulla: non ho completato questa guida.
Un'altra persona ha completato questa guida.
Team

USF Sarasota-Manatee, Team 1-3, Stewart Fall 2014 Membro di USF Sarasota-Manatee, Team 1-3, Stewart Fall 2014
USFSM-STEWART-F14S1G3
3 Membri
14 Guide realizzate
2 Commenti
Does anyone know where to purchase replacement microphones for Soundstation 100's? And if replacing mic's does not resolve the problem, are there any other solutions to address the issue of one's voice starting to drop out after about 10 minutes into a call? Thx
I encountered an older version. Padding pieces are black. Microphones soldered on board with black & red wires, no plastic tab to disconnect
Putting the thing back together proved to be a challenge : the little display came apart and started shifting all over. Getting that one aligned inside while closing the thing with my fat fingers… . Nasty.