Salta al contenuto principale

Piaggio X9 500 Rear Wheel Removal

Cosa ti serve

  1. Piaggio X9 500 Rear Wheel Removal, Disassembling Piaggio X9 500 Exhaust Removal: passo 1, immagine 1 di 2 Piaggio X9 500 Rear Wheel Removal, Disassembling Piaggio X9 500 Exhaust Removal: passo 1, immagine 2 di 2
    • Loosen the exhaust strap:

    • Use an 12mm wrench to loosen the exhaust band lock nut.

    • A 6mm Allen key is required to unscrew the bolt at the bottom of the band.

    • The Allen bolt is screwed into a loose nut in a cavity cast into the swing arm. It may fall out or become twisted. A magnet is helpful in retrieving it to re-align it for reassembly.

    • Once the bottom of the strap is loose, you can push it upward and slide the retaining pin that secures the top of the strap out to release it.

  2. Piaggio X9 500 Rear Wheel Removal: passo 2, immagine 1 di 1
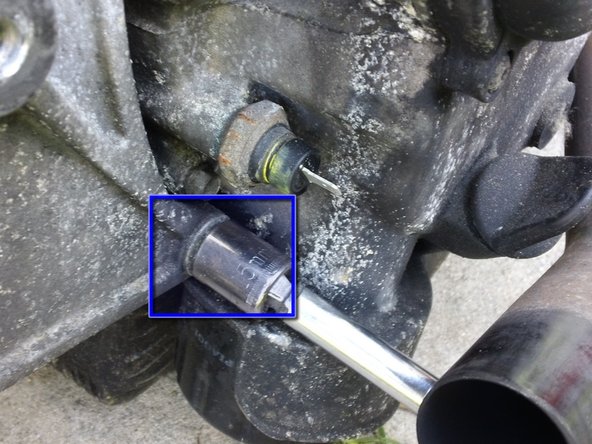
    • Use a 13mm socket to loosen the clamp between the muffler and header pipe.

    • You do not need to remove the bolt, but you want to loosen the clamp enough to allow the exhaust to be removed without damaging the gasket between the muffler and header pipe.

  3. Piaggio X9 500 Rear Wheel Removal: passo 3, immagine 1 di 1
    • A Torx T40 driver is required to remove the final bolt securing the exhaust.

    • The Exhaust assembly is now free. Pull and wiggle the muffler back (taking care not to damage your exhaust joint gasket) until the muffler comes free from the header pipe.

  4. Piaggio X9 500 Rear Wheel Removal, Disassembling Piaggio X9 500 Swingarm: passo 4, immagine 1 di 2 Piaggio X9 500 Rear Wheel Removal, Disassembling Piaggio X9 500 Swingarm: passo 4, immagine 2 di 2
    • Remove the 15mm nut securing the upper front corner of the swingarm.

    • Remove the 15mm nut securing the lower front corner of the swing arm.

    • Access to this nut is limited by the header pipe. A swivel extension maybe required to reach it.

  5. Piaggio X9 500 Rear Wheel Removal: passo 5, immagine 1 di 1
    • Straighten and remove the cotter pin securing the rear hub nut cover.

    • Don't worry about damaging the cotter pin. It is intended to be replaced each time it is removed.

    • Remove the cover from the rear hub nut.

  6. Piaggio X9 500 Rear Wheel Removal: passo 6, immagine 1 di 2 Piaggio X9 500 Rear Wheel Removal: passo 6, immagine 2 di 2
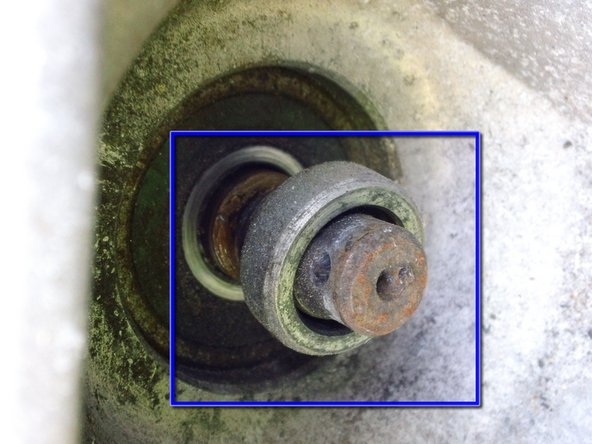
    • Remove the 24mm rear hub nut. Having a friend hold the rear brake handle will help break it loose. You can also use an impact wrench to remove it if you cannot get enough torque with a hand ratchet.

    • There is a spacer behind the rear hub nut. It will slide off with little or no force.

    • There is a spacer behind the rear hub nut. It will slide off with little or no force.

  7. Piaggio X9 500 Rear Wheel Removal: passo 7, immagine 1 di 1
    • Grip the swingarm and pull it free of the 2 15mm studs and rear axle. You will now have access to the rear wheel.

    • and dont forget to remove 2 allen screws from shocks absorber and tilt it to remove swingers and tyre

  8. Piaggio X9 500 Rear Wheel Removal, Piaggio X9 500 Rear Wheel Removal: passo 8, immagine 1 di 1
    • Remove the five 10mm bolts securing the rear wheel.

    • Pull the wheel towards you, sliding it free of the rear axle.

Conclusione

To reassemble your device, follow these instructions in reverse order.

Altre 5 persone hanno completato questa guida.

Eric Essen

Membro da: 06/04/10

17.792 Reputazione

8 Guide realizzate

Team

iFixit Membro di iFixit

Staff

135 Membri

16.732 Guide realizzate

Un commento

This is perhaps the best written diy that i have come across. As someone who has penned procedures for many items I take my hat off to you. Keep up the quality work. I would add to soak everything down with a “nutbuster spray and let soak before beginning. Sometimes things are a little too easily broken, especially cast items.

jhrichaiii@aol.com

Joseph Richardson - Replica

Aggiungi Commento

Visualizza Statistiche:

Ultime 24 Ore: 1

Ultimi 7 Giorni: 7

Ultimi 30 Giorni: 36

Tutti i Tempi: 9,084