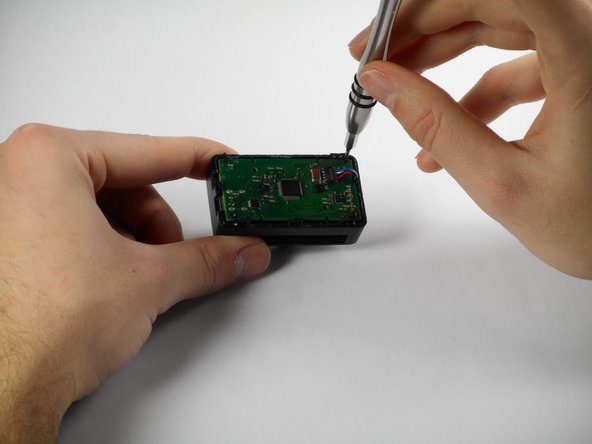
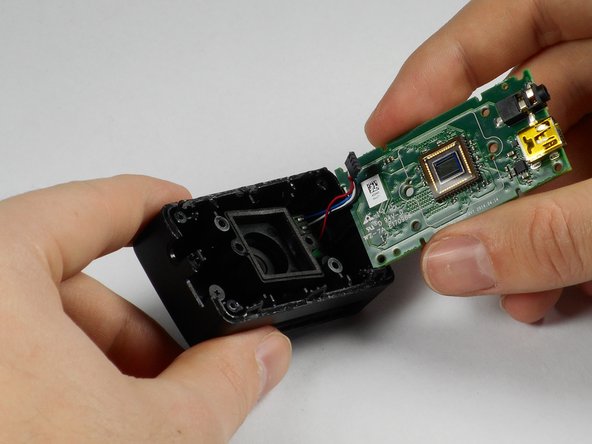
Salta al contenuto principale

Oculus Rift Development Kit 2 Camera Motherboard Replacement

Cosa ti serve

  1. Oculus Rift Development Kit 2 Camera Motherboard Replacement, Camera Motherboard: passo 1, immagine 1 di 2 Oculus Rift Development Kit 2 Camera Motherboard Replacement, Camera Motherboard: passo 1, immagine 2 di 2
    • Remove the filter from the camera as shown.

  2. Oculus Rift Development Kit 2 Camera Motherboard Replacement: passo 2, immagine 1 di 2 Oculus Rift Development Kit 2 Camera Motherboard Replacement: passo 2, immagine 2 di 2
    • Remove the cover plate from the front face of the camera using the iFixit Opening Pick.

  3. Oculus Rift Development Kit 2 Camera Motherboard Replacement: passo 3, immagine 1 di 2 Oculus Rift Development Kit 2 Camera Motherboard Replacement: passo 3, immagine 2 di 2
    • Remove the two 3/16" J #000 screws.

    • Lift the back plate off.

  4. Oculus Rift Development Kit 2 Camera Motherboard Replacement: passo 4, immagine 1 di 1
    • Gently tug on the wires to free them from the motherboard.

  5. Oculus Rift Development Kit 2 Camera Motherboard Replacement: passo 5, immagine 1 di 3 Oculus Rift Development Kit 2 Camera Motherboard Replacement: passo 5, immagine 2 di 3 Oculus Rift Development Kit 2 Camera Motherboard Replacement: passo 5, immagine 3 di 3
    • Remove the four 3/16" Phillips #000 from the four corners of the motherboard.

    • Remove the two 1/4" Phillips #0 screws shown to release the motherboard from the enclosure.

Conclusione

To reassemble your device, follow these instructions in reverse order.

Un'altra persona ha completato questa guida.

Team

Cal Poly, Team 18-5, Maness Winter 2015 Membro di Cal Poly, Team 18-5, Maness Winter 2015

CPSU-MANESS-W15S18G5

4 Membri

6 Guide realizzate

0 Commenti

Aggiungi Commento

Visualizza Statistiche:

Ultime 24 Ore: 0

Ultimi 7 Giorni: 0

Ultimi 30 Giorni: 0

Tutti i Tempi: 656