Salta al contenuto principale

Lenovo ThinkPad X1 Carbon 5th Gen Wi-Fi Card Replacement

Cosa ti serve

  1. Lenovo ThinkPad X1 Carbon 5th Gen Wi-Fi Card  Replacement, Back Cover: passo 1, immagine 1 di 1
    • Turn the laptop on to its back.

  2. Lenovo ThinkPad X1 Carbon 5th Gen Wi-Fi Card  Replacement: passo 2, immagine 1 di 1
    • Use the Phillips #1 screwdriver to remove five 1.2 mm screws from the back cover of the laptop.

  3. Lenovo ThinkPad X1 Carbon 5th Gen Wi-Fi Card  Replacement: passo 3, immagine 1 di 1
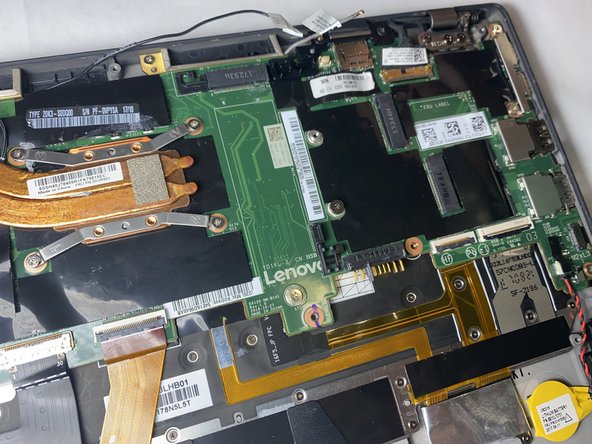
    • Remove the back cover using the opening tool, leaving the laptop back exposed.

    • Use the opening tool to pry the edge and work your way around the perimeter.

    • Careful to undo the clips before removing the back cover.

  4. Lenovo ThinkPad X1 Carbon 5th Gen Wi-Fi Card  Replacement, Wi-Fi Card: passo 4, immagine 1 di 1
    • Use the Phillips #1 screwdriver to remove the 1.2 mm screw that's holding the Wi-Fi card in place.

  5. Lenovo ThinkPad X1 Carbon 5th Gen Wi-Fi Card  Replacement: passo 5, immagine 1 di 1
    • Disconnect the white and black coaxial antenna cables from the Wi-Fi card.

  6. Lenovo ThinkPad X1 Carbon 5th Gen Wi-Fi Card  Replacement: passo 6, immagine 1 di 2 Lenovo ThinkPad X1 Carbon 5th Gen Wi-Fi Card  Replacement: passo 6, immagine 2 di 2
    • Slide the card out to remove it from the laptop.

Conclusione

To reassemble your device, follow these instructions in reverse order.

Team

Gateway, Team 1-3, Saknee Fall 2021 Membro di Gateway, Team 1-3, Saknee Fall 2021

GCC-SAKNEE-F21S1G3

4 Membri

15 Guide realizzate

0 Commenti

Aggiungi Commento

Visualizza Statistiche:

Ultime 24 Ore: 2

Ultimi 7 Giorni: 14

Ultimi 30 Giorni: 47

Tutti i Tempi: 928