Salta al contenuto principale

Lenovo ThinkPad X1 Carbon 5th Gen Fan and Heat Sink Replacement

Cosa ti serve

  1. Lenovo ThinkPad X1 Carbon 5th Gen Fan and Heat Sink  Replacement, Back Cover: passo 1, immagine 1 di 1
    • Turn the laptop on to its back.

  2. Lenovo ThinkPad X1 Carbon 5th Gen Fan and Heat Sink  Replacement: passo 2, immagine 1 di 1
    • Use the Phillips #1 screwdriver to remove five 1.2 mm screws from the back cover of the laptop.

  3. Lenovo ThinkPad X1 Carbon 5th Gen Fan and Heat Sink  Replacement: passo 3, immagine 1 di 1
    • Remove the back cover using the opening tool, leaving the laptop back exposed.

    • Use the opening tool to pry the edge and work your way around the perimeter.

    • Careful to undo the clips before removing the back cover.

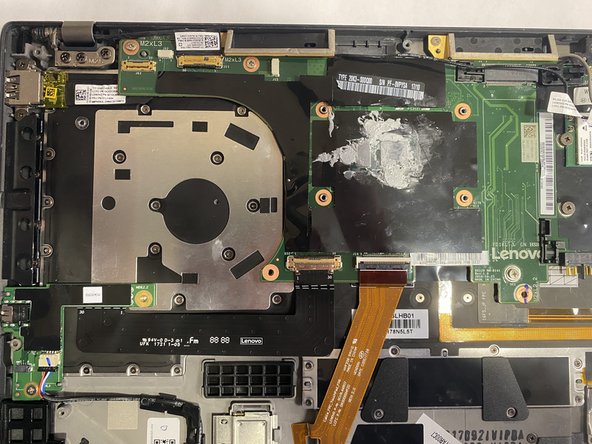
  4. Lenovo ThinkPad X1 Carbon 5th Gen Fan and Heat Sink  Replacement, Fan and Heat Sink: passo 4, immagine 1 di 3 Lenovo ThinkPad X1 Carbon 5th Gen Fan and Heat Sink  Replacement, Fan and Heat Sink: passo 4, immagine 2 di 3 Lenovo ThinkPad X1 Carbon 5th Gen Fan and Heat Sink  Replacement, Fan and Heat Sink: passo 4, immagine 3 di 3
    • Use the Phillips #1 screwdriver to remove all five 1 mm screws holding the fan and heat sink down.

  5. Lenovo ThinkPad X1 Carbon 5th Gen Fan and Heat Sink  Replacement: passo 5, immagine 1 di 2 Lenovo ThinkPad X1 Carbon 5th Gen Fan and Heat Sink  Replacement: passo 5, immagine 2 di 2
    • Pick up the fan and heat sink and carefully and remove it.

Conclusione

To reassemble your device, follow these instructions in reverse order.

Un'altra persona ha completato questa guida.

Team

Gateway, Team 1-3, Saknee Fall 2021 Membro di Gateway, Team 1-3, Saknee Fall 2021

GCC-SAKNEE-F21S1G3

4 Membri

15 Guide realizzate

0 Commenti

Aggiungi Commento

Visualizza Statistiche:

Ultime 24 Ore: 5

Ultimi 7 Giorni: 12

Ultimi 30 Giorni: 58

Tutti i Tempi: 1,905