Salta al contenuto principale

LG EnV Touch VX11000 Screen Assembly Replacement

Cosa ti serve

  1. LG EnV Touch VX11000 Screen Assembly Replacement, Battery: passo 1, immagine 1 di 1
    • Turn the phone off.

    • Flip it over so the front screen is facing down.

  2. LG EnV Touch VX11000 Screen Assembly Replacement: passo 2, immagine 1 di 1
    • Slide the release latch down and toward you while lifting up on the left side of the battery cover.

  3. LG EnV Touch VX11000 Screen Assembly Replacement: passo 3, immagine 1 di 2 LG EnV Touch VX11000 Screen Assembly Replacement: passo 3, immagine 2 di 2
    • Lift the edge of the battery to remove it.

  4. LG EnV Touch VX11000 Screen Assembly Replacement, Volume and Camera Buttons: passo 4, immagine 1 di 2 LG EnV Touch VX11000 Screen Assembly Replacement, Volume and Camera Buttons: passo 4, immagine 2 di 2
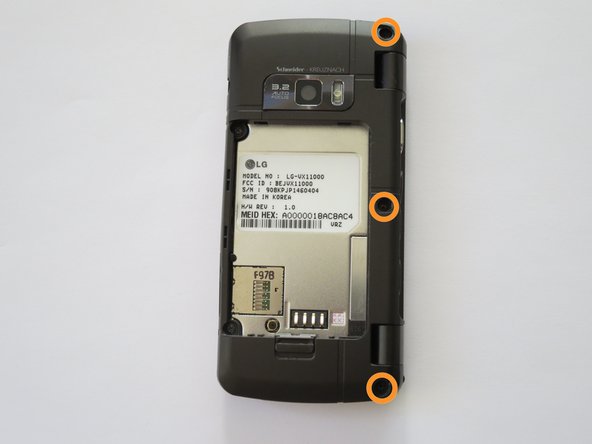
    • Locate the three screw covers on the back of the phone. Using your fingernail (or a spudger, pry off screw covers.

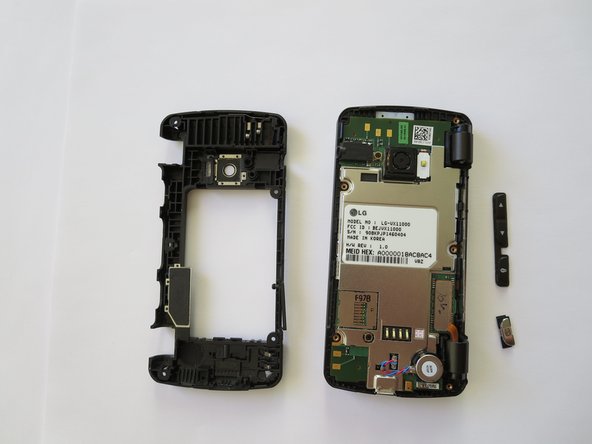
    • Using a Phillips #000 Screwdriver, remove the 1.5mm #000 Phillips screws that were under the screw covers.

  5. LG EnV Touch VX11000 Screen Assembly Replacement: passo 5, immagine 1 di 1
    • Locate the two inner 1.5mm #000 Phillips screws and remove them using a Phillips #000 screwdriver.

  6. LG EnV Touch VX11000 Screen Assembly Replacement: passo 6, immagine 1 di 2 LG EnV Touch VX11000 Screen Assembly Replacement: passo 6, immagine 2 di 2
    • Use a plastic opening tool or your fingernail to pry off the back case.

    • The camera and volume keys will fall off.

  7. LG EnV Touch VX11000 Screen Assembly Replacement, Screen Assembly: passo 7, immagine 1 di 3 LG EnV Touch VX11000 Screen Assembly Replacement, Screen Assembly: passo 7, immagine 2 di 3 LG EnV Touch VX11000 Screen Assembly Replacement, Screen Assembly: passo 7, immagine 3 di 3
    • Open the phone at a 90 degree angle. This needs to be done in order to reach the screws.

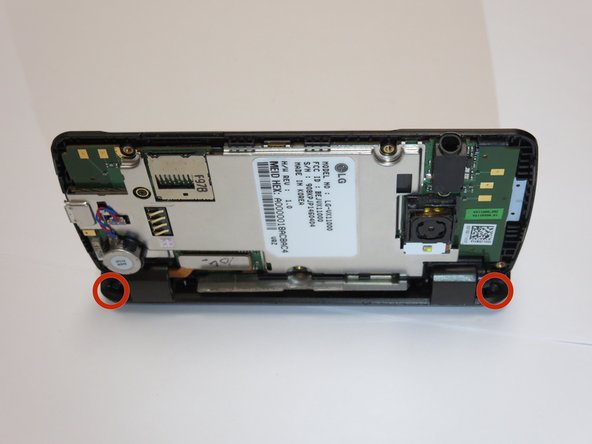
    • Locate the two 1.5mm #000 Phillips screws on the outside of each hinge.

    • Remove the two 1.5mm #000 Phillips screws with a Phillips #000 screwdriver.

  8. LG EnV Touch VX11000 Screen Assembly Replacement: passo 8, immagine 1 di 2 LG EnV Touch VX11000 Screen Assembly Replacement: passo 8, immagine 2 di 2
    • Pry off the two screw covers on the inside screen, using a spudger or your fingernail.

    • Remove the two 1.5mm #000 Phillips screws that were under the screw covers using the Phillips #000 screwdriver.

  9. LG EnV Touch VX11000 Screen Assembly Replacement: passo 9, immagine 1 di 2 LG EnV Touch VX11000 Screen Assembly Replacement: passo 9, immagine 2 di 2
    • Pry off the front frame using your fingernail.

    • The frame should still be connected to the rest of the phone by the orange tab.

  10. LG EnV Touch VX11000 Screen Assembly Replacement: passo 10, immagine 1 di 1
    • Remove the four 1.5mm #000 Phillips screws at each of the corners of the phone, using the Phillips #000 screwdriver.

  11. LG EnV Touch VX11000 Screen Assembly Replacement: passo 11, immagine 1 di 3 LG EnV Touch VX11000 Screen Assembly Replacement: passo 11, immagine 2 di 3 LG EnV Touch VX11000 Screen Assembly Replacement: passo 11, immagine 3 di 3
    • Peel off the gold tape.

    • Gently pry up the metal frame with your fingers so that the screen can be removed.

  12. LG EnV Touch VX11000 Screen Assembly Replacement: passo 12, immagine 1 di 2 LG EnV Touch VX11000 Screen Assembly Replacement: passo 12, immagine 2 di 2
    • Unplug the connector from the screen.

Conclusione

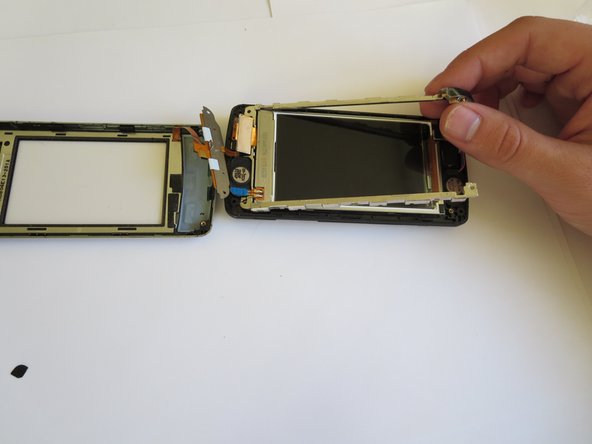
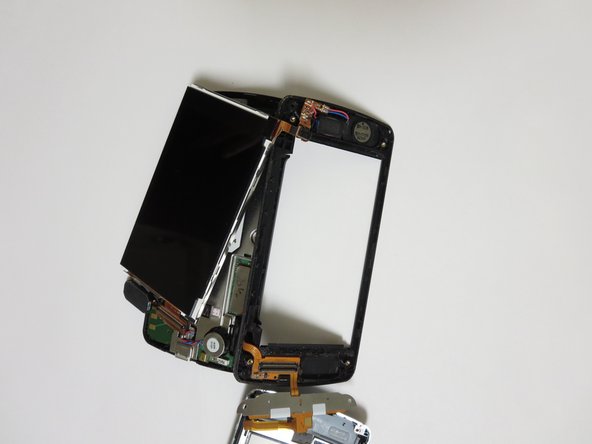
To reassemble your device, follow these instructions in reverse order.

Altre 3 persone hanno completato questa guida.

Rachel Smith

Membro da: 09/30/13

593 Reputazione

5 Guide realizzate

Team

Cal Poly, Team 13-2, Forte Fall 2013 Membro di Cal Poly, Team 13-2, Forte Fall 2013

CPSU-FORTE-F13S13G2

4 Membri

10 Guide realizzate

0 Commenti

Aggiungi Commento

Visualizza Statistiche:

Ultime 24 Ore: 0

Ultimi 7 Giorni: 2

Ultimi 30 Giorni: 5

Tutti i Tempi: 1,086