Salta al contenuto principale

Kurio 7 Speaker Replacement

Cosa ti serve

  1. Kurio 7 Speaker Replacement, Back Panel: passo 1, immagine 1 di 3 Kurio 7 Speaker Replacement, Back Panel: passo 1, immagine 2 di 3 Kurio 7 Speaker Replacement, Back Panel: passo 1, immagine 3 di 3
    • Begin by removing the rubber cover from the Kurio 7.

  2. Kurio 7 Speaker Replacement: passo 2, immagine 1 di 2 Kurio 7 Speaker Replacement: passo 2, immagine 2 di 2
    • Remove the four 30 mm Phillips #00 screws from the outer case.

  3. Kurio 7 Speaker Replacement: passo 3, immagine 1 di 2 Kurio 7 Speaker Replacement: passo 3, immagine 2 di 2
    • Insert the plastic opening tool in the gap between the front cover and the back cover of the device.

    • Slide the plastic opening tool around the edge of the device. Gently pry apart the tabs that hold the front cover and the back cover together.

    • Be careful not to break off the tabs that hold the front cover and the back cover together.

  4. Kurio 7 Speaker Replacement: passo 4, immagine 1 di 2 Kurio 7 Speaker Replacement: passo 4, immagine 2 di 2
    • Once all of the tabs are removed, the back cover should come off easily.

    • Gently remove the back cover. There are wires inside that may get caught on the cover while removing it. These wires are soldered to their components and are difficult to reattach.

  5. Kurio 7 Speaker Replacement, Kurio 7 Motherboard Removal Guide: passo 5, immagine 1 di 2 Kurio 7 Speaker Replacement, Kurio 7 Motherboard Removal Guide: passo 5, immagine 2 di 2
    • Use a plastic credit card, or other thin object, to separate the battery from the screen.

    • Be sure to work the card carefully and slowly around in order to not damage, break, or deform the battery.

    • Carefully set the battery aside.

  6. Kurio 7 Speaker Replacement: passo 6, immagine 1 di 2 Kurio 7 Speaker Replacement: passo 6, immagine 2 di 2
    • Use a Phillips #00 screwdriver to remove the eight 40mm screws holding the motherboard in place.

  7. Kurio 7 Speaker Replacement: passo 7, immagine 1 di 3 Kurio 7 Speaker Replacement: passo 7, immagine 2 di 3 Kurio 7 Speaker Replacement: passo 7, immagine 3 di 3
    • Place the plastic opening tool on the base of the black ribbon clip and pull up, like a lever, to release the mount. This should release the clip holding the ribbon to the mount.

    • Pull the ribbon out of the mount.

  8. Kurio 7 Speaker Replacement: passo 8, immagine 1 di 1
    • There should be masking tape on the yellow ribbon. Pull the tape off of the motherboard and wrap it around the yellow ribbon.

    • Do not pull the tape completely off the motherboard, as it is used to protect components on the ribbon.

    • To remove the ribbon from the mount, follow the same steps in Step 3.

  9. Kurio 7 Speaker Replacement: passo 9, immagine 1 di 1
    • Pull back the ribbons and put the battery near the bottom of the Kurio.

    • The motherboard is now removed so that other components can be worked on.

  10. Kurio 7 Speaker Replacement, Speaker: passo 10, immagine 1 di 1
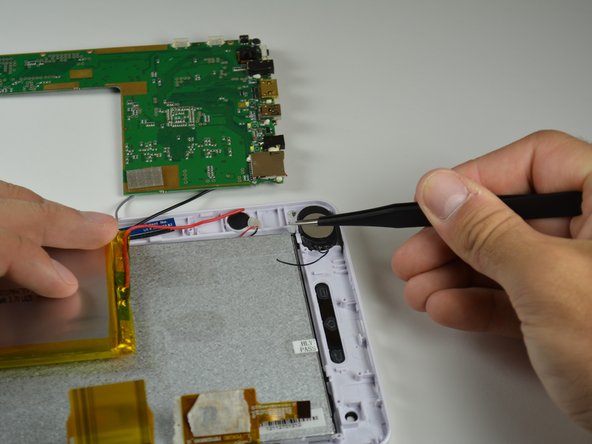
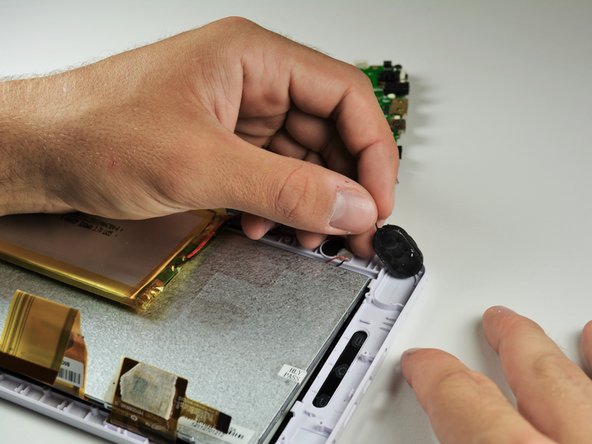
    • Pull the wires off of the motherboard using the tweezers. The wires aren't soldered on well.

    • Before you do break the solder, check the wires connections. You may be able to just solder the wire if it is already broken off.

  11. Kurio 7 Speaker Replacement: passo 11, immagine 1 di 2 Kurio 7 Speaker Replacement: passo 11, immagine 2 di 2
    • Remove any hot glue residue holding the speaker in place by peeling it off using tweezers.

  12. Kurio 7 Speaker Replacement: passo 12, immagine 1 di 3 Kurio 7 Speaker Replacement: passo 12, immagine 2 di 3 Kurio 7 Speaker Replacement: passo 12, immagine 3 di 3
    • Use the spudger to pry out the old speaker.

    • You have successfully removed the speaker!

Conclusione

Solder in the new speaker. Refer to the soldering guide if you're unsure on how to solder. To reassemble your device, follow these instructions in reverse order.

Un'altra persona ha completato questa guida.

Alex Powaser

Membro da: 04/14/14

331 Reputazione

2 Guide realizzate

Team

Cal Poly, Team 12-36, Maness Spring 2014 Membro di Cal Poly, Team 12-36, Maness Spring 2014

CPSU-MANESS-S14S12G36

4 Membri

14 Guide realizzate

0 Commenti

Aggiungi Commento

Visualizza Statistiche:

Ultime 24 Ore: 0

Ultimi 7 Giorni: 0

Ultimi 30 Giorni: 3

Tutti i Tempi: 2,050