Salta al contenuto principale

HTC Touch LCD Screen Replacement

Cosa ti serve

  1. HTC Touch LCD Screen Replacement, LCD Screen: passo 1, immagine 1 di 1
    • Remove the back panel by sliding it up.

  2. HTC Touch LCD Screen Replacement: passo 2, immagine 1 di 1
    • Remove the battery.

  3. HTC Touch LCD Screen Replacement: passo 3, immagine 1 di 1
    • Remove the 4 torx-head screws in the corners of the phone using the T5 Torx Screwdriver.

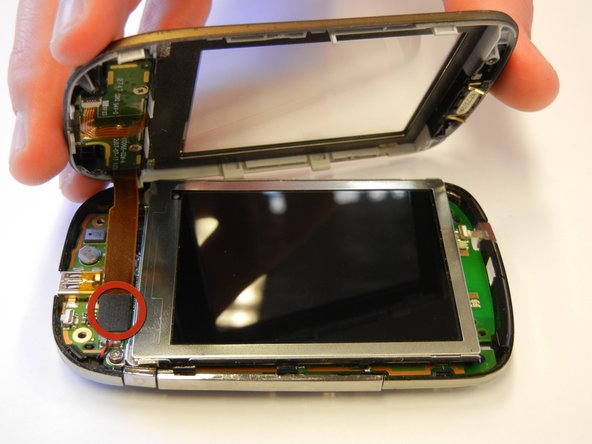
  4. HTC Touch LCD Screen Replacement: passo 4, immagine 1 di 2 HTC Touch LCD Screen Replacement: passo 4, immagine 2 di 2
    • Use the plastic opening tool to remove the front panel from the phone.

    • Be sure to unplug the front button cable from the inside of the phone.

  5. HTC Touch LCD Screen Replacement: passo 5, immagine 1 di 1
    • Unscrew the 2 torx-head screws at the base of the LCD screen using the T5 Torx Screwdriver.

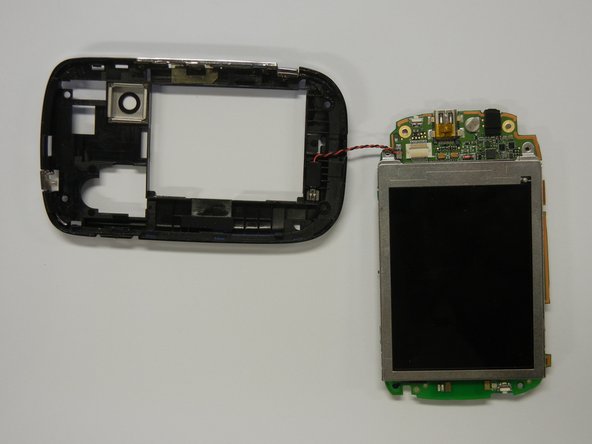
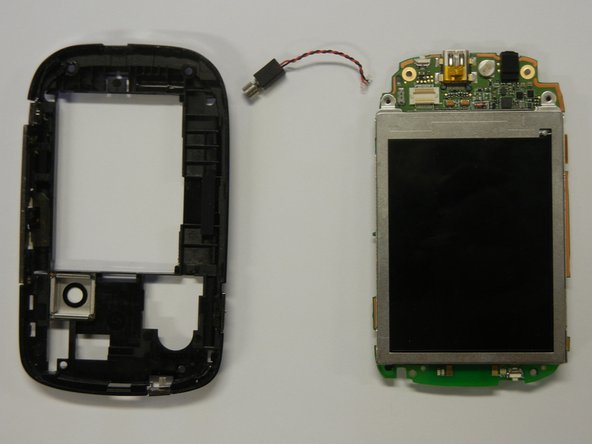
  6. HTC Touch LCD Screen Replacement: passo 6, immagine 1 di 2 HTC Touch LCD Screen Replacement: passo 6, immagine 2 di 2
    • Separate the motherboard from the black plastic casing.

    • Unplug the black and red wire from the motherboard.

    • Unplug the black and red wire from the black plastic casing.

  7. HTC Touch LCD Screen Replacement: passo 7, immagine 1 di 1
    • Lift the black lever next to the orange ribbon cable to remove the LCD screen.

Conclusione

To reassemble your device, follow these instructions in reverse order.

Un'altra persona ha completato questa guida.

Team

Cal Poly, Team 15-12, Regan Spring 2011 Membro di Cal Poly, Team 15-12, Regan Spring 2011

CPSU-REGAN-S11S15G12

4 Membri

10 Guide realizzate

0 Commenti

Aggiungi Commento

Visualizza Statistiche:

Ultime 24 Ore: 0

Ultimi 7 Giorni: 0

Ultimi 30 Giorni: 2

Tutti i Tempi: 10,857